105
Bruker Optik GmbH HYPERION User Manual
Operation 4
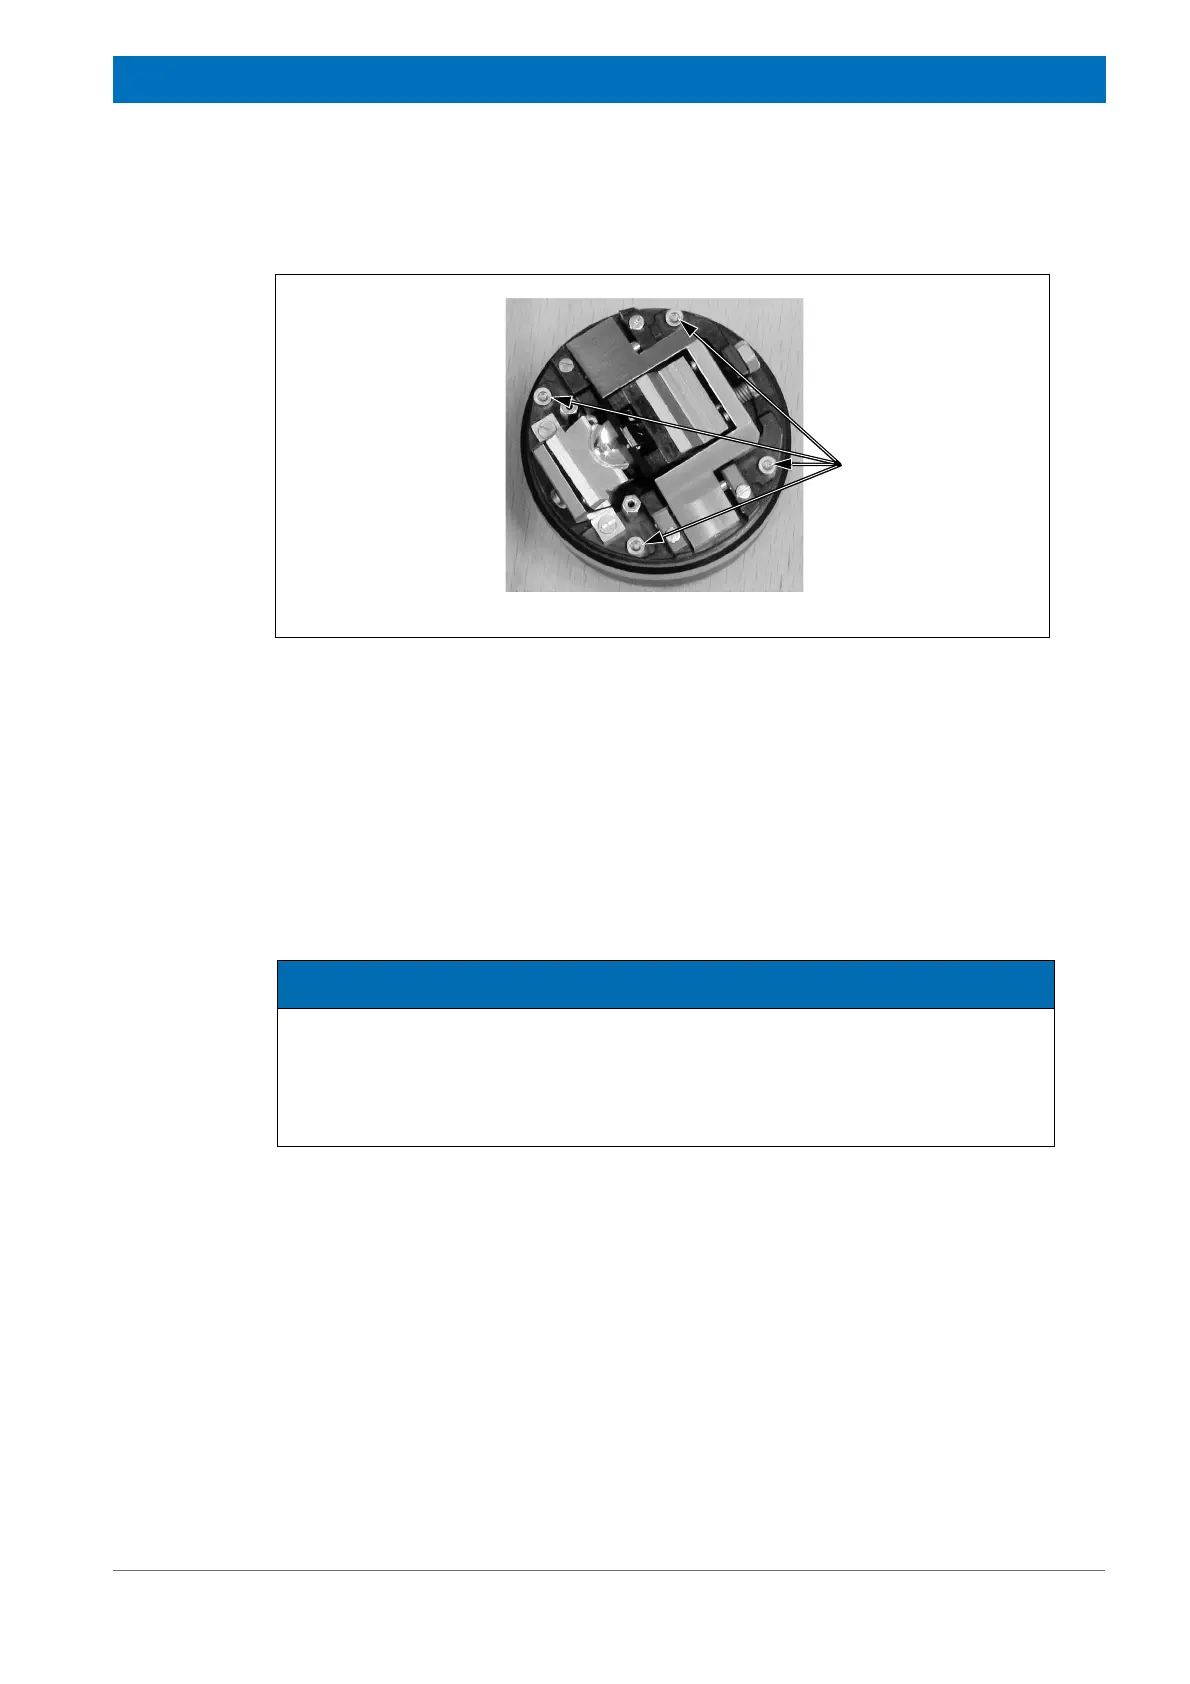
3. Loosen the four Allen screws at the bottom side of the GIR objective (fig. 4.10), but
do not remove them!
4. Attach the GIR objective to the revolving nosepiece opposite to the standard 15x
objective. (Note: Due to lack of space, first remove the plastic purge shroud of the
standard 15x objective, if present.)
5. Swing the GIR objective in the beam path.
6. Set the mirror optics of the GIR objective to the viewing mode (VIS).
7. Microscope: Activate the reflection mode and the viewing mode, if not yet done.
8. Put the mirror on the microscope sample stage. (Note: The mirror is included in the
delivery scope.)
9. Focus on the mirror by moving the stage upwards.
10. Move the stage in x- and/or y-direction until you see an edge of the mirror. Align the
mirror edge vertically. Position the mirror in such a way that the vertical mirror edge
is more or less in the center of the image. See fig. 4.7.
11. Set the mirror optics of the GIR objective to the measurement mode (GIR).
12. Rotate the lower part of the GIR objective slightly to the left or to the right (fig. 4.11)
until the displayed image shows a vertically aligned mirror edge. See fig. 4.8a. Be
careful not to displace the mirror lying on the stage unintentionally!
Figure 4.10: GIR objective bottom side without housing
4x Allen screws
Note
Potential risk of damaging the GIR objective
➣ Move the stage upwards carefully. Attention: The working distance of the GIR
objective is only ca. 0.7 mm. Prevent the stage or the sample lying on the stage
from hitting against the bottom side of the GIR objective. Otherwise the mirror
optics of the GIR objective might be damaged.