2-22
FRONT BRAKE LINE
REMOVAL
1. Open bleeder nipple cap on front brake caliper. Install
end of a length of plastic tubing over caliper bleeder
valve, while placing free end in a suitable container.
Open bleeder valve about 1/2-turn. Pump brake hand
lever to drain brake fluid.
2. See Figure 2-22. Remove screw (4) to detach brake line
clamp (5) from lower triple clamp (right side).
3. Slide brake line out of wire guide (6) on front fender.
4. Remove master cylinder banjo bolt (1) (metric) and two
gaskets (2) to detach brake line from master cylinder
body. Discard gaskets.
5. Remove caliper banjo bolt (7) and two gaskets (8) to
detach brake line from front brake caliper. Discard gas-
kets.
6. Carefully inspect the brake line for dents, cuts or other
defects. Replace the brake line if any damage is noted.
INSTALLATION
1. See Figure 2-22. Position new master cylinder gaskets
(2) on each side of the banjo fitting. Insert banjo bolt (1)
(metric) through gaskets and banjo fitting. Loosely install
bolt into master cylinder.
2. From the master cylinder, the brake line runs downward
in front of the right handlebar, where it turns inboard at
the upper triple clamp. Loosely install clamp (5), and
screw (4) to attach front brake line to right side of lower
triple clamp.
3. Place brake line inside wire guide (6) on front fender.
4. Position new gaskets (8) on each side of banjo fitting at
free end of brake line. Insert caliper banjo bolt (7)
through gaskets. Loosely install bolt into caliper.
5. Tighten clamp screw (4) on lower triple clamp to 30-35
in-lbs (3.4-4.0 Nm).
6. Tighten master cylinder banjo bolt (1) (metric) to 17-20 ft-
lbs (23.0-27.1 Nm).
7. Tighten brake caliper banjo bolt (7) to 16-20 ft-lbs (21.7-
27.1 Nm).
8. Install bleeder valve if removed. Refill master cylinder
and bleed brakes. See BRAKES in Section 1.
9. Test operation of brake lever.
10. Tighten front bleeder valve to 4-6 ft-lbs (5.4-8.1 Nm).
Install bleeder cap.
11. Test brake lamp operation with the brake hand lever
applied and ignition/headlamp switch turned to IGN.
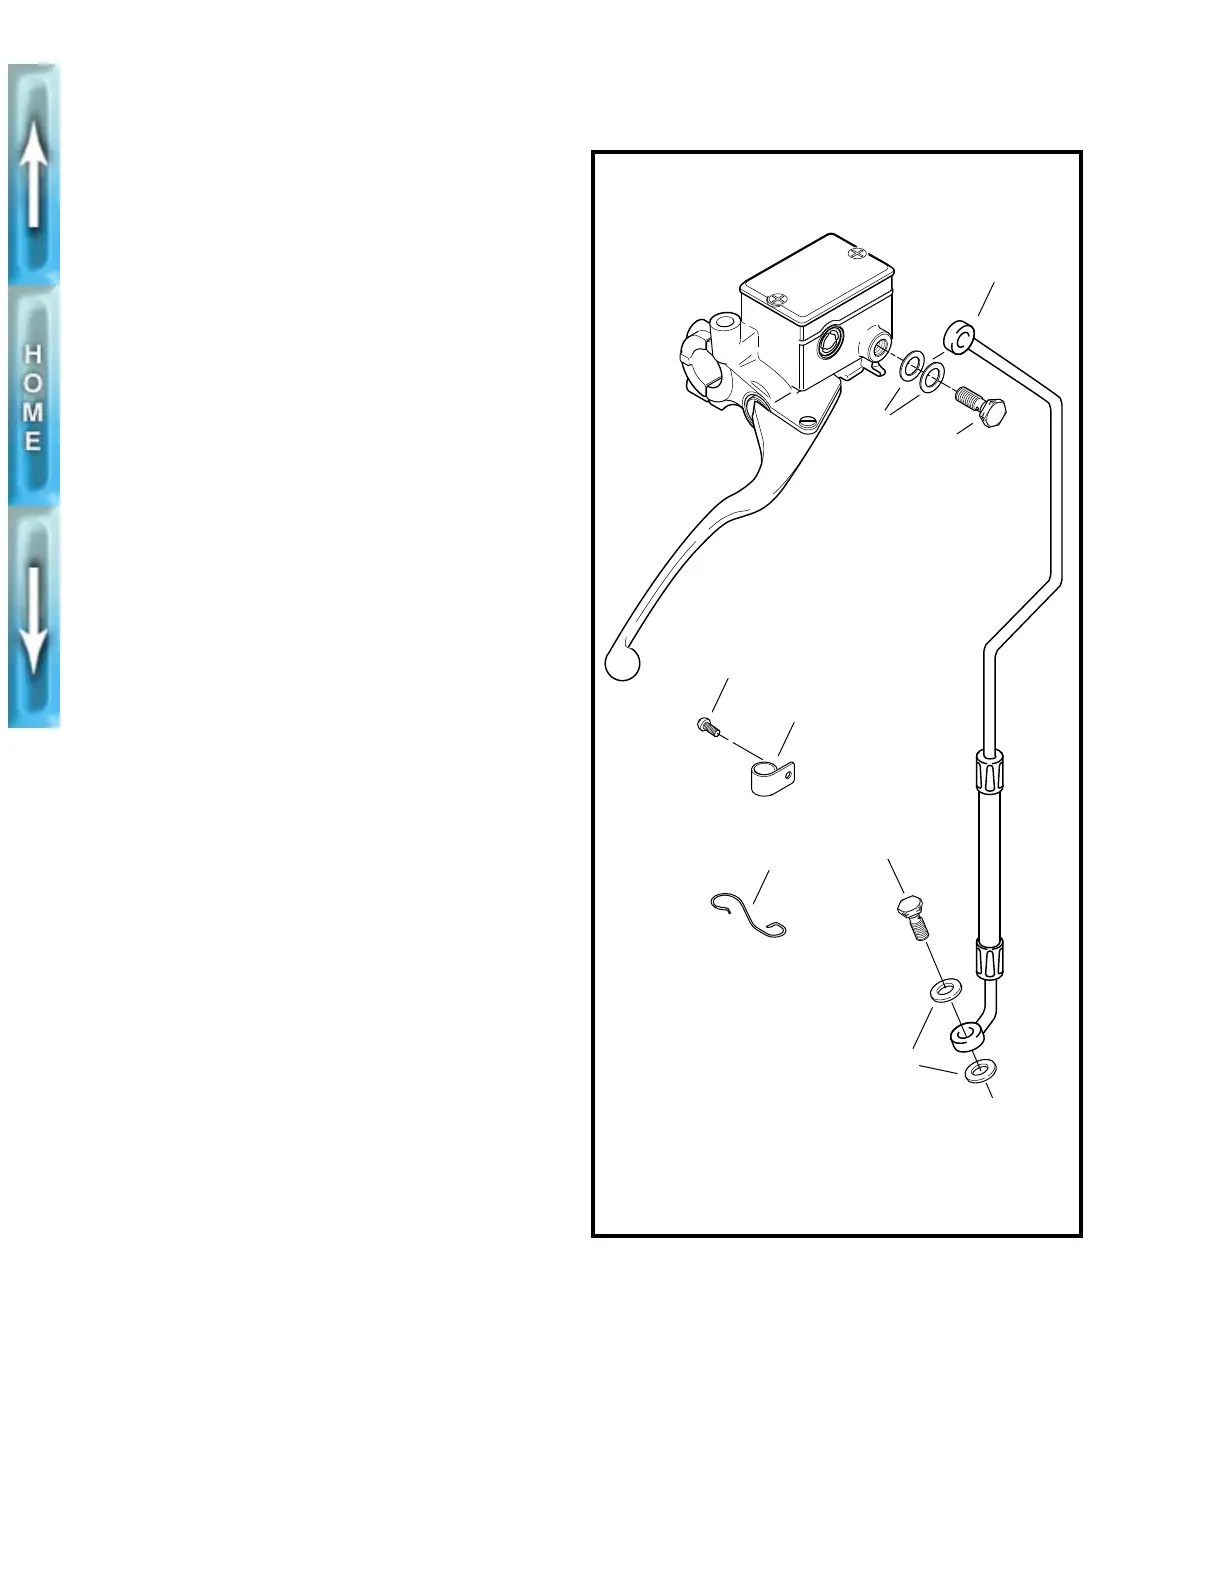
Figure 2-22. Front Brake Line
Lower right side-
brake caliper
Top right side-
master cylinder
1. Master cylinder
banjo bolt (metric)
2. Master cylinder
gasket (2)
3. Brake line
4. Screw
5. Clamp
6. Wire guide
7. Caliper banjo bolt
8. Caliper gasket (2)
b0203x2x
3
2
1
4
5
6
7
8