6-12
INSPECTION/REPAIR
NOTE
If replacement of clutch pack (friction plates [18], steel plates
[19], and spring plate [20]) is the only service work to be per-
formed, perform all INSPECTION AND REPAIR steps (except
Step 5), and then proceed to ASSEMBLY, NOTE.
See Figure 6-9. Wash all parts, except the friction (driven)
plates (18) and bearing (25), in cleaning solvent. Blow dry
with compressed air. Examine the clutch components as fol-
lows:
1. Check for worn lining surface.
2. Inspect for checked or chipped lining.
3. Inspect each steel (drive) plate (19) for grooves. Also,
check each steel plate for flatness in several places using
a feeler gauge; the plate must be placed on a surface
plate or flat surface. Replace any plates that are dam-
aged or that are warped more than 0.006 in. (0.15 mm).
4. Wipe the lubricant from the eight friction plates, and
stack them on top of each other. Measure the thickness
of the eight stacked friction plates with a dial caliper or
micrometer. The minimum thickness must be 0.661 in.
(16.79 mm). If the thickness is less than specified, the
friction plates and steel plates must be discarded, and a
new
set of both friction and steel plates must be
installed.
5. Check the bearing (25) for smoothness by rotating the
clutch shell while holding the clutch hub. If bearing is
rough or binds, it must be replaced.
6. Check the primary chain sprocket and the starter ring
gear on the clutch shell (26). If either sprocket or ring
gear are badly worn or damaged, replace the clutch
shell.
7. Check the slots that mate with the clutch plates on both
clutch shell and hub. If slots are worn or damaged,
replace shell and/or hub.
8. Check the diaphragm spring (11) for cracks or bent tabs.
Install a
new
spring if either condition exists.
ASSEMBLY
NOTE
See Figure 6-9. If replacement of clutch pack (friction plates
[18], steel plates [19], and spring plate [20]) is the only ser-
vice work to be performed, perform ASSEMBLY Steps 2, 5, 6,
7, and 8 only, and then proceed to INSTALLATION, NOTE.
Observe all
1
WARNING and
1
CAUTION statements
which apply to the steps specified.
1. See Figure 6-9. If the assembly of the clutch hub (23)
and shell (26) was disassembled, press
new
bearing
(25) in clutch shell; secure bearing with a
new retaining
ring (24). Press inboard end of clutch hub into shell bear-
ing; secure with new retaining ring (27) on end of hub.
2. Install the clutch pack, which consists of eight friction
plates (18), six steel plates (19), and a spring plate (20),
into the clutch hub (23). The order of plate assembly,
from inboard to outboard, is as follows:
F -
St - F - St - F - St - F - Sp - F - St - F - St - F - St - F
INBOARD............................................................OUTBOARD
F = Friction plate
St = Steel plate
Sp = Spring plate
If disassembled, assemble bearing (15) and adjusting screw
(16) in release plate (13); secure with new retaining ring (14).
3. Install adjusting screw assembly (13, 14, 15 and 16) into
pressure plate (17), noting that two tabs on perimeter of
release plate (13) must be inserted into corresponding
recesses in pressure plate (17). Secure the adjusting
screw assembly with retaining ring (12).
4. Position diaphragm spring (11), with its concave side fac-
ing inboard (toward pressure plate), onto pressure plate
(17) assembly. Position spring seat (10), with its flat,
larger O.D. side facing inboard (toward diaphragm
spring), and a new snap ring (9) onto convex (outboard)
side of diaphragm spring (11).
5. Thread the CLUTCH SPRING FORCING SCREW (Part
No. HD-38515-91) (item 1, Figure 6-10.) onto the clutch
adjusting screw (item 16, Figure 6-9.). Place the bridge
(item 2, Figure 6-10.) of SPRING COMPRESSING TOOL
(Part No. HD-38515-A) against diaphragm spring (item
10, Figure 6-9.). Thread the tool handle (item 3, Figure 6-
10.) onto end of forcing screw. Do not tighten compress-
ing tool against diaphragm spring at this time.
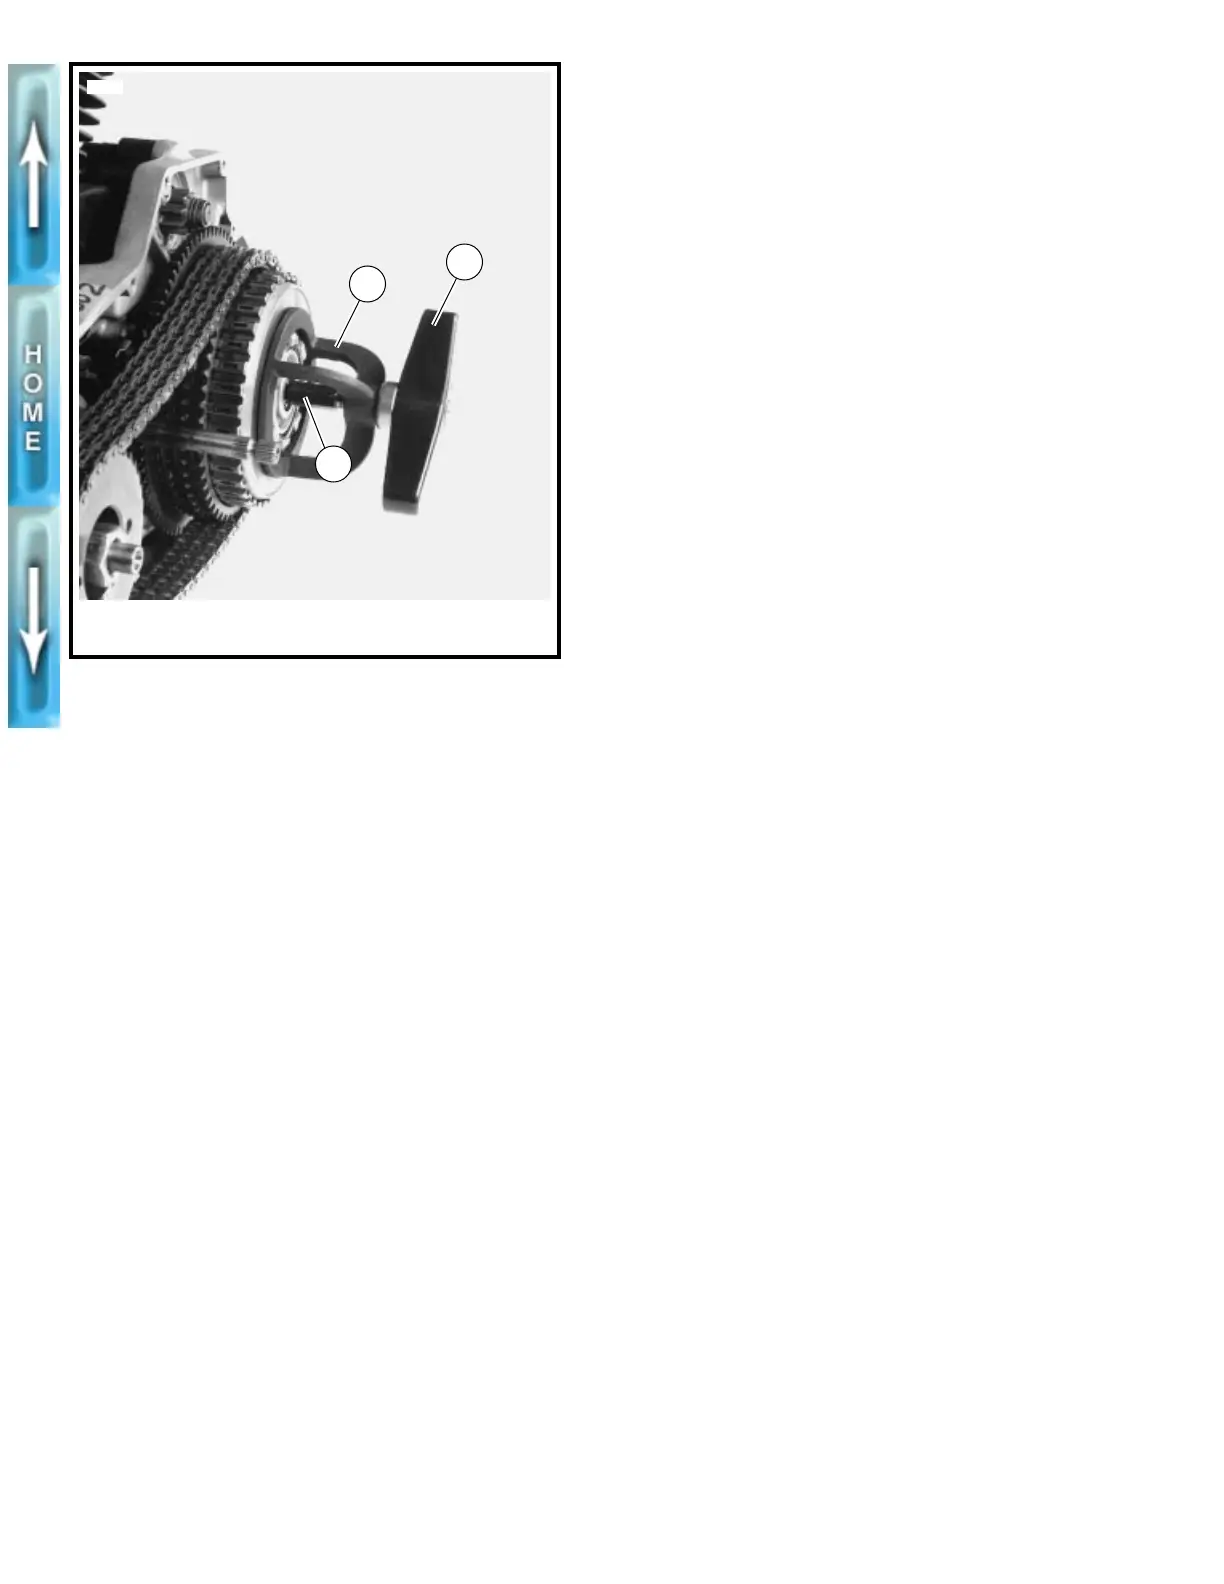
Figure 6-10. Compressing Clutch Diaphragm Spring
1. Clutch spring
forcing screw
2. Bridge
3. Tool handle
2
3555
3
1