2-23
REAR BRAKE MASTER CYLINDER
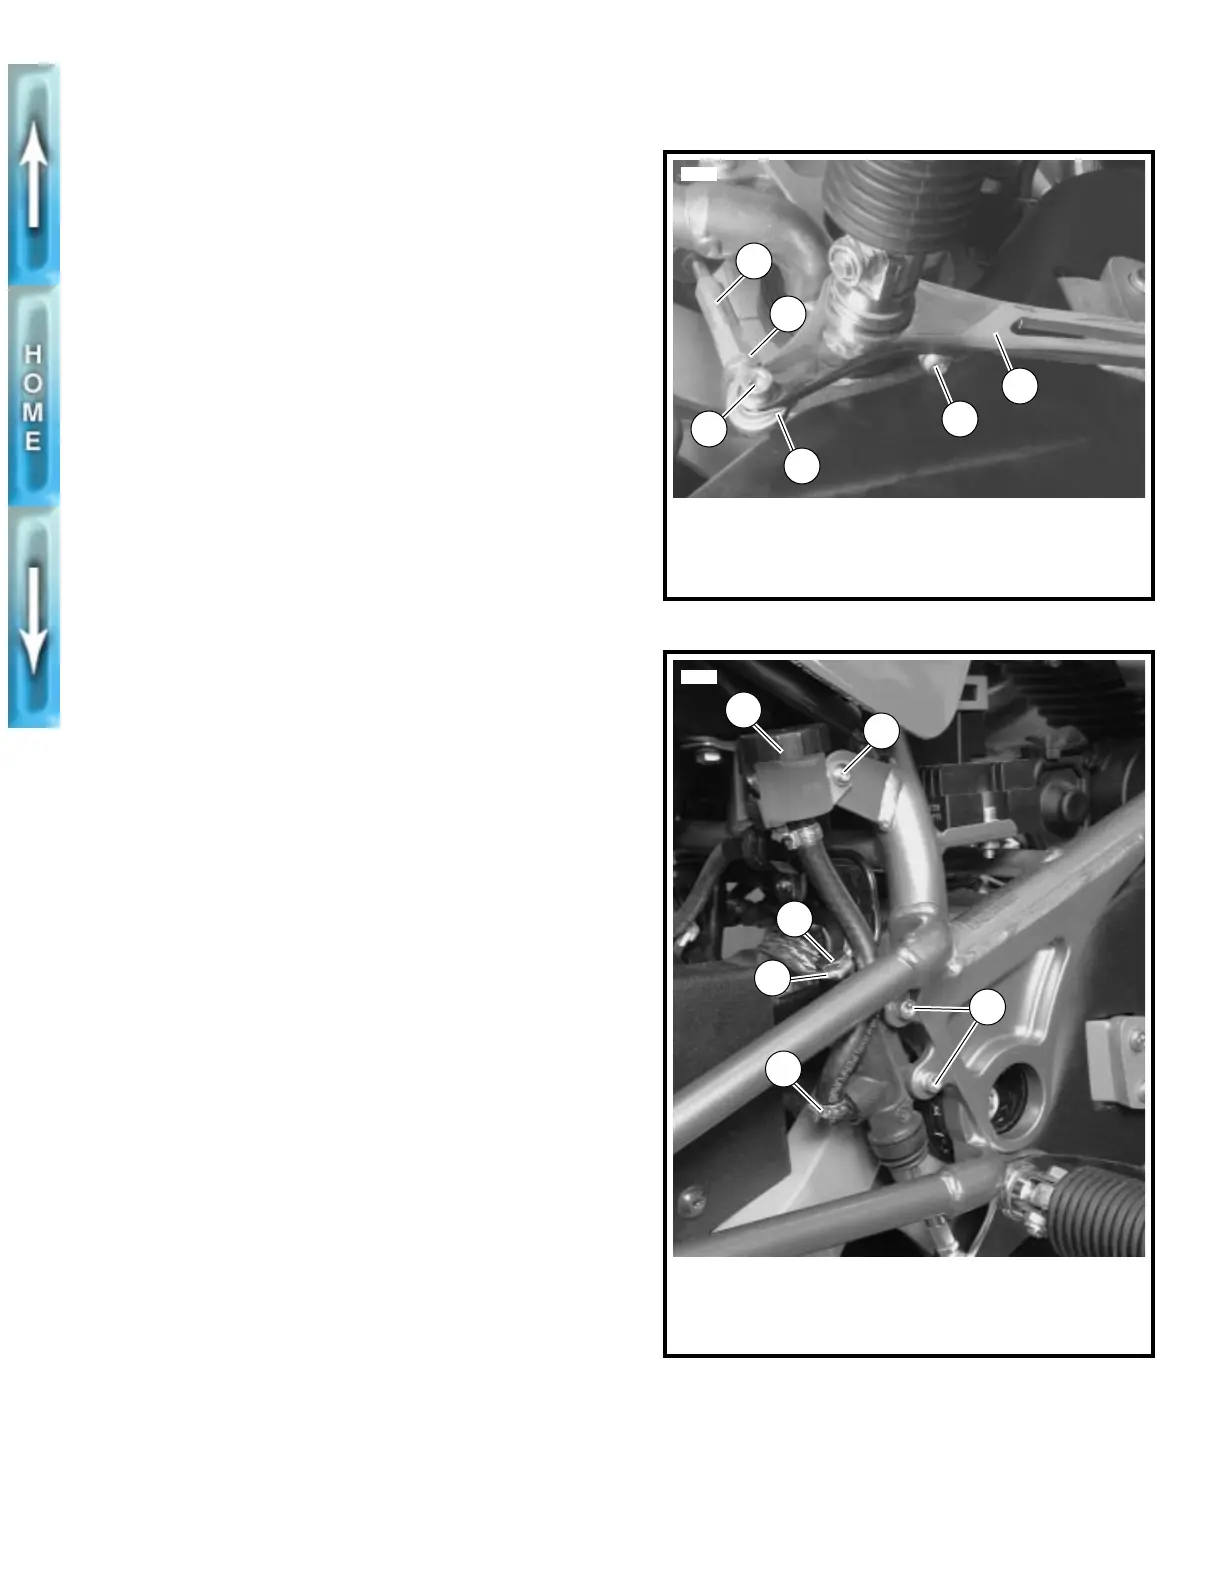
ADJUSTMENT
Brake Pedal
1. See Figure 2-23. Brake pedal must have 1/8 in. (3.2 mm)
pushrod freeplay. If adjustment is necessary, hold push-
rod (1) and loosen locknut (2) (metric).
2. Rotate pushrod to increase or decrease freeplay.
3. Tighten locknut.
NOTE
If you alter pedal height, always check pushrod freeplay.
REMOVAL/DISASSEMBLY
NOTE
Do not disassemble the master cylinder unless problems are
experienced. Discard all seals during the disassembly proce-
dure. Install a complete rebuild kit upon assembly.
1. Open bleeder nipple cap on rear caliper. Install end of a
length of plastic tubing over caliper bleeder valve, while
placing free end in a suitable container. Open bleeder
valve (metric) about 1/2-turn. Pump brake pedal to drain
brake fluid.
2. See Figure 2-23. Remove screw and locknut (3) to
detach male end of push rod (4) from brake pedal.
Remove push rod.
1CAUTION
Damaged banjo seating surfaces will leak when reassem-
bled. Prevent damage to seating surfaces by carefully
removing brake line components.
3. See Figure 2-24. Remove banjo bolt (metric) (3) and two
gaskets (4) from rear master cylinder. Discard gaskets.
4. Remove two screws and locknuts (5) holding the rear
brake master cylinder to frame.
5. Remove reservoir hose clamp from rear master cylinder.
6. Remove screw on reservoir assembly.
CLEANING, INSPECTION AND
REPAIR
1WARNING
Clean brake system components using denatured alco-
hol. Do not use mineral-base cleaning solvents, such as
gasoline or paint thinner. Use of mineral-base solvents
causes deterioration of rubber parts that continues after
assembly. This could result in improper and unsafe brake
operation which may cause personal injury.
1. Thoroughly clean master cylinder and all brake system
components. Examine walls of master cylinder reservoir
for scratches and grooves. Replace if damaged. Verify
that vent holes on master cylinder are completely open
and free of dirt or debris. Stand master cylinder on
wooden block or towel to protect seating surfaces.
2. Inspect cover gasket on front of master cylinder for cuts,
tears or general deterioration. Replace as necessary.
Figure 2-23. Brake Pedal
Figure 2-24. Rear Master Cylinder
5569
1. Pushrod
2. Locknut (metric)
3. Screw and locknut
4. Male end of pushrod
5. Pedal height
adjustment screw
6. Brake pedal
6
5
4
1
2
3
5721
1. Master cylinder
reservoir
2. Screw
3. Banjo bolt (metric)
4. Gaskets (2)
5. Screws and locknuts
6. Hose clamp
1
2
3
5
6
4