2-35
9. Install rear shock. See REAR SHOCK ABSORBER,
INSTALLATION on page 2-37.
10. Install rear brake caliper assembly. See REAR BRAKE
CALIPER, INSTALLATION on page 2-26.
11. Install rear wheel. See REAR WHEEL, INSTALLATION
on page 2-13.
12. Install rider footrests. See FOOTRESTS, INSTALLATION
on page 2-52.
13. Install rear fender. See FENDERS, REMOVAL/INSTAL-
LATION on page 2-54.
14. Connect and fill lubrication system. See ENGINE LUBRI-
CATION SYSTEM in Section 1.
1
WARNING
Always connect positive battery cable first. If the positive
cable should contact ground with the negative cable
installed, the resulting sparks may cause a battery explo-
sion resulting in personal injury and/or property damage.
1
CAUTION
Hold battery cable when tightening battery terminal hard-
ware. Failure to hold cable may cause battery damage.
15. Connect battery cables, positive cable first.
1
WARNING
After installing seat, pull upward on front of seat to be
sure it is locked in position. If seat is loose, it could shift
during vehicle operation and startle the rider, causing
loss of control and personal injury.
16. Install tail section, fuel tank and seat. See TAIL SEC-
TION, INSTALLATION on page 2-55.
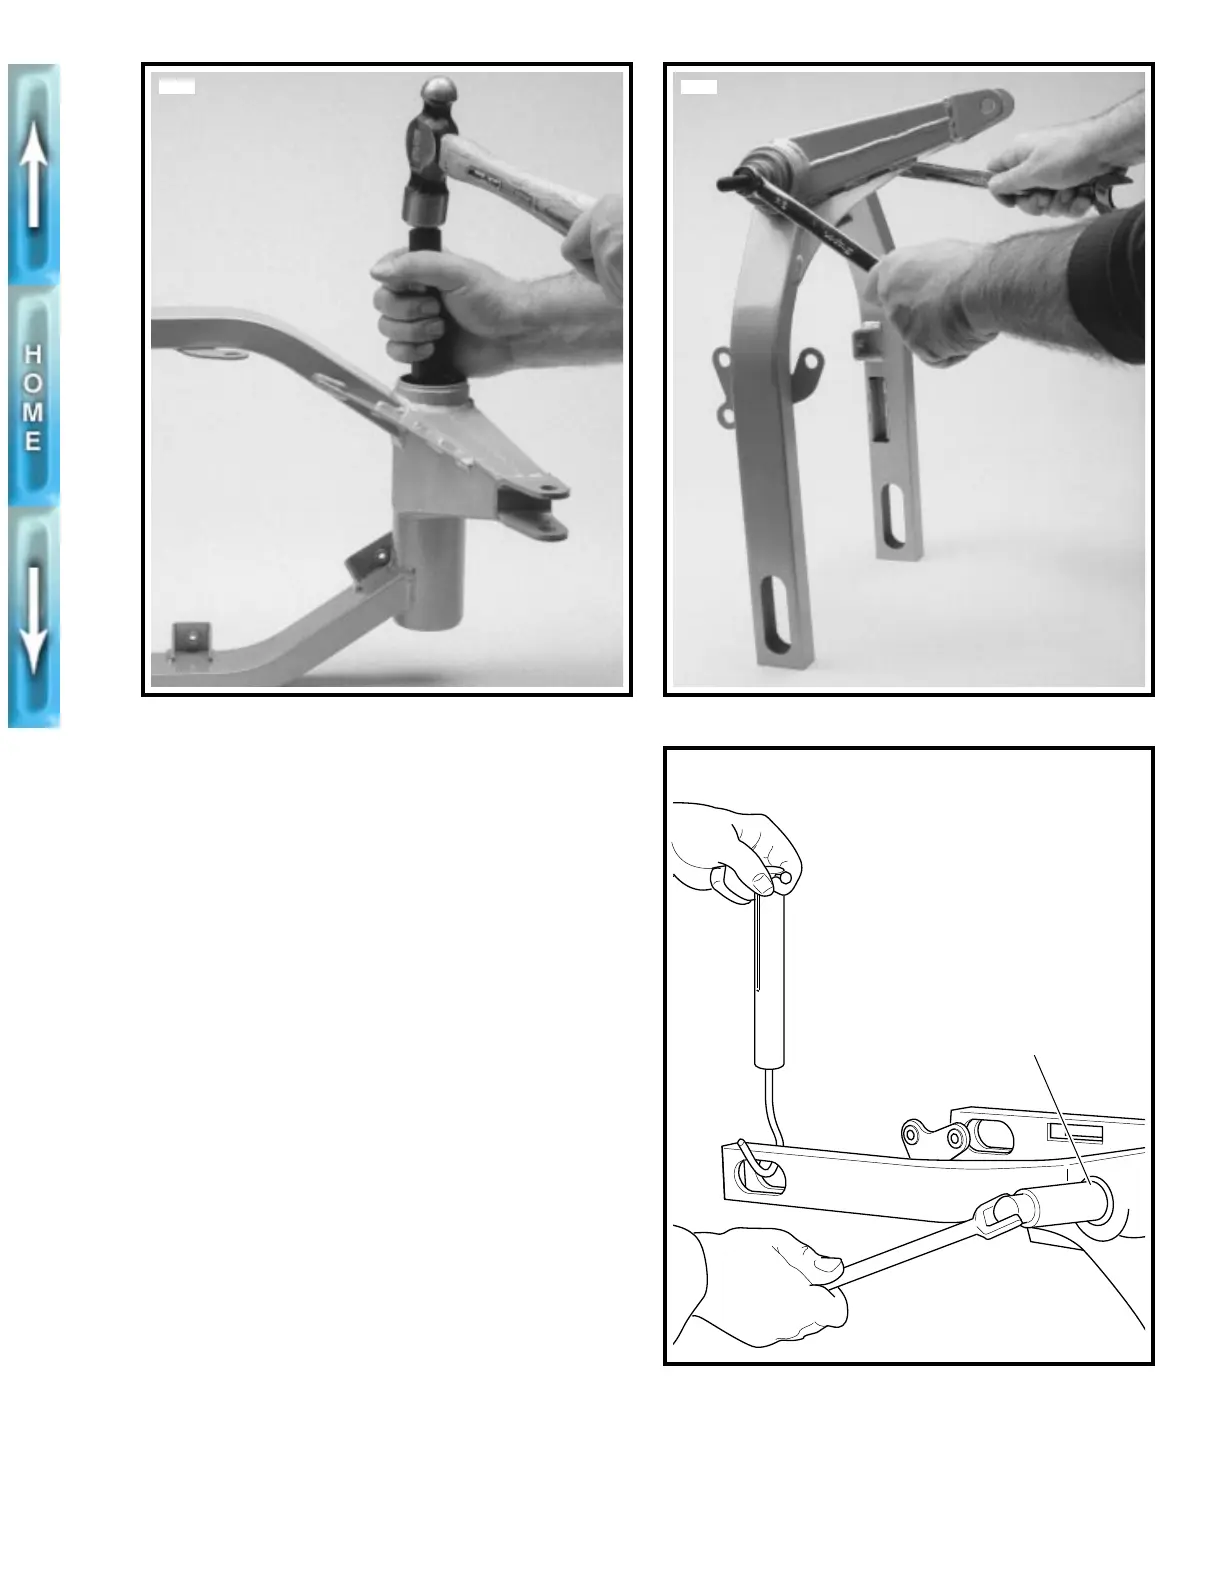
Figure 2-38. Removing Roller Bearing Cups
5702
Figure 2-39. Installing Bearings into Swingarm
Figure 2-40. Adjusting Swingarm Preload
5701
b0250x2x
Acceptable preload is
3.5-5.5 lbs (1.6-2.5 kg)
Pivot Shaft Bearing
Adjuster (Part No. B-41175)