5-17
3. When installing drive housing (10) to solenoid housing
(11), use
new
O-ring (16). Be sure to install return spring
(17) and ball (18).
4. Lubricate armature bearings (8) with high temperature
grease, such as LUBRIPLATE 110. Install armature (6)
and field frame (7) to solenoid housing (11).
5. Install brushes and brush holder (4).
6. Install end cover (3) with end cover screws (2) and O-
rings (23).
7. Install thru-bolts (1).
8. Install solenoid wire to terminal.
INSTALLATION
1. Install starter and starter gasket from right side of motor-
cycle.
2. Install positive battery cable and solenoid wire to sole-
noid.
3. See Figure 5-8. Install the starter mounting bolts and
washers. Tighten mounting bolts to 13-20 ft-lbs (17.6-
27.1Nm).
4. Install primary cover. See PRIMARY CHAIN in Section 6.
5. Fill primary chaincase/transmission with proper lubricant.
See CLUTCH, TRANSMISSION FLUID in Section 1.
1
WARNING
Always connect positive battery cable first. If the positive
cable should contact ground with the negative cable
installed, the resulting sparks may cause a battery explo-
sion resulting in personal injury.
1
CAUTION
Hold battery cable when tightening battery terminal hard-
ware. Failure to hold cable will cause battery damage.
6. Connect battery cables, positive cable first. Tighten bat-
tery terminal hardware to 30-40
in-lbs
(3.4-4.5 Nm).
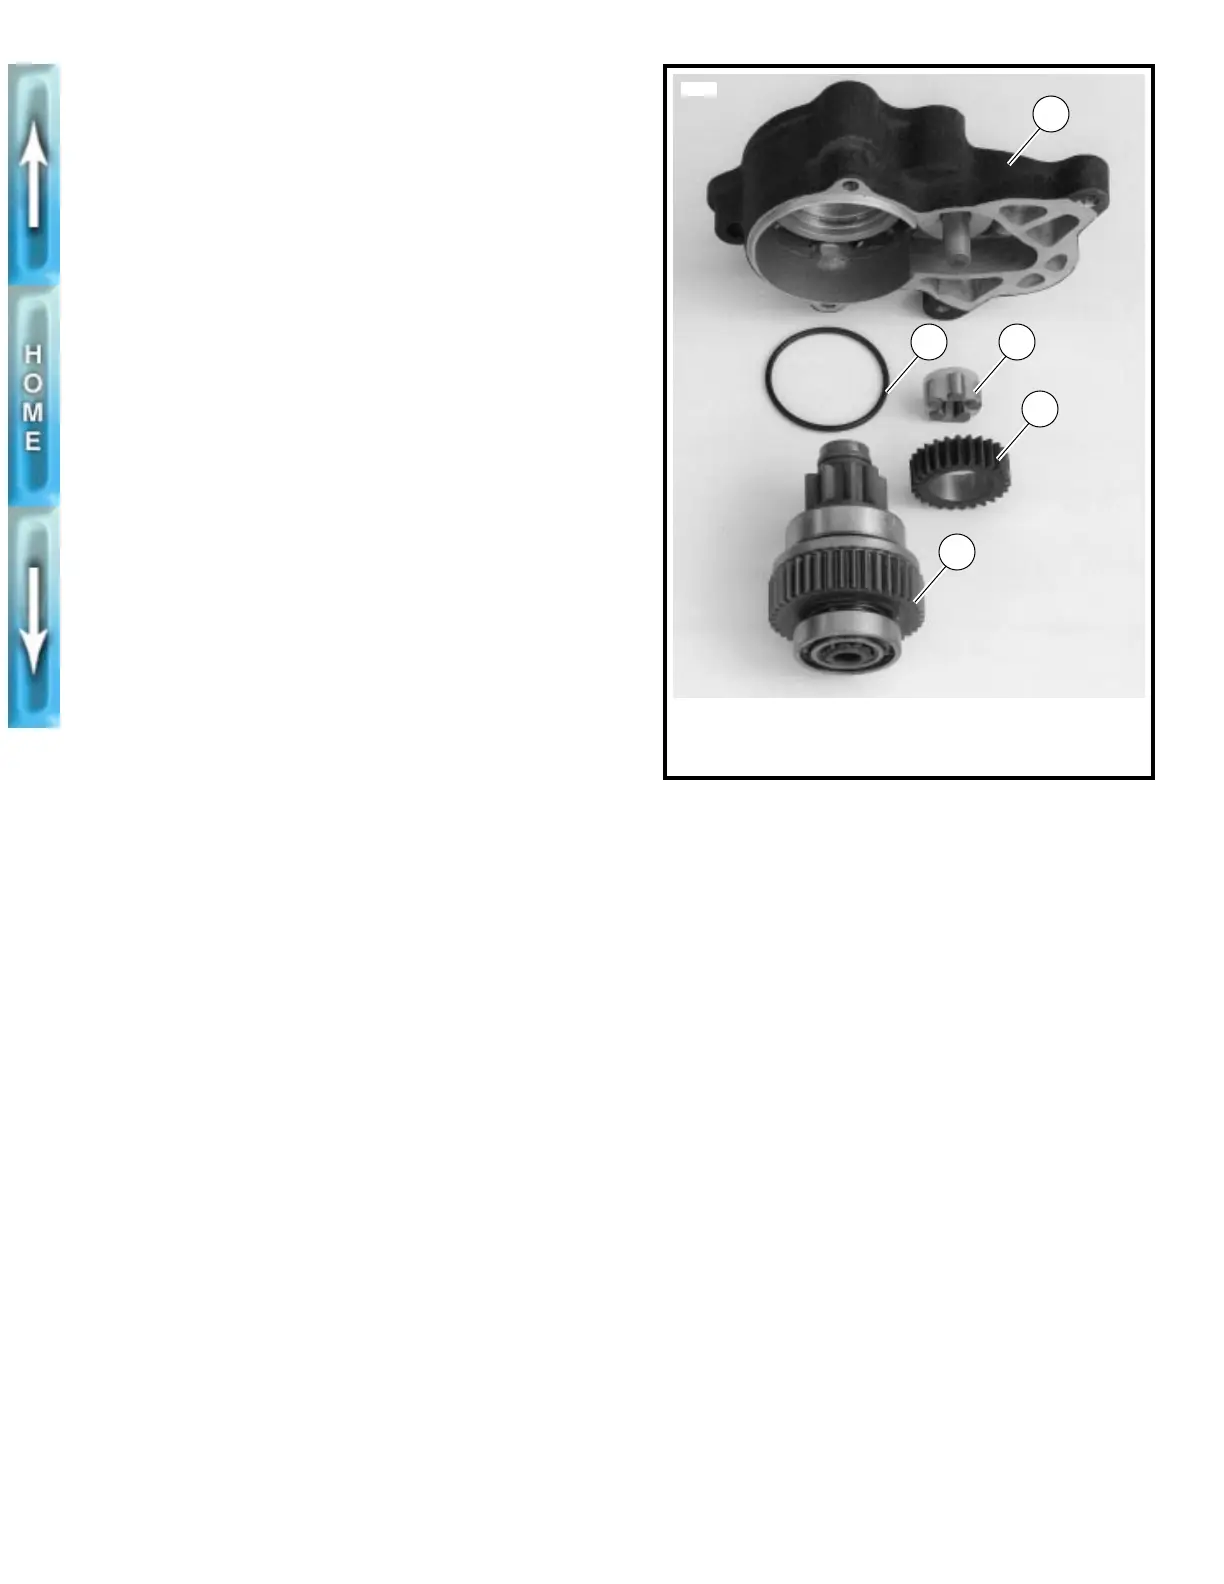
Figure 5-24. Starter Drive Assembly
4. O-ring
5. Drive housing
1. Drive
2. Idler gear
3. Idler gear bearing
1
2
34
5
3530a