2-49
HANDLEBAR
REMOVAL
1. Remove front brake master cylinder. See FRONT
BRAKE MASTER CYLINDER, REMOVAL on page 2-19.
2. Remove left and right handlebar switch housings. See
HANDLEBAR SWITCHES in Section 7.
3. Cut left handlebar grip and remove.
4. Remove instrument support. See SPEEDOMETER AND
TACHOMETER on page 2-46.
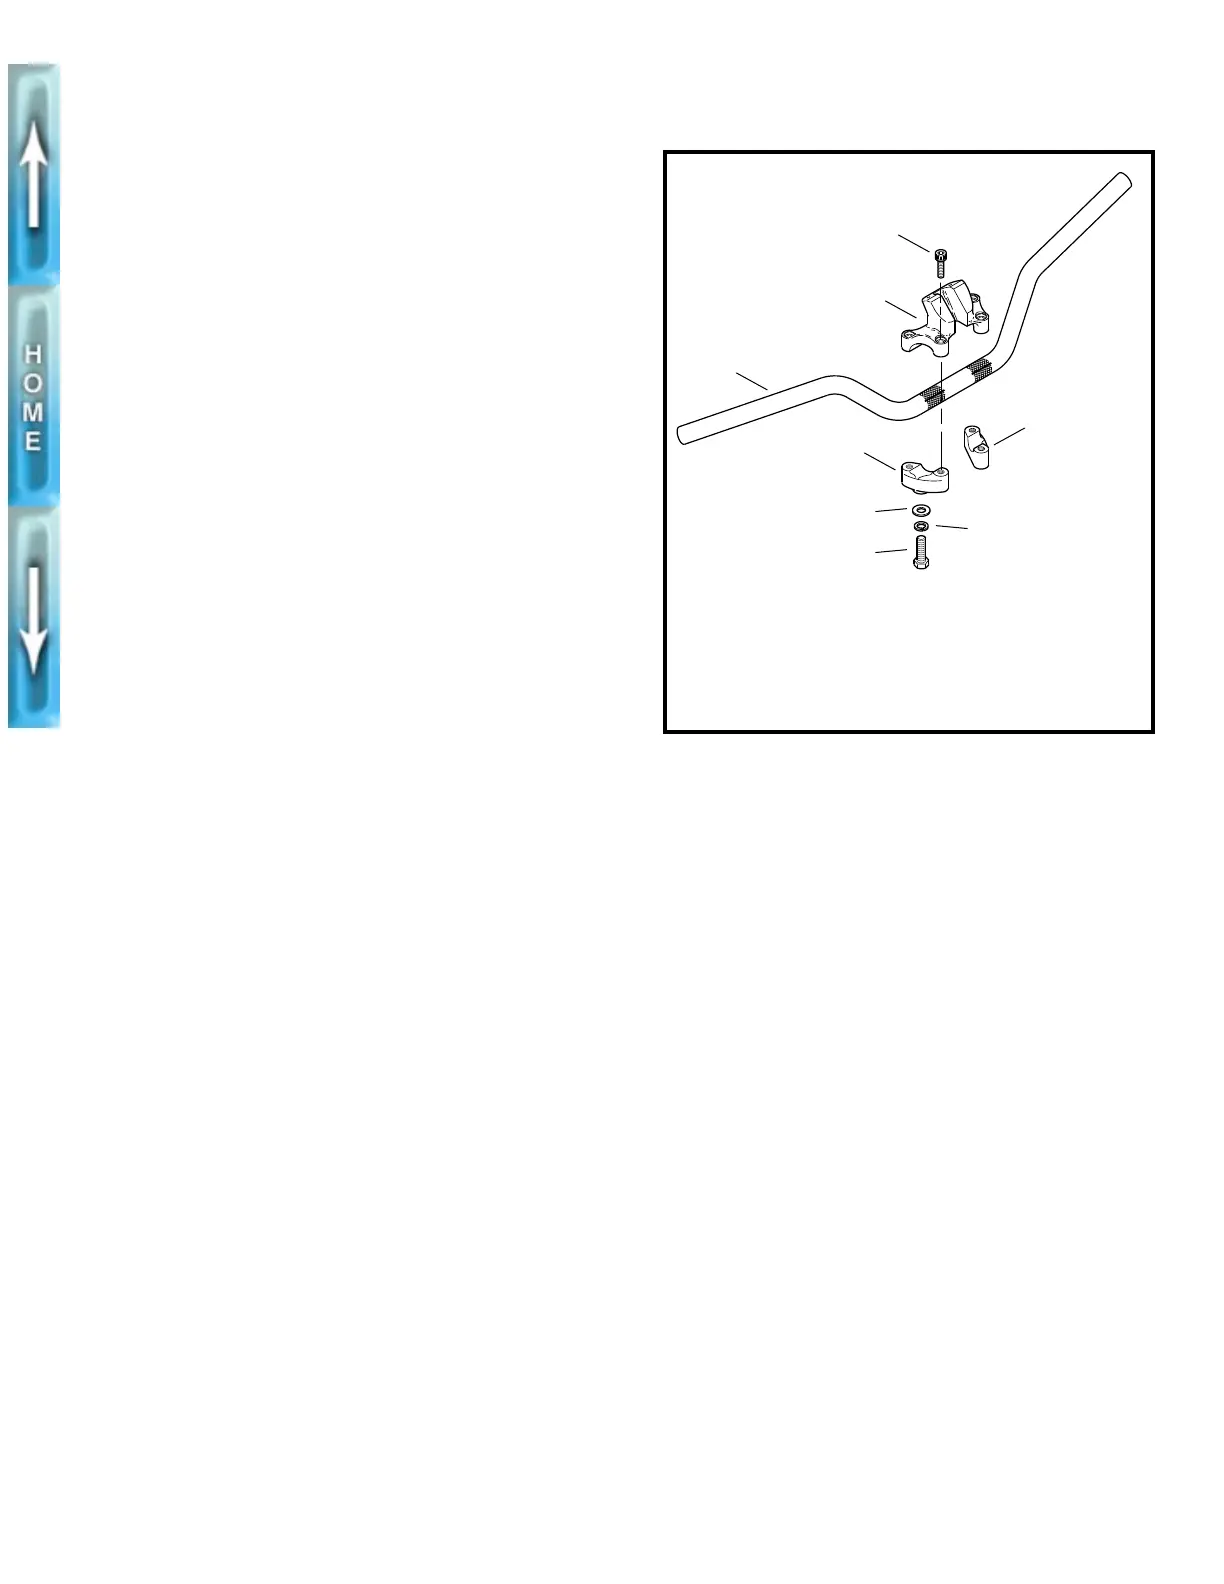
5. Loosen four screws (1) on upper handlebar clamp (2).
6. Move handlebar towards the air cleaner to increase clutch
cable freeplay. Remove clutch control. See CLUTCH
CONTROL, REMOVAL/DISASSEMBLY on page 2-44.
7. Remove four screws (1), upper handlebar clamp (2) and
handlebars (3).
8. Remove four bolts (8), lockwashers (7) and washers (6)
to detach lower handlebar clamps (4, 5) from upper triple
clamp.
INSTALLATION
1. Install lower handlebar clamps (4, 5) with four bolts (8),
lockwashers (7) and washers (6). Tighten to 30-33 ft-lbs
(40.7-44.7 Nm).
2. Install clutch control. See CLUTCH CONTROL, ASSEM-
BLY/INSTALLATION on page 2-45.
3. Install handlebar (3) using upper handlebar clamp (2)
and four screws (1). Tighten screws to 10-12 ft-lbs (13.6-
16.2 Nm).
4. Install instrument support. See SPEEDOMETER AND
TACHOMETER on page 2-46.
5. Install left and right handlebar switch housings. See
HANDLEBAR SWITCHES in Section 7.
6. Install a new left handgrip.
a. Clean end of handlebar with M600.
b. Place LOCTITE 411 ADHESIVE around inside of
grip.
c. Push grip onto handlebar end. Twist grip on bar until
end touches left switchgear housing.
d. Wipe off excess adhesive with a rag.
7. Install front brake master cylinder. See FRONT BRAKE
MASTER CYLINDER, INSTALLATION on page 2-19.
Figure 2-57. Handlebars
b0220x2x
1
2
4
5
3
8
6
7
1. Screw (4)
2. Upper handlebar
clamp
3. Handlebar
4. Lower right handlebar
clamp
5. Lower left handlebar
clamp
6. Washer (4)
7. Lockwasher (4)
8. Bolt (4)