4-26
Cisco Wireless LAN Controller Configuration Guide
OL-17037-01
Chapter 4 Configuring Controller SettingsWireless Device Access
Changing the Default Values of SNMP Community Strings
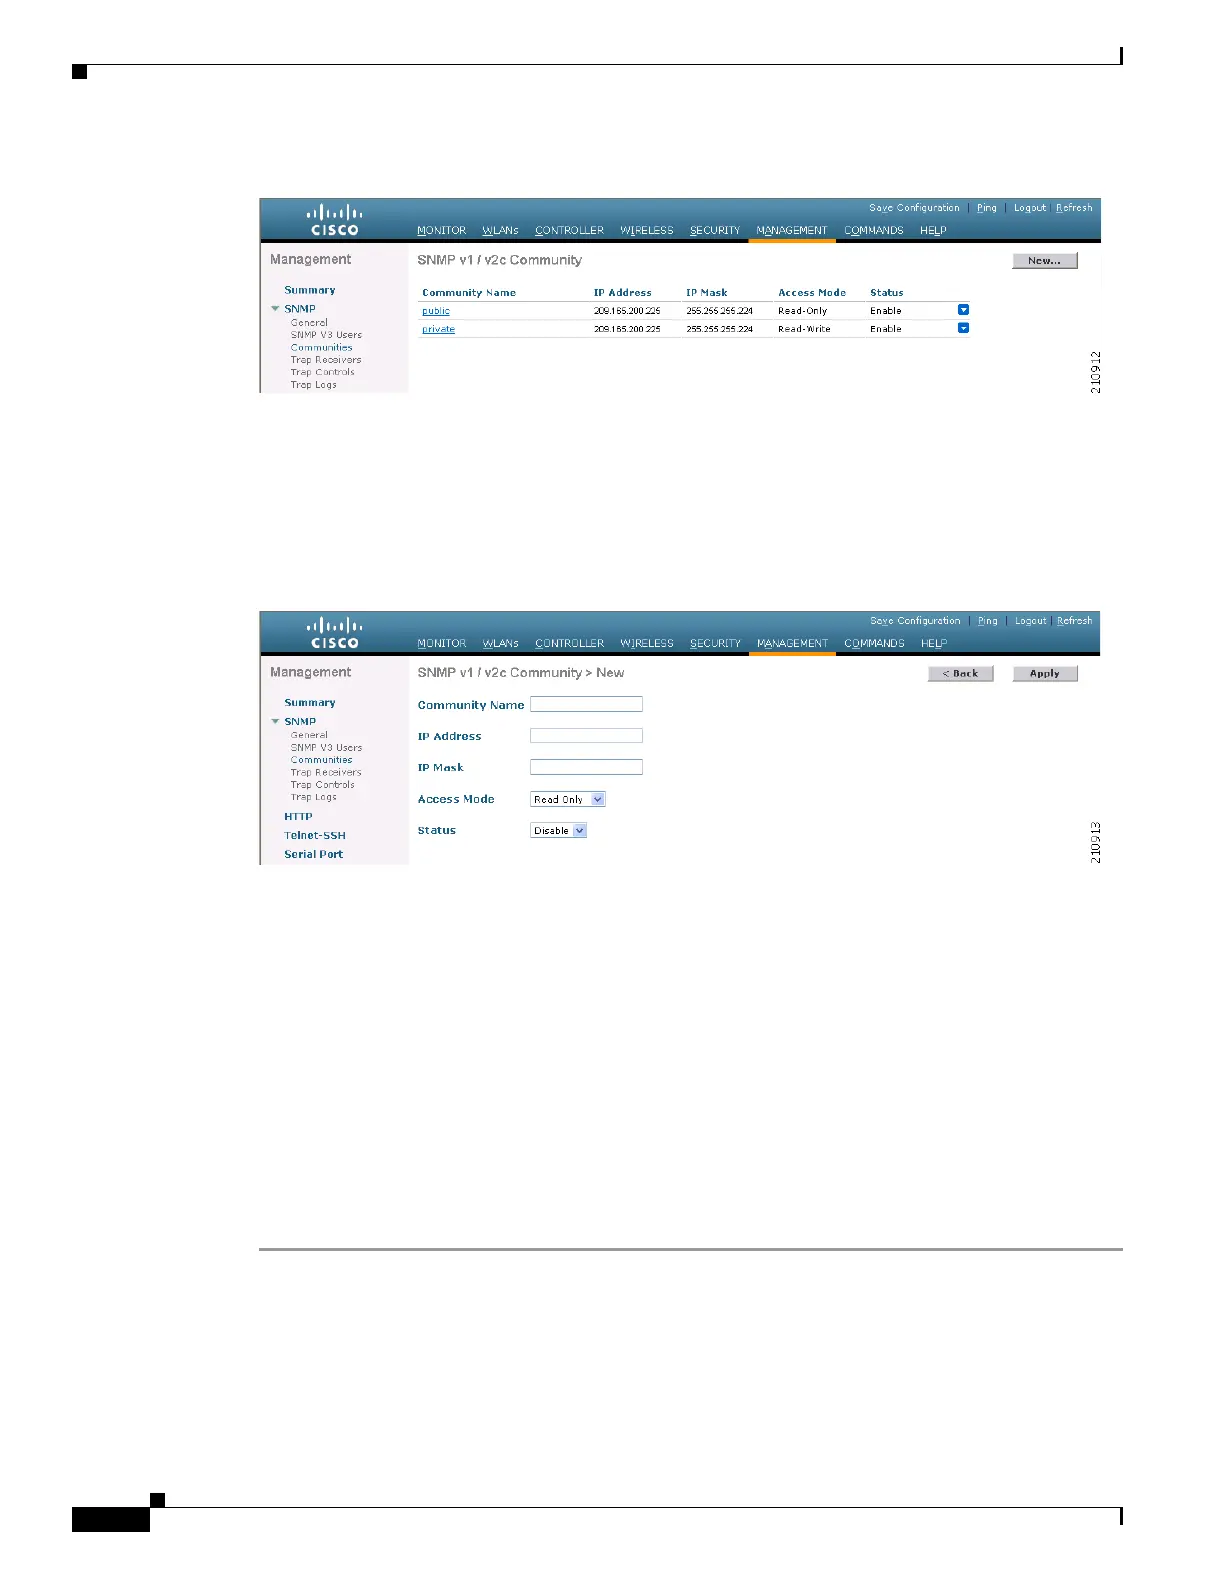
Figure 4-5 SNMP v1 / v2c Community Page
Step 2
If “public” or “private” appears in the Community Name column, hover your cursor over the blue
drop-down arrow for the desired community and choose Remove to delete this community.
Step 3 Click New to create a new community. The SNMP v1 / v2c Community > New page appears (see
Figure 4-6).
Figure 4-6 SNMP v1 / v2c Community > New Page
Step 4
In the Community Name field, enter a unique name containing up to 16 alphanumeric characters. Do not
enter “public” or “private.”
Step 5 In the next two fields, enter the IP address from which this device accepts SNMP packets with the
associated community and the IP mask.
Step 6 Choose Read Only or Read/Write from the Access Mode drop-down box to specify the access level for
this community.
Step 7 Choose Enable or Disable from the Status drop-down box to specify the status of this community.
Step 8 Click Apply to commit your changes.
Step 9 Click Save Configuration to save your settings.
Step 10 Repeat this procedure if a “public” or “private” community still appears on the SNMP v1 / v2c
Community page.

 Loading...