5-10
Cisco Wireless LAN Controller Configuration Guide
OL-17037-01
Chapter 5 Configuring Security Solutions
Configuring RADIUS
c. From the IKE Phase 1 drop-down box, choose one of the following options to specify the Internet
Key Exchange (IKE) protocol: Aggressive or Main. The default value is Aggressive.
IKE Phase 1 is used to negotiate how IKE should be protected. Aggressive mode passes more
information in fewer packets with the benefit of slightly faster connection establishment at the cost
of transmitting the identities of the security gateways in the clear.
d. In the Lifetime field, enter a value (in seconds) to specify the timeout interval for the session. The
valid range is 1800 to 57600 seconds, and the default value is 1800 seconds.
e. From the IKE Diffie Hellman Group drop-down box, choose one of the following options to specify
the IKE Diffie Hellman group: Group 1 (768 bits), Group 2 (1024 bits), or Group 5 (1536 bits).
The default value is Group 1 (768 bits).
Diffie-Hellman techniques are used by two devices to generate a symmetric key through which they
can publicly exchange values and generate the same symmetric key. Although all three groups
provide security from conventional attacks, Group 5 is considered more secure because of its larger
key size. However, computations involving Group 1 and Group 2 based keys might occur slightly
faster because of their smaller prime number size.
Step 20 Click Apply to commit your changes.
Step 21 Click Save Configuration to save your changes.
Step 22 Repeat the previous steps if you want to configure any additional services on the same server or any
additional RADIUS servers.
Step 23 To specify the RADIUS server fallback behavior, follow these steps:
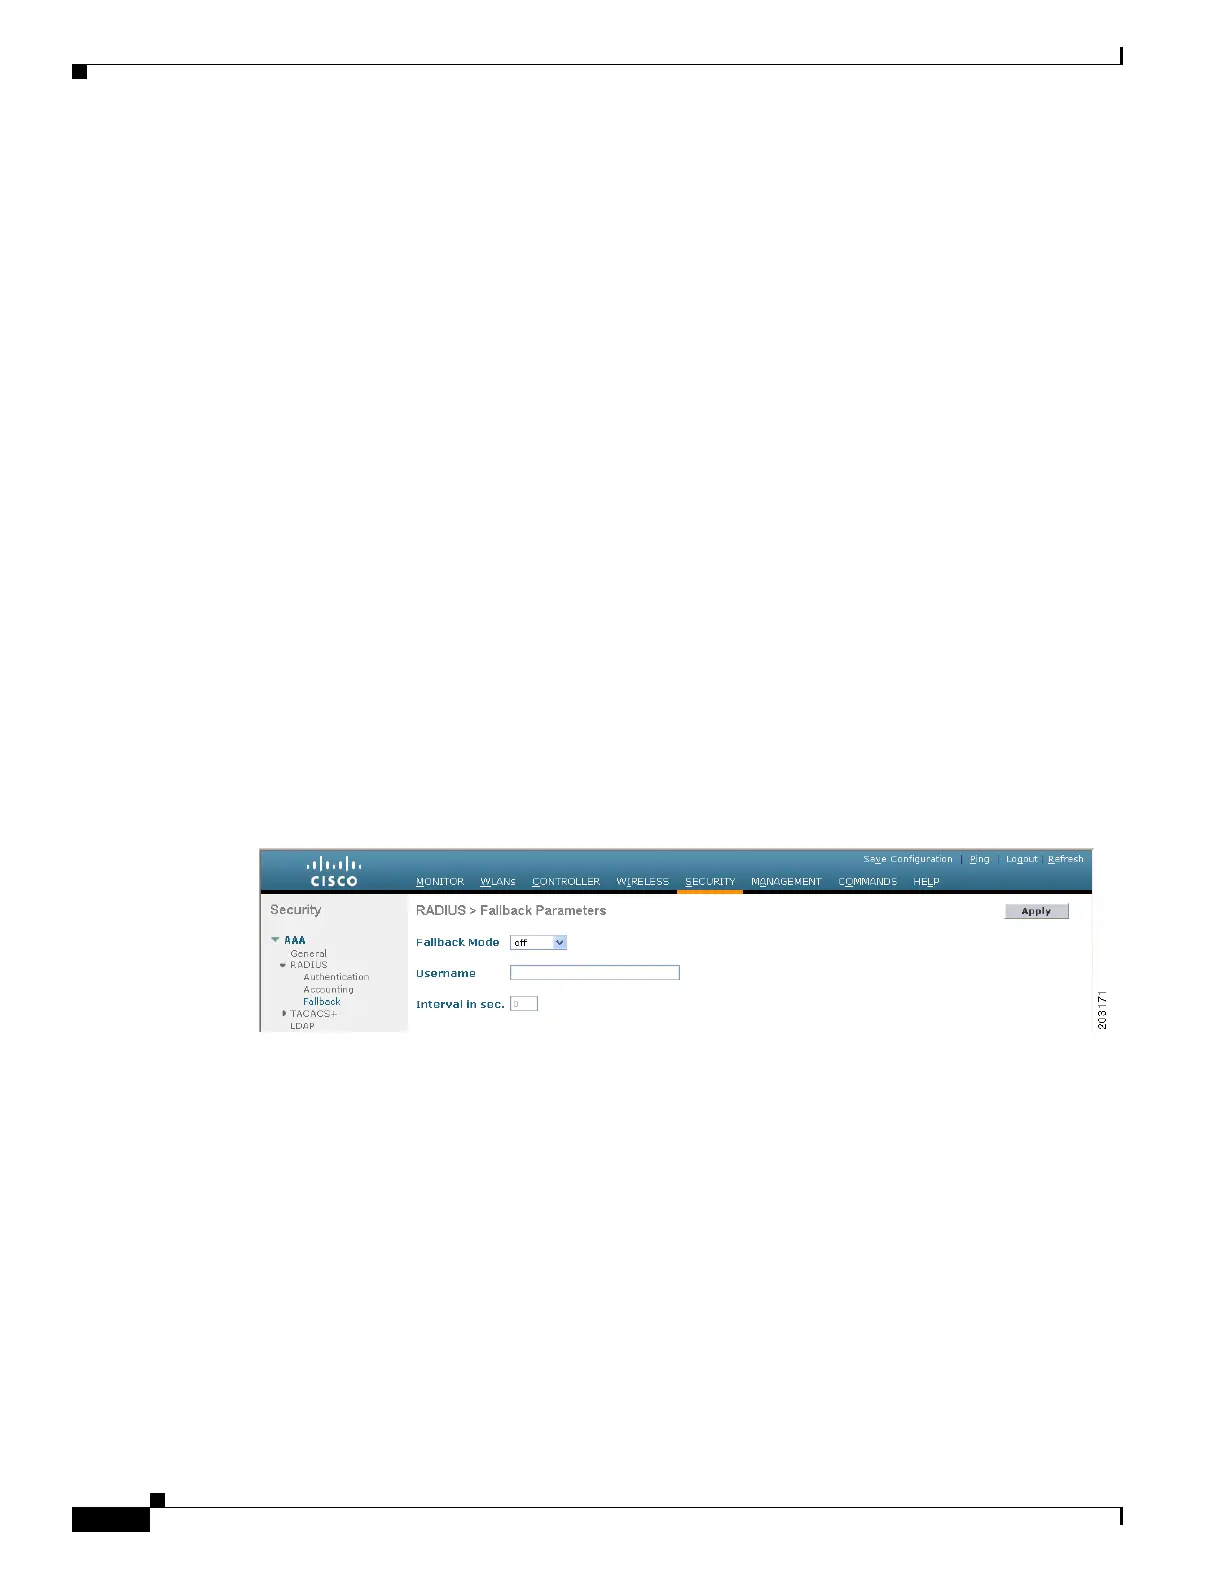
a. Click Security > AAA > RADIUS > Fallback to open the RADIUS > Fallback Parameters page
(see Figure 5-4).
Figure 5-4 RADIUS > Fallback Parameters Page
b.
From the Fallback Mode drop-down box, choose one of the following options:
• Off—Disables RADIUS server fallback. This is the default value.
• Passive—Causes the controller to revert to a server with a lower priority from the available
backup servers without using extraneous probe messages. The controller simply ignores all
inactive servers for a time period and retries later when a RADIUS message needs to be sent.
• Active—Causes the controller to revert to a server with a lower priority from the available
backup servers by using RADIUS probe messages to proactively determine whether a server
that has been marked inactive is back online. The controller simply ignores all inactive servers
for all active RADIUS requests. Once the primary server receives a response from the recovered
ACS server, the active fallback RADIUS server no longer sends probe messages to the server
requesting the active probe authentication.
c. If you enabled Active fallback mode in Step b, enter the name to be sent in the inactive server probes.
in the Username field. You can enter up to 16 alphanumeric characters. The default value is
“cisco-probe.”

 Loading...