3-118 Cisco 700 Hardware Installation and Mainteneance
General Installation
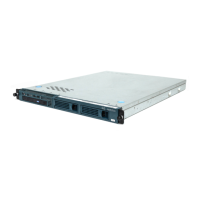
General Installation
The router should already be in the area where you will install it, and your installation location
should already be determined; if not, refer to the section “Site Requirements” in the chapter
“Preparing for Installation.”
When installing the router on a table or floor, ensure that you have planned a clean, safe location for
the chassis and have considered the following:
• The location does not block the chassis intake (front) and exhaust (back panel) vents.
• Multiple chassis can be placed side by side, but do not stack them.
• Dust accumulates on floors. If you are placing the router on the floor, try to find a location with
a minimum of dust. Excessive amounts of dust drawn in by the blower will require frequent filter
cleaning or replacement.
• A raised platform or sturdy table provides a cleaner environment than does the floor.
• When deciding where to install any equipment, consider future maintenance requirements. Allow
at least 3 or 4 feet of clearance for installing the power supplies and, later, for maintenance
(installing/replacing power supplies or interface processors, or making/adding network
connection cables or equipment).
Warning Two people are required to lift the chassis safely. Grasp the chassis underneath the lower
edge and lift with both hands. Keep your back straight and lift with your legs, not your back.
Step 1 Make sure that the area in which you will install the router is free of debris and dust. Also
make sure your path to the location is unobstructed.
Step 2 On the rear of the chassis, do the following:
• Check the ejector levers and ensure that the RP, SP (or SSP), RSP7000, RSP7000CI, and
all interface processors are securely installed.
• Check the captive installation screws on the RP, SP (or SSP), RSP7000, RSP7000CI,
and each interface processor and tighten any that are loose.
Step 3 Ensure that both power supply bays are empty.
Warning Never attempt to lift the chassis with the handles on the power supplies or on the interface
processors, or by the plastic panels on the front of the chassis. These handles are not designed to
support the weight of the chassis.
Step 4 Two people are required to perform this step. With a person positioned at either side of the
chassis, grasp the bottom edge of the chassis with one hand near the front and the other near
the back. Together, slowly lift the chassis. Avoid sudden twists or moves to prevent injury.
Step 5 Place the router in a location where the air intake vent on the front of the chassis (the bottom
front panel) is not drawing in exhaust air from other equipment.
Step 6 Ensure that you have at least three or four feet of clearance around the rear of the chassis.
You will need this space to install the power supplies, perform maintenance on the chassis,
and observe LEDs.
Step 7 After you correctly position the chassis, proceed to the following section, “Installing Power
Supplies.”

 Loading...