Chapter 5 Web GUI Setup and Monitoring
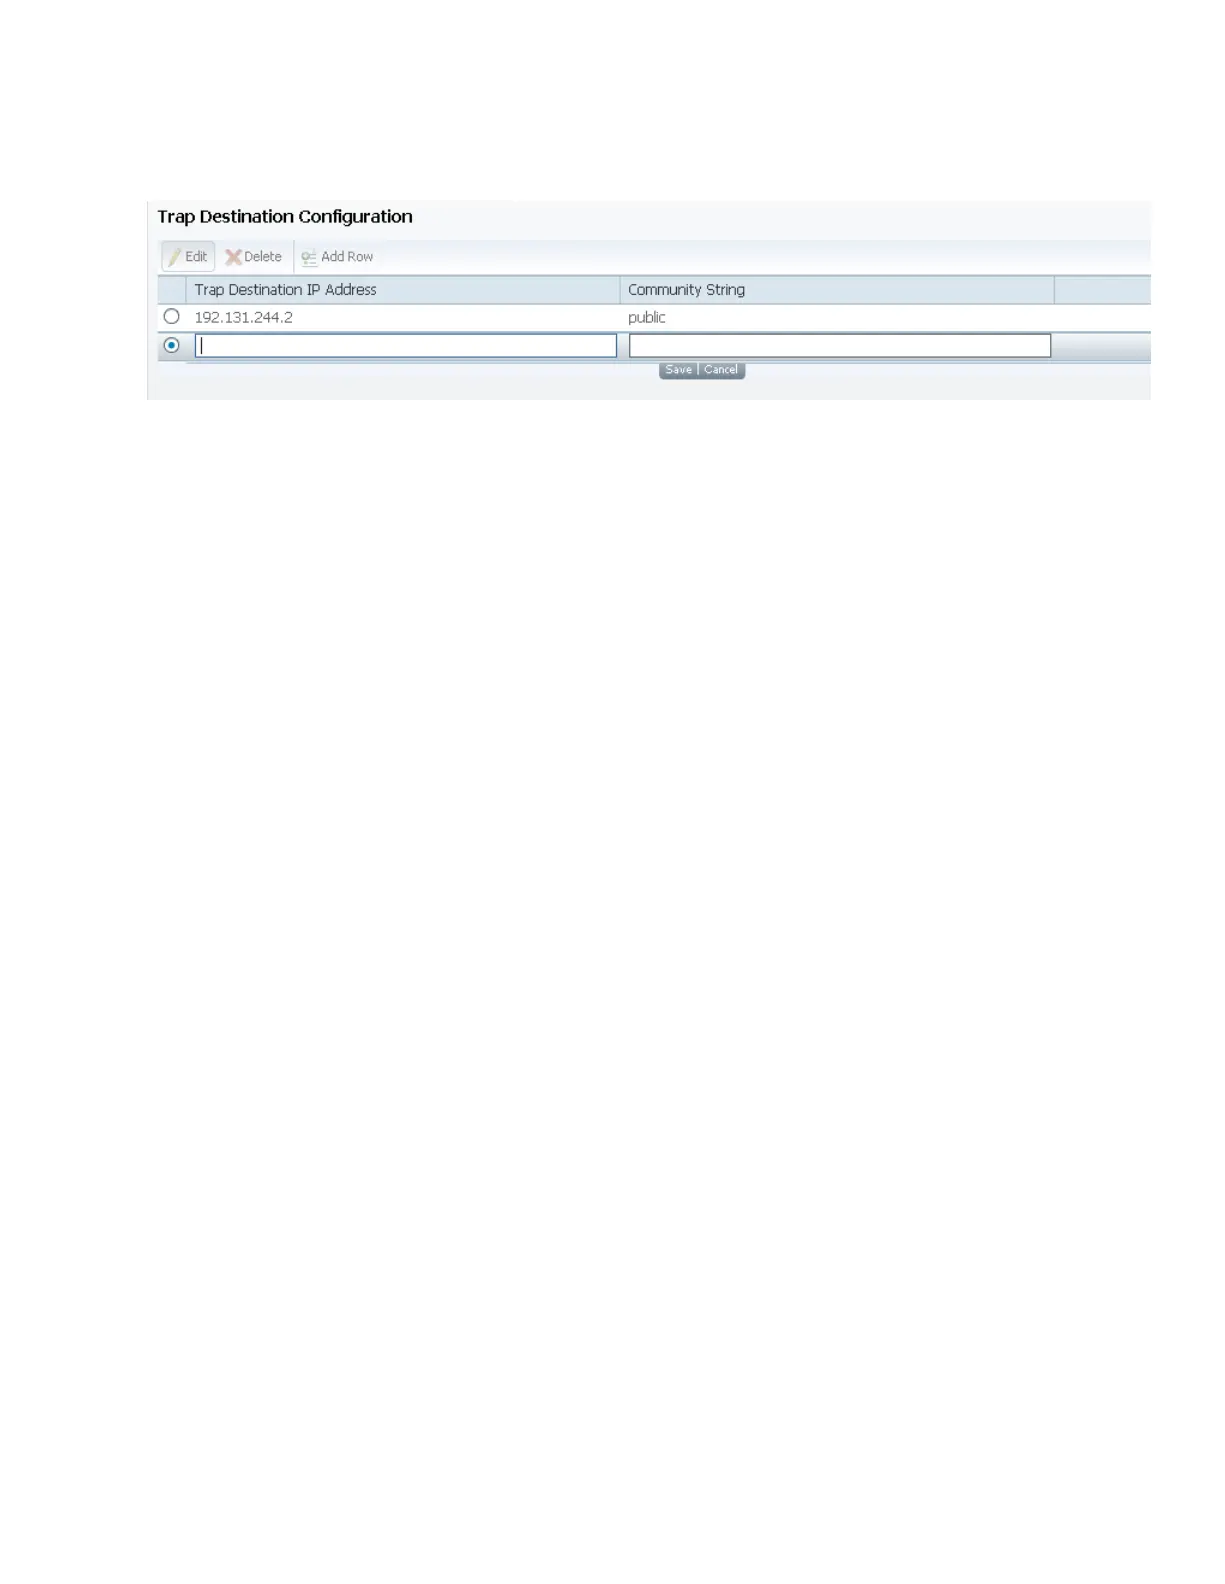
Adding a Trap Destination
1 Click Add in the Trap Destination Configuration area.
2 In the Trap Destination IP Address field, enter the IP address that sets the
destination for SNMP trap messages for system events (for example, fault
messages).
3 In the Community String field, enter the community string for the trap
destination (IP address entered above).
Enter public or custom string. The default is public. You can enter a string up to
35 characters.
4 Click Apply.
To edit/delete an existing trap destination, select the trap destination entry by
clicking on the radio button. Click Edit and make the necessary changes, or click
Delete to remove the address from the Trap Destination Configuration list.