Chapter 5 Web GUI Setup and Monitorin g
3 In the table, click the radio button of the program entry you want to edit.
From the Action drop-down list, choose the DPM program action for the PE
(Pass, Map, Drop, or XCode). The auxiliary programs (P1A and P2A) cannot be
set to XCode.
Click Save.
If you want to configure an auxiliary PE, we highly recommend that you
perform the following:
- From the Enable Auto Map For Auxiliary PEs drop-down list, choose Yes in
the ASI Outputs page.
- Set PxA to Map.
- Click Resynchronize All to ensure that the inputs and outputs are the same.
4 Select the program entry you want to edit.
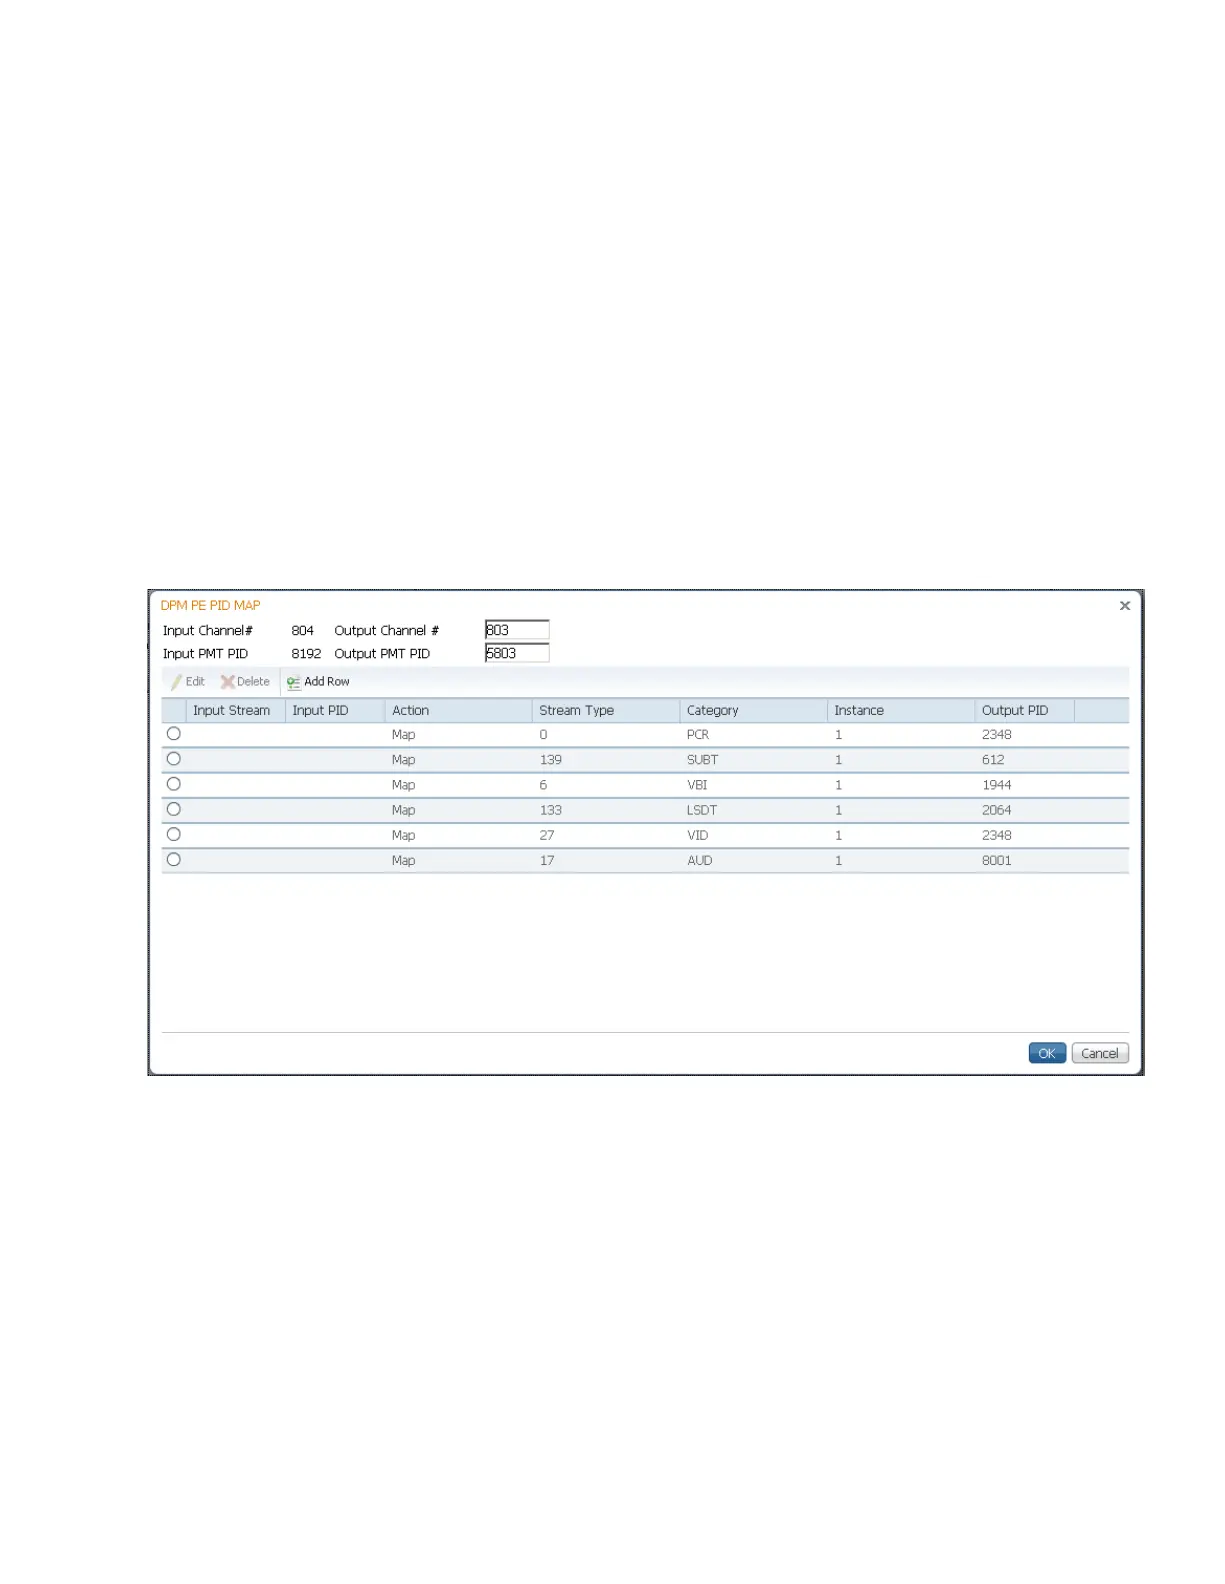
5 Click Edit. The DPM PE PID MAP dialog box opens.
6 In the Output Channel # field, enter the output channel number you want to
map to the input channel (Input Channel #). This value is only used if the PE
Action was set to Map. You can enter a range from 1 to 65535.
7 Enter the Output PMT PID you want to map to the Input PMT PID.
8 In the PE PID MAP area, you can select an existing PID mapping entry you want
to modify or click Add Row to create a new entry.
9 The Input Stream indicates the input service that will be mapped by the current
entry. The Input PID displays the input PID (1 to 8190) that will be mapped by
the current entry. This is only used if the Action is set to Map.