Table 41. Internal view description (continued)
Number Item Description
▌5▐ Tape drive The module can contain a half-height or a full-height tape drive. The drive is
a customer replaceable unit (CRU), and is designed for easy removal and
replacement.
▌6▐ Power supply The power supply is a customer replaceable unit (CRU) and the sole source of
power for the module. The module is shipped with one power supply, but can
contain an optional second power supply for redundancy.
▌7▐ Robotic lock lever This component is used to lock down the accessor so it cannot move. This
action is done when the module is moved or when the robotic assembly is
removed.
▌8▐ Finger hole One of two finger holes that are used to lift out the accessor assembly. The
other is under the accessor in the photograph.
▌9▐ Spooling mechanism This component moves the accessor.
Adding, removing, or replacing a tape drive
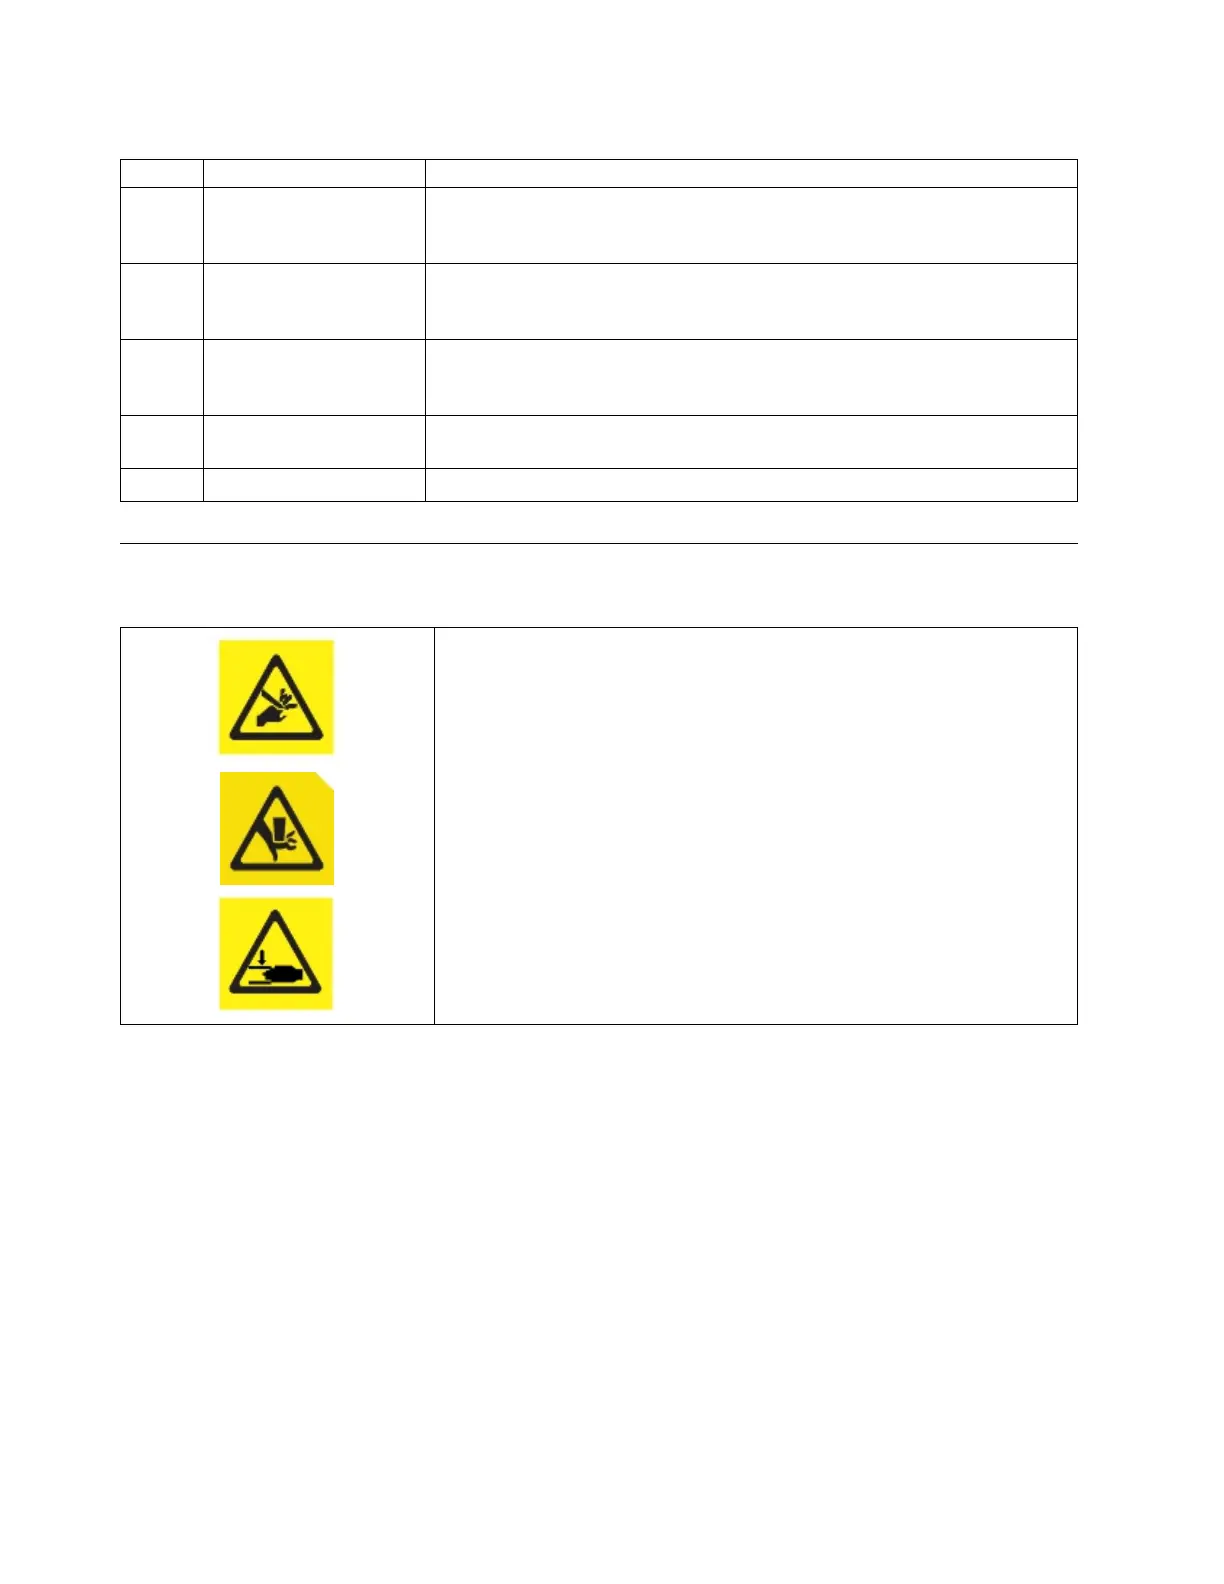
Table 42. Pinch hazard
Caution: Risk of pinching hands or fingers. Can trap hands, fingers, and
cause serious injury. Keep hands clear during operation. (L012)
Note: Only individuals who are informed about the procedures and risks can replace or upgrade this
tape drive assembly. Read all troubleshooting documentation and procedures before you proceed with
repair or upgrade procedures. Hazardous moving parts exist inside this product. Do not insert tools or
any portion of your body into the drive bay openings.
Adding a tape drive
1. If you are adding a tape drive, remove a drive bay cover. With a Philips screwdriver, remove one
half-height drive bay cover to install one half-height drive, or remove two drive bays covers to install
a full-height tape drive.
106 Dell EMC ML3 Tape Library: User's Guide