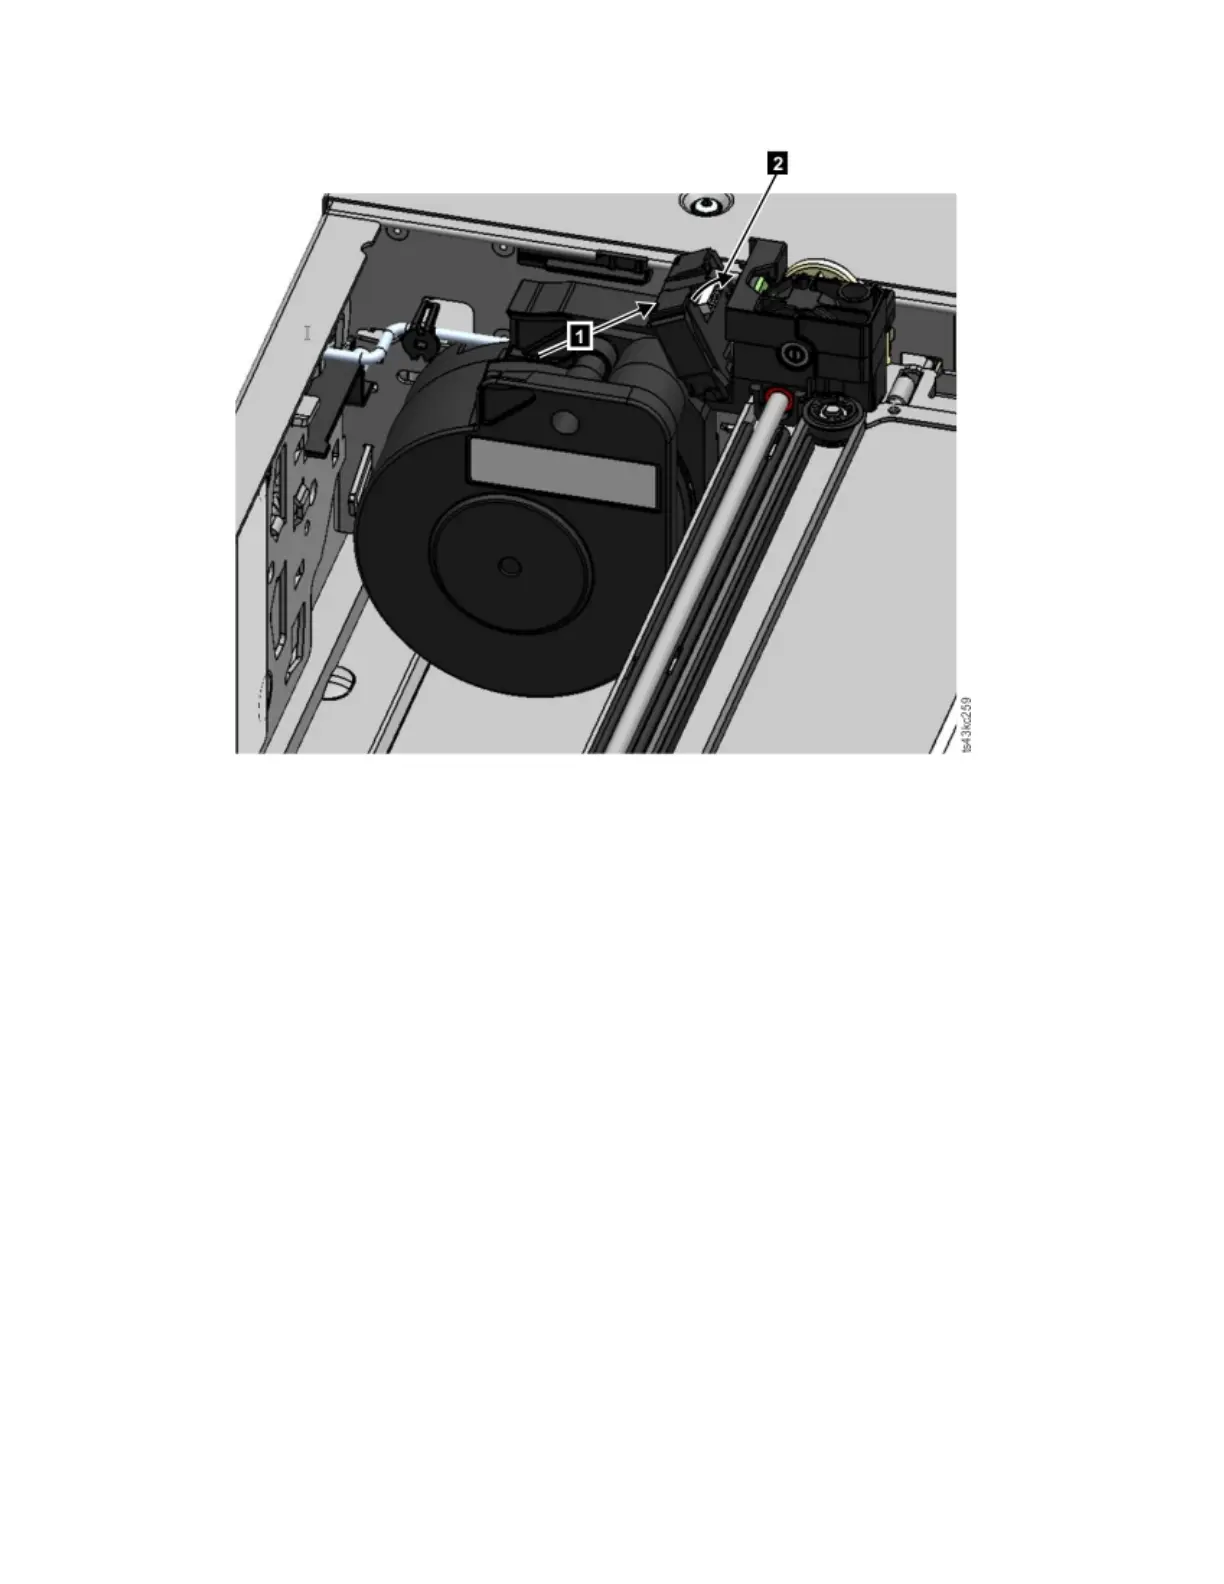
6. Unlock the accessor. The accessor drops smoothly. If it does not, check the alignment of the gears.
7. Before the accessor gets to the bottom, lock the robot. Standing at the front of the module, move the
blue lever to the left, then away from you, then to the right.
Tip: If the end of the spooling cable drops into the module, unlock the accessor, remove it from the
module, return the end of the spooling cable to its cradle, return the accessor to its previous position
in the module, relock the accessor, and repeat the procedure.
After the accessor and spooling mechanism installation
1. Push the magazines back into the module until they lock into place.
2. Replace the top cover on the Base Module if you removed one.
3. Slide the module into the rack.
4. If no adjacent modules exist, tighten the front screws.
5. If adjacent modules exist
a. Set the alignment mechanisms to the lock position. If you encounter resistance, adjust the upper
module so the pin in the alignment mechanism moves into the hole in the lower module.
b. When the alignment mechanism is in the locked position, tighten the front screws on the module
c. Reconnect the expansion interconnect cables.
6. Reconnect the Ethernet, SAS, and Fibre Channel cables to the Base Module.
7. Reconnect the power supply cables to the Base Module.
8. Pack the failed accessor and spooling mechanism to return to your service.
Figure 77. Installing the spooling cable
126 Dell EMC ML3 Tape Library: User's Guide