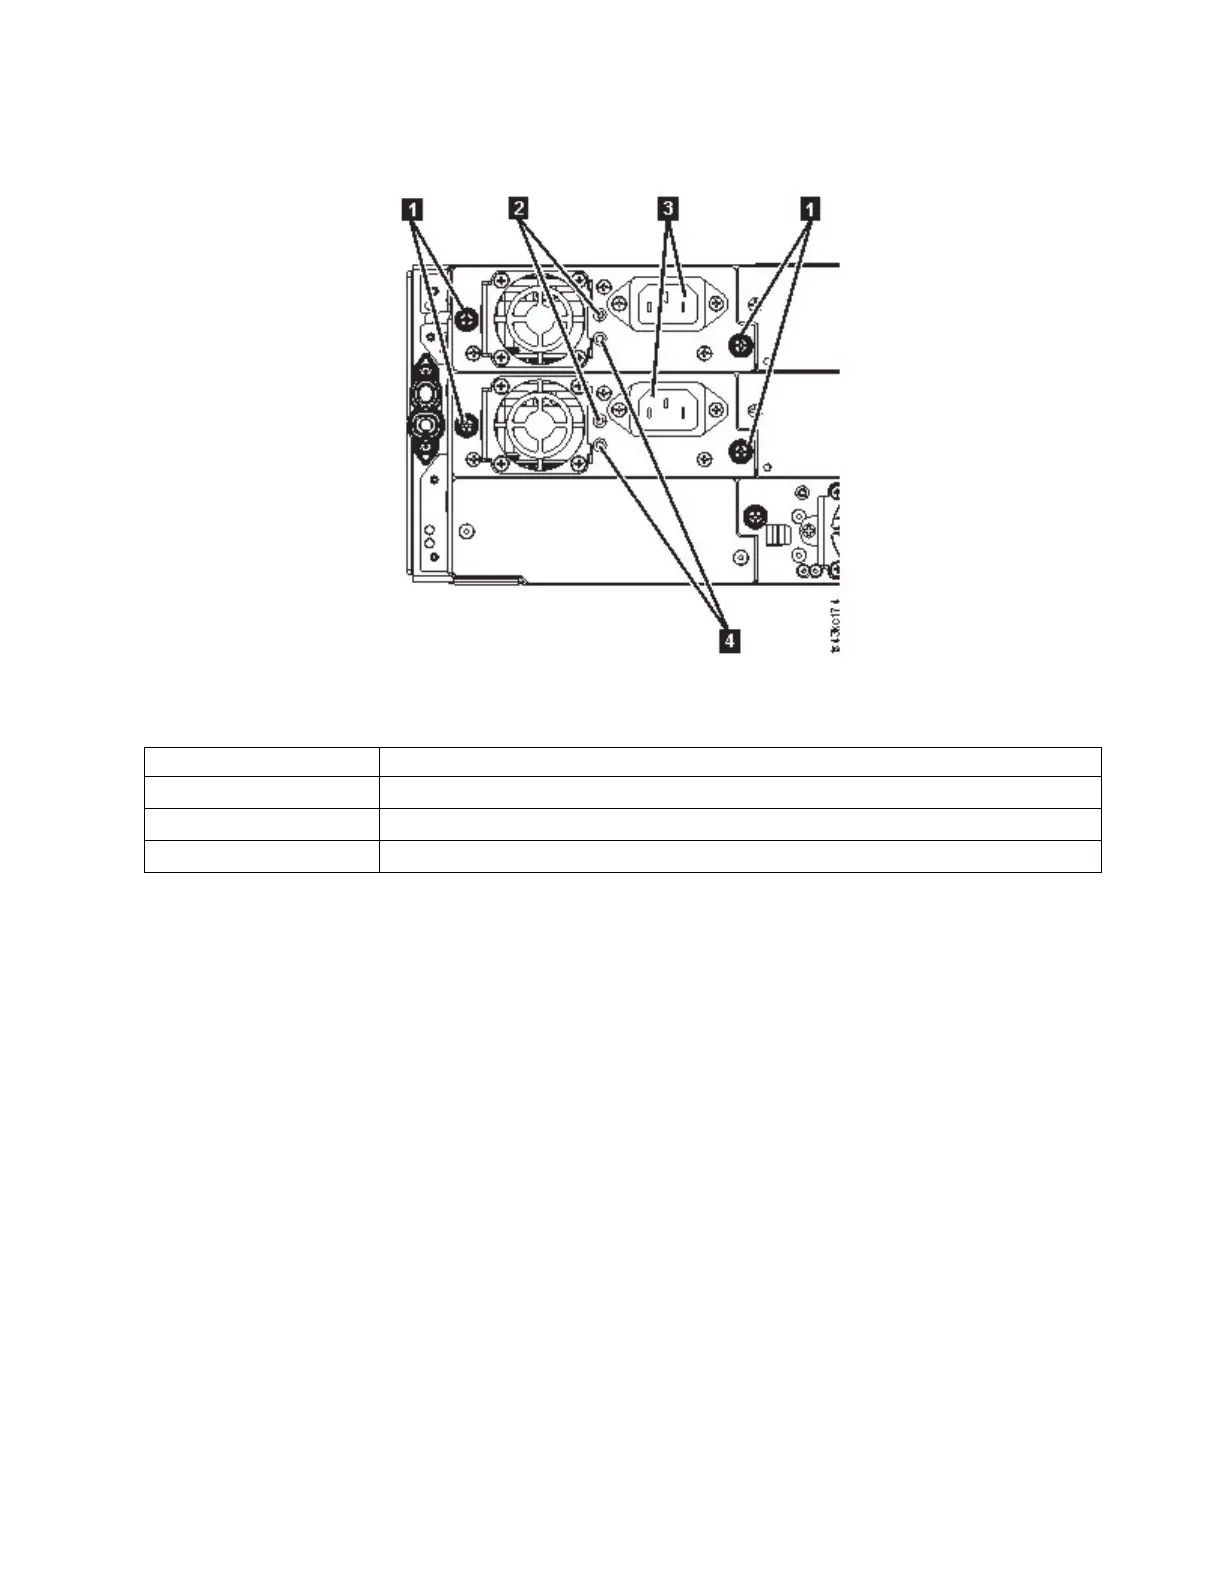
Removing the power supply
Table 43. Power supply components
▌1▐ Blue captive thumbscrews
▌2▐ White, lit if the AC power is connected
▌3▐ AC power outlet
▌4▐ Green, lit if the module in turned on
1. Locate the failed power supply on the rear of the library by the UID LEDs notification, and also by
the power supply LEDs; either the green LED (▌4▐) is lit or both LEDs are unlit.
2. Unplug the AC power cord (▌3▐) from the power supply you are replacing.
3. Loosen the two blue captive thumbscrews (▌1▐) with your fingers on the power supply.
4. Using the thumbscrews (one on each side), slowly pull the power supply approximately 10 cm (4
inches) from the back of the module.
5. Use one hand to completely remove the power supply from the module, while the other hand is used
to support the bottom.
Figure 67. Power supplies
Upgrading and servicing 115