EasyManuals Logo

Dell EMC ML3 User Manual

Dell EMC ML3
202 pages
To Next Page IconTo Next Page
To Previous Page IconTo Previous Page
Page #147 background imageLoading...
Page #147 background image
2. The accessor is shipped with the robot in the unlocked position. Verify that the replacement unit is
locked, then set it on top of the gears.
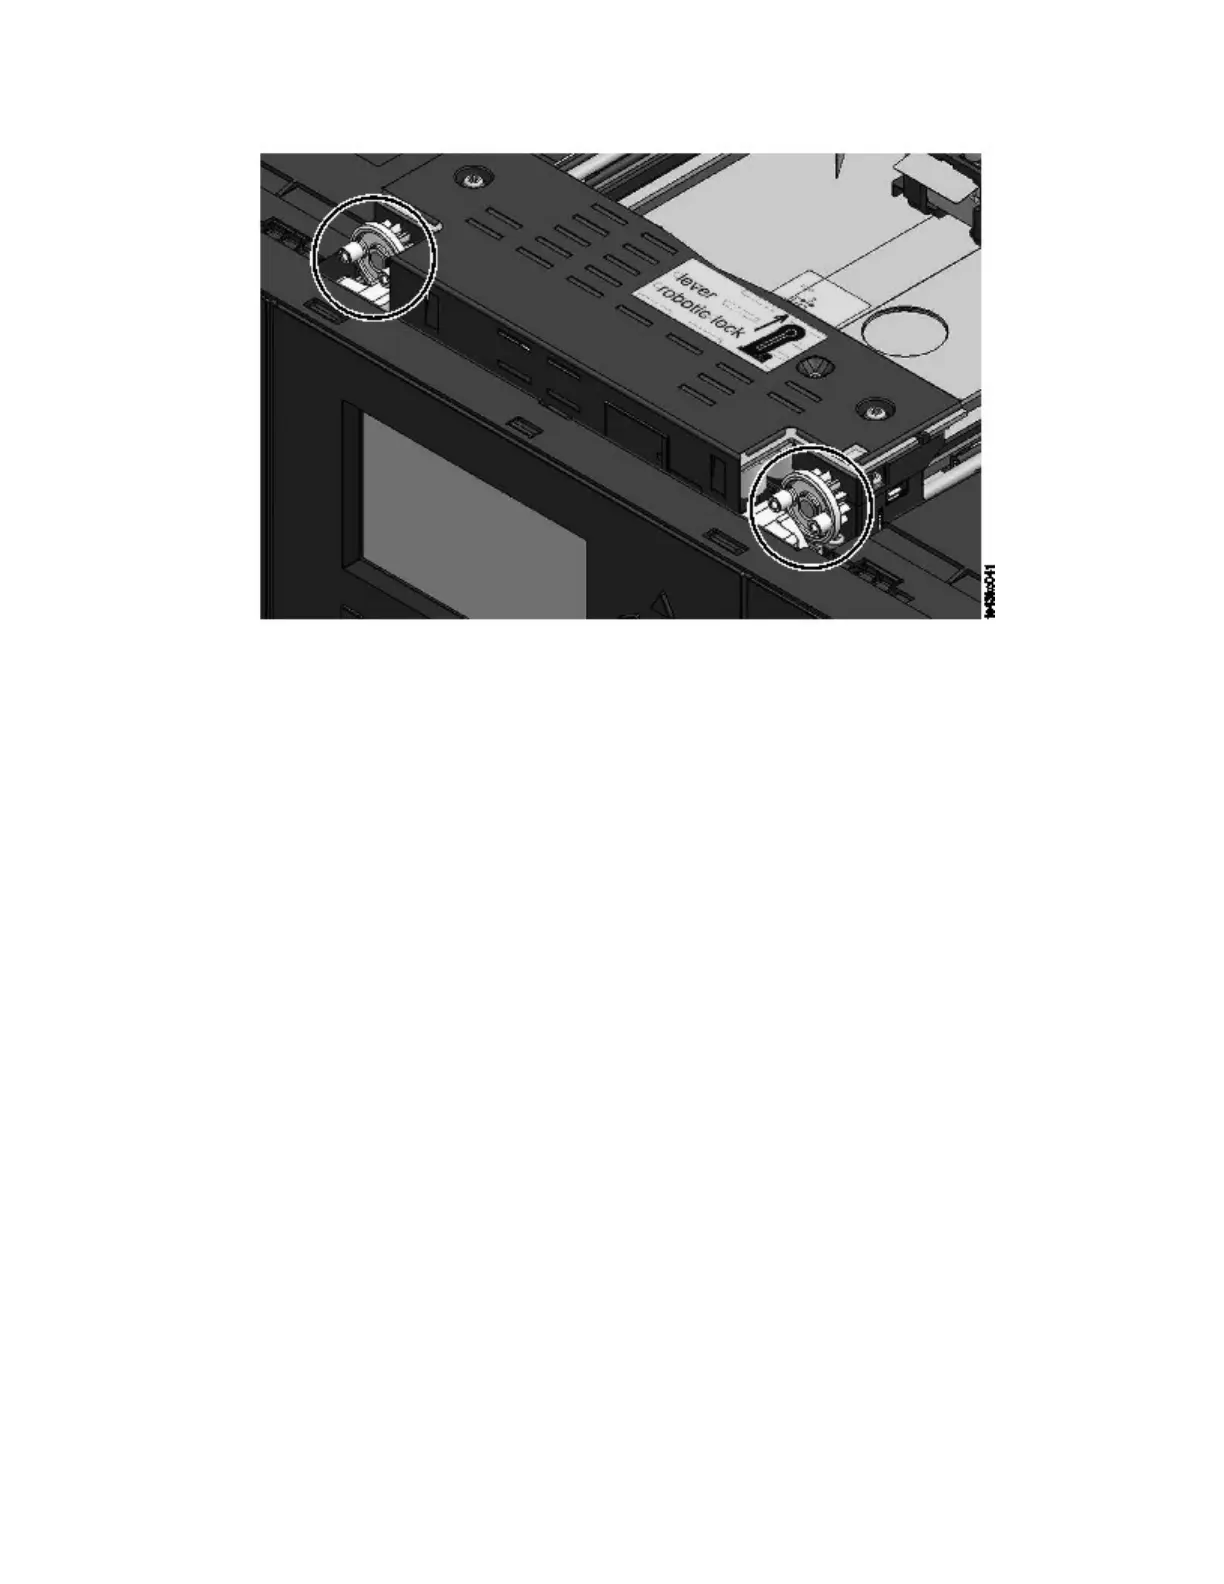
3. Place the gears of the accessor into the grooves on the inside corners of the module. Confirm that all
four of the pins are touching the outside of the grooves.
4. Standing at the right side of the module, remove the end of the spooling cable from the park position.
5. Place the spooling cable into the grooves where it attaches to the accessor and rotate it until it snaps
into place. See Figure 77 on page 126.
Figure 76. Pins are aligned horizontally
Upgrading and servicing 125

Table of Contents

Questions and Answers:

Question and Answer IconNeed help?

Do you have a question about the Dell EMC ML3 and is the answer not in the manual?

Dell EMC ML3 Specifications

General IconGeneral
Number of Drives1
CategoryTape Library
Drive TechnologyLTO
Humidity20% to 80% (non-condensing)
Drive TypeLTO Ultrium
Maximum Capacity15 TB (compressed)
Interface6Gb/s SAS
Max Data Transfer Rateup to 750 MB/s (with compression)
Operating Temperature10°C to 35°C
Non-operating Temperature-40°F to 140°F (-40°C to 60°C)

Related product manuals