61
8.3.4.12 Setup Serial Device
On this page you can set which device is connected to the multi-functional serial interface.
If there is no device connected, select “no device”.
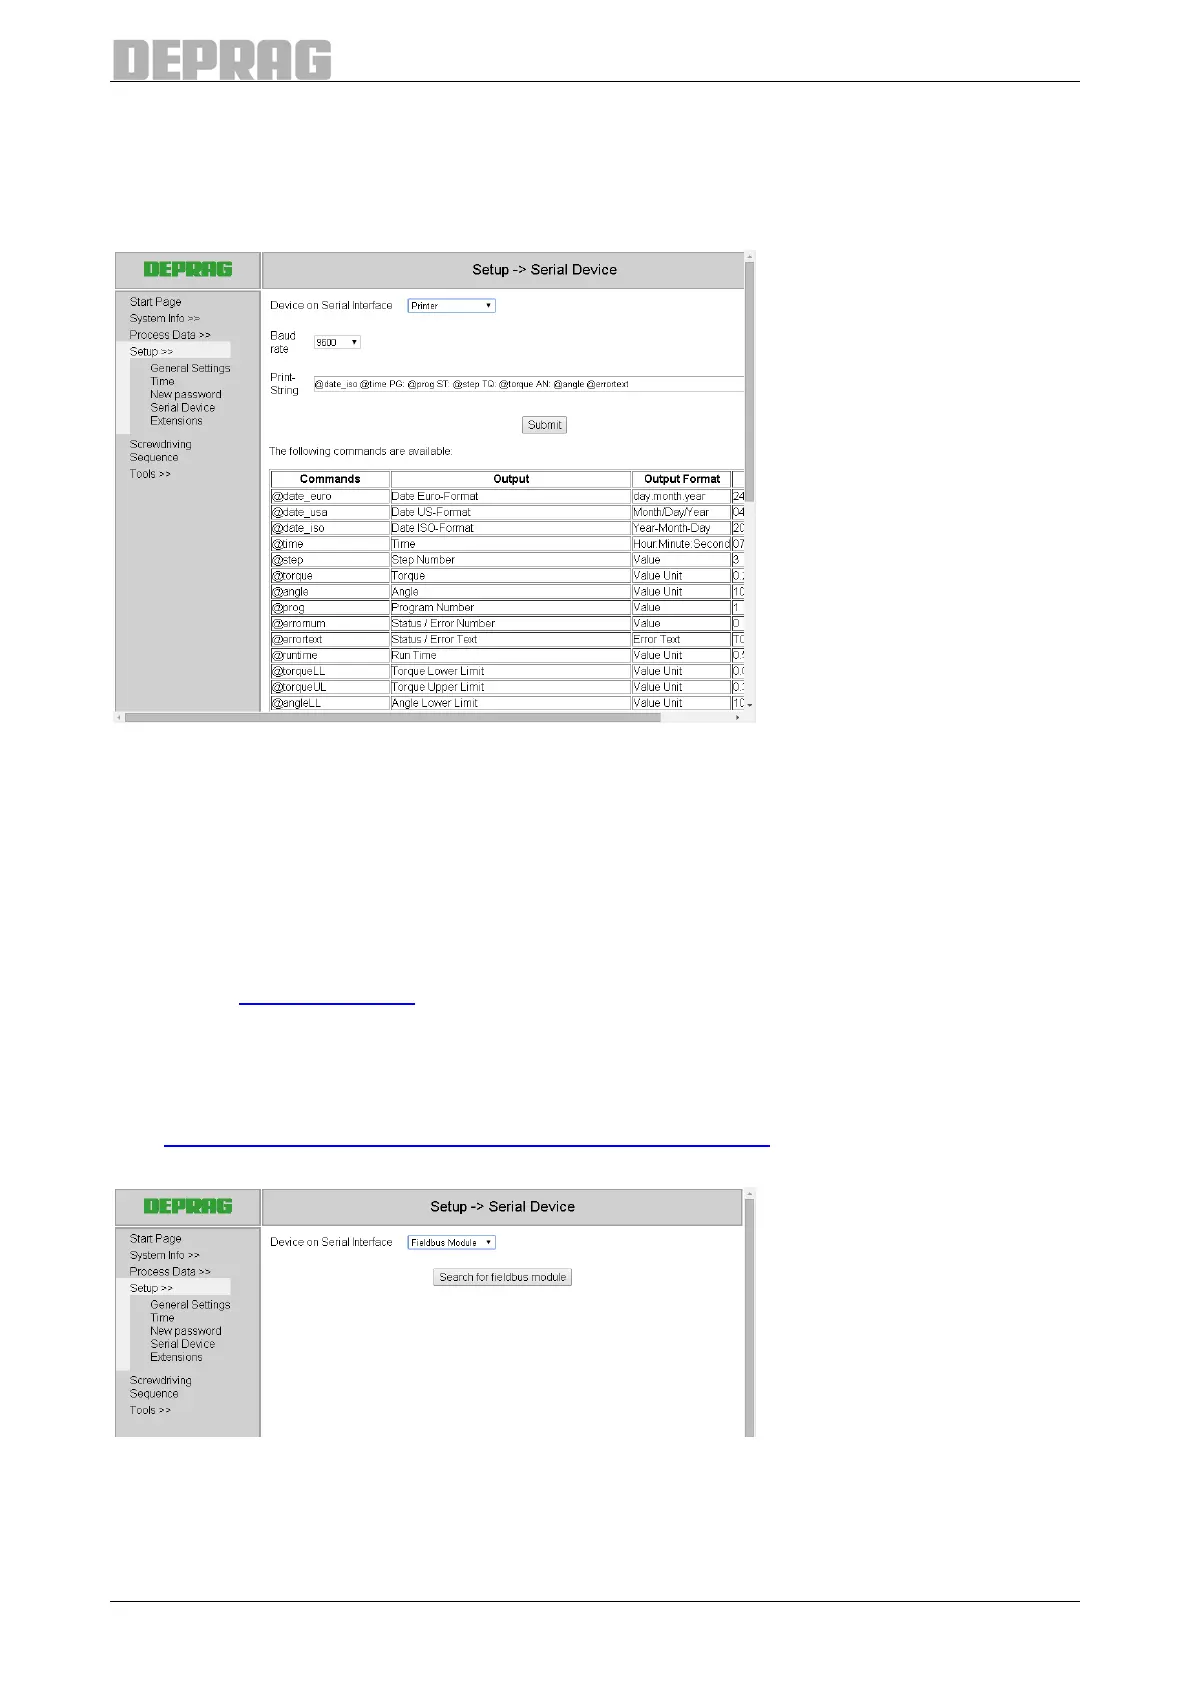
8.3.4.12.1 Printer
Figure 29: Printer settings
The following settings can be altered:
• Baud rate: the baud rate which the printer receives data
• Printed text: variable text which should be printed after a screw assembly
Under printed text you can determine what should be printed if a screwdriving program
uses the command “Print”. The printed text is printed as entered whereby the variables are
replaced by the relevant values. Variables always begin with the '@' symbol and must end
with a space character. A detailed description of the printouts and variables available can
be found in 12.4 Print output.
8.3.4.12.2 Fieldbus module
On this page all general settings for the (optional) fieldbus module can be found. The spe-
cific settings for the installed fieldbus module can also be carried out on this page, see
also 10.1.2
Special parameters for fieldbus systems (optional).
Figure 30: Selection of fieldbus
First click on the button “Search for fieldbus module”, so that the AST11 establishes a con-
nection with the fieldbus module connected.
 Loading...