10
MAINTENANCE
116 AXH1157-UK (ENG) L3500 L4700 F7000 [FPT S3A]
The drum gearbox is located on the bottom of the
drum, to check or change the oil in the gearbox of the
drum (fig. 170108-1) it is necessary to:
• Prepare the vehicle in the maintenance position.
• Turn on the machine and fully lift the drum
setting the gearbox and the drum in a horizontal
position.
• Rotate the drum so as to stop the cap "1" in the
lower part of the drum and the cap "2" in
horizontal position.
• Turn off the machine and lock the drum lifting
cylinder with the appropriate support rod.
• Position a container under the drum cap to collect
any oil spill.
• Unscrew the cap “2”.
• In case of check:
• Check that the oil is just below the cap "2" hole.
• If necessary, top up with recommended oil.
• In case of change
• Unscrew the plug "1" and let the oil drain
completely.
• Refit the lower cap and tighten it securely.
• Refill with new oil from the cap left open until it
reaches the level.
• Refit the cap and tighten it securely.
10.16 - Lighting
The vehicle lighting must always be efficient and fully
functional. Its operation must be checked every day. In
case of damage to the lighting system immediately
replace the damaged part. Immediately replace a
burned out bulb.
ATTENTION
Refer to the "Maintenance" chapter before
making any adjustments or maintenance.
NOTE
The bulbs are very fragile. Handle with care.
The low beam bulbs must not be handled with
bare hands.
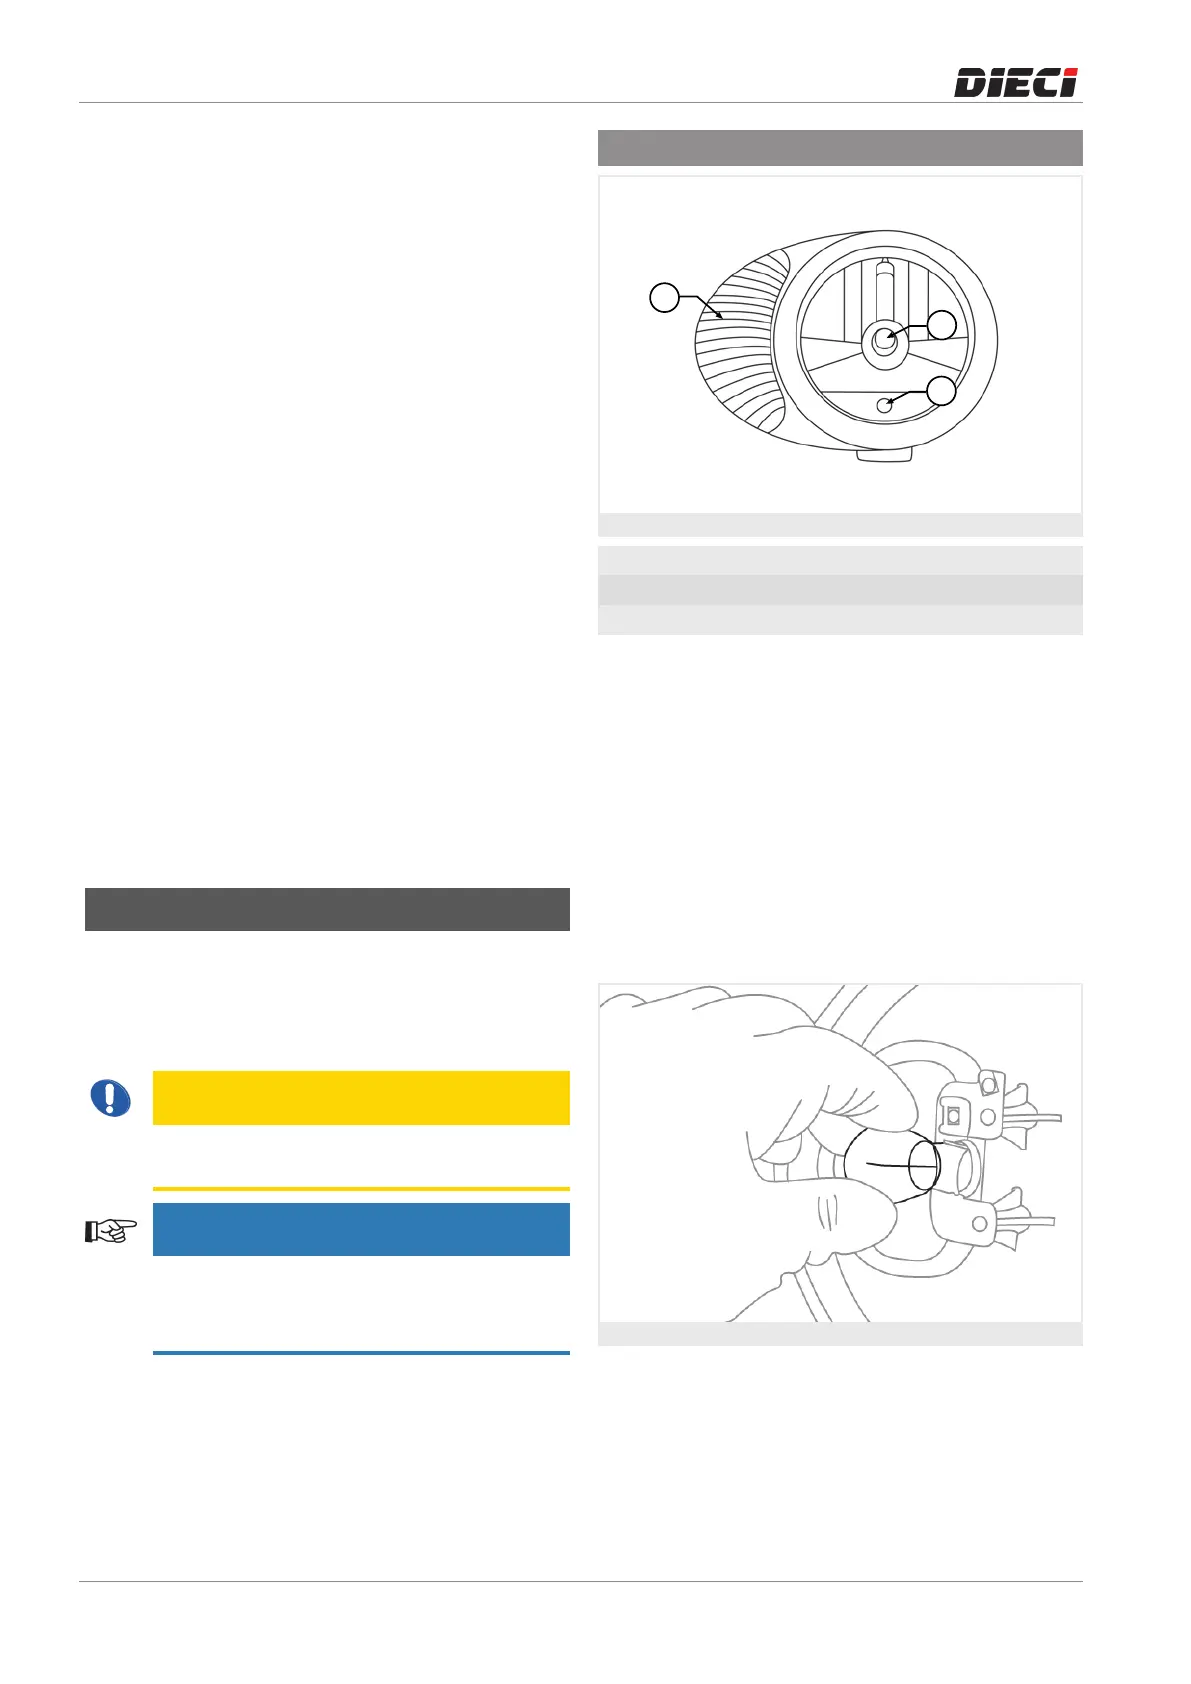
10.16.1 - Headlight
Figure: 150301-1
1 Direction indicator - 21 W
2 Front side light- 4 W
3 Low beam and high beam light - 60/55 W H4
To access the bulbs:
• Prepare the vehicle in the maintenance position.
• Turn off the battery isolation switch to disconnect
power to the electrical system.
• Remove the power supply connector on the back
of the light.
• Remove the front of the headlight by loosening
the screws placed in the rear cap.
To close the headlight operate in the reverse order,
paying attention to correct positioning of the sealing
gasket.
Figure: 150302-1
Direction indicator bulb replacement
• Press the top of the bulb (fig. 150302-1).
• Turn the bulb, keeping it pressed, to release it
from the lock.
• Perform the same procedure to insert the new
bulb.