Working basis
18 Service Instructions 1767 - 00.0 - 12/2016
3.3.5 Removing and placing the front cover
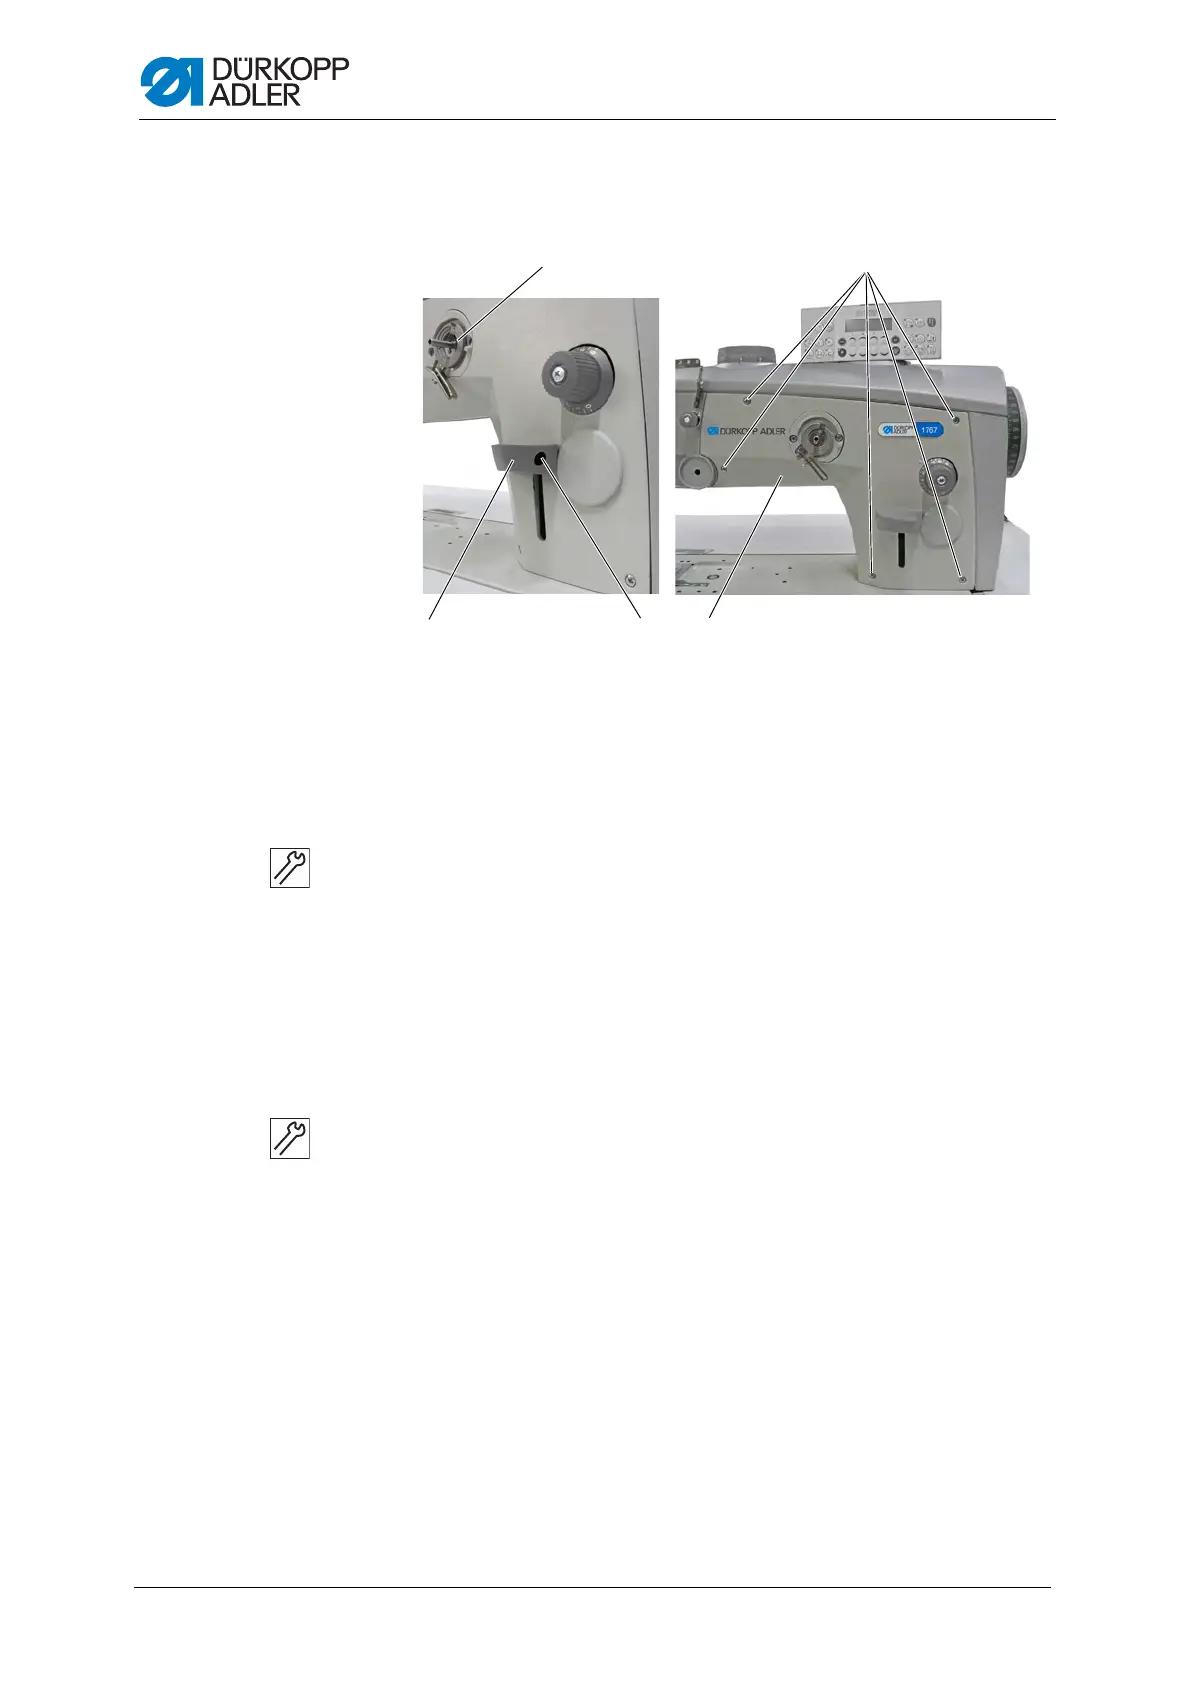
Fig. 5: Removing and placing the front cover
Removing the front cover
To remove the front cover:
1. Loosen the screw (3).
2. Pull off the stitch adjustment lever handle (2).
3. Switch on the winder (1).
4. Loosen the screws (5).
5. Remove the front cover (4).
Placing the front cover
To place the front cover:
1. Switch on the winder (1).
2. Place the front cover (4).
3. Tighten the screws (5).
4. Fit the stitch adjustment lever handle (2).
5. Tighten the screw (3).
(1) - Winder
(2) - Stitch adjustment lever handle
(3) - Screw
(4) - Front cover
(5) - Screws

 Loading...