Positioning the arm shaft
Service Instructions 1767 - 00.0 - 12/2016 27
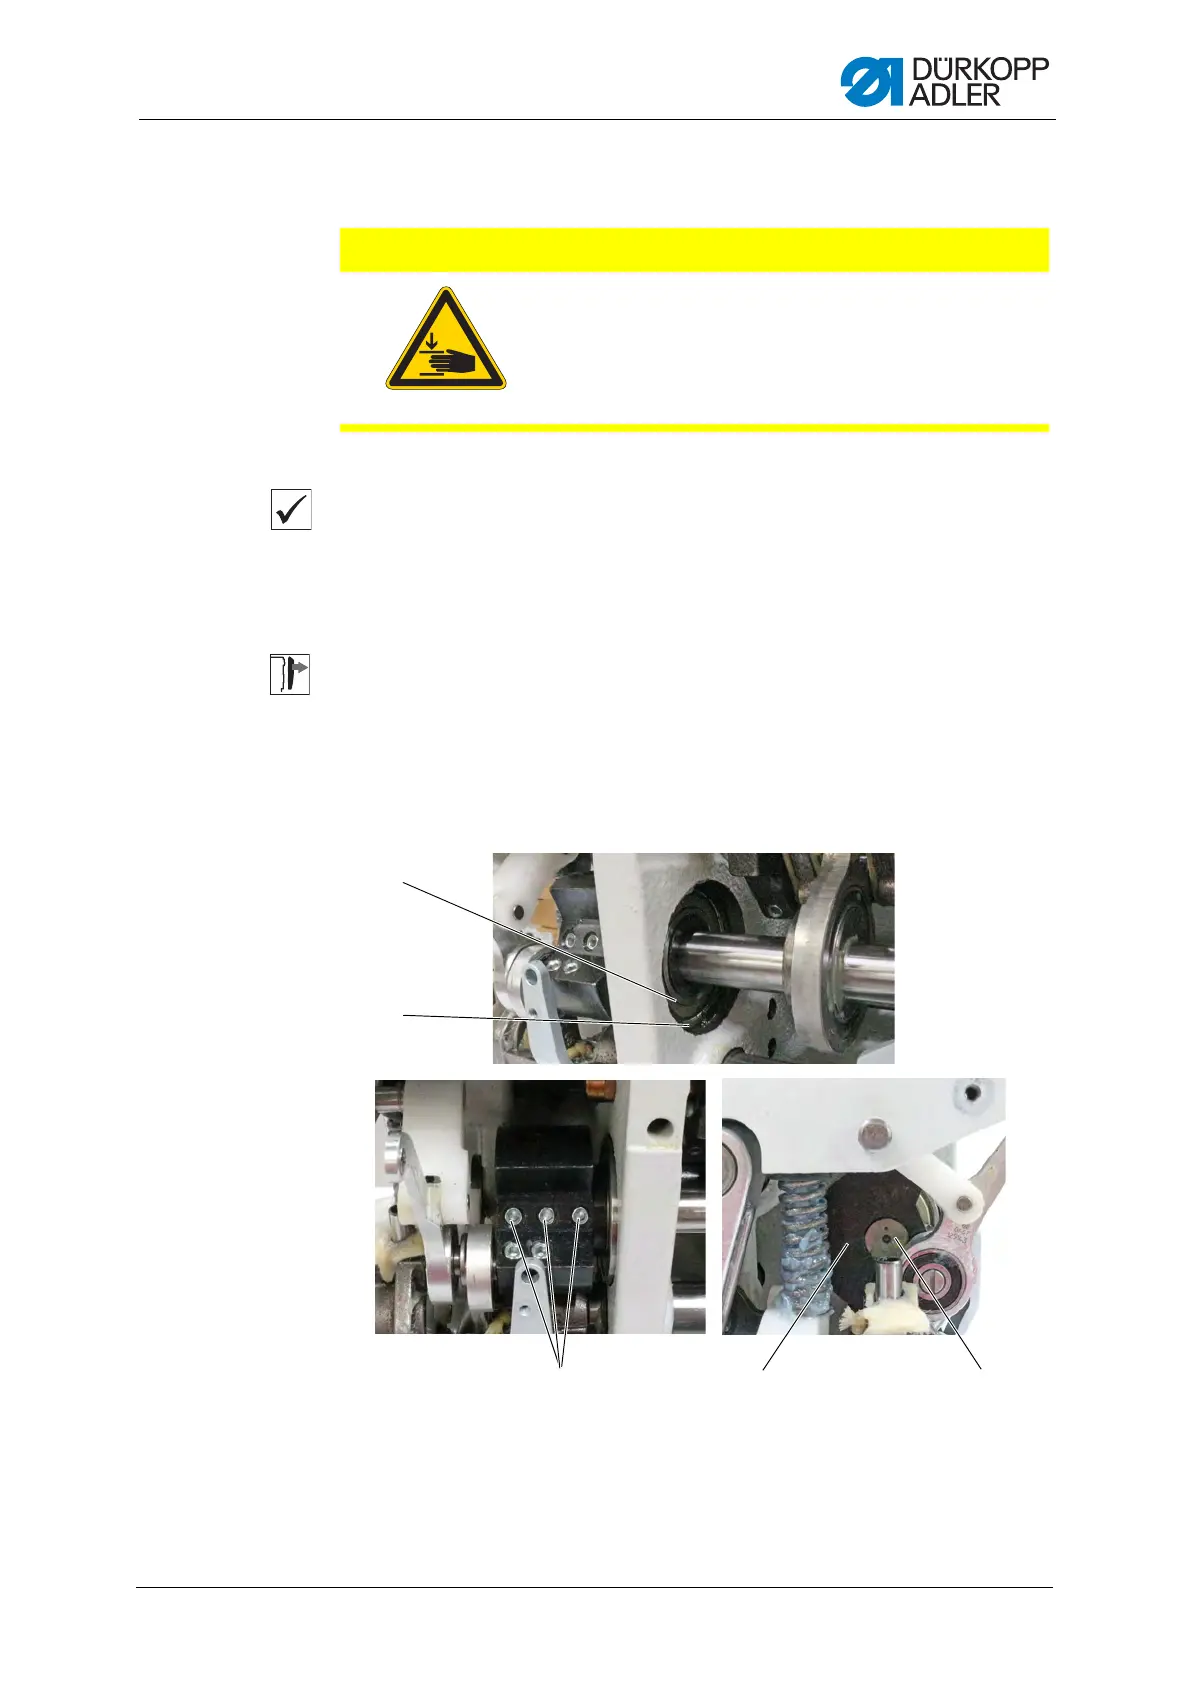
4 Positioning the arm shaft
Proper setting
The ball bearing (1) is seated flush with the locking ring (2).
The 3 threaded pins (3) are seated flush on the flat of the arm shaft.
The flat of the crank (4) is flush with the flat of the arm shaft (5) or offset
slightly toward the rear.
Cover
• Remove the arm cover ( p. 15)
• Remove the head cover ( p. 16)
• Remove the front cover ( p. 18)
• Disassemble the tensioning plate ( p. 19)
Fig. 15: Positioning the arm shaft crank
CAUTION
Risk of injury from moving parts!
Crushing possible.
Switch off the machine before you check and set
the position of the arm shaft crank.
(1) - Ball bearing
(2) - Locking ring
(3) - Threaded pins
(4) - Flat of crank
(5) - Flat of arm shaft

 Loading...