Working basis
Service Instructions 1767 - 00.0 - 12/2016 19
3.3.6 Disassembling and assembling the tensioning plate
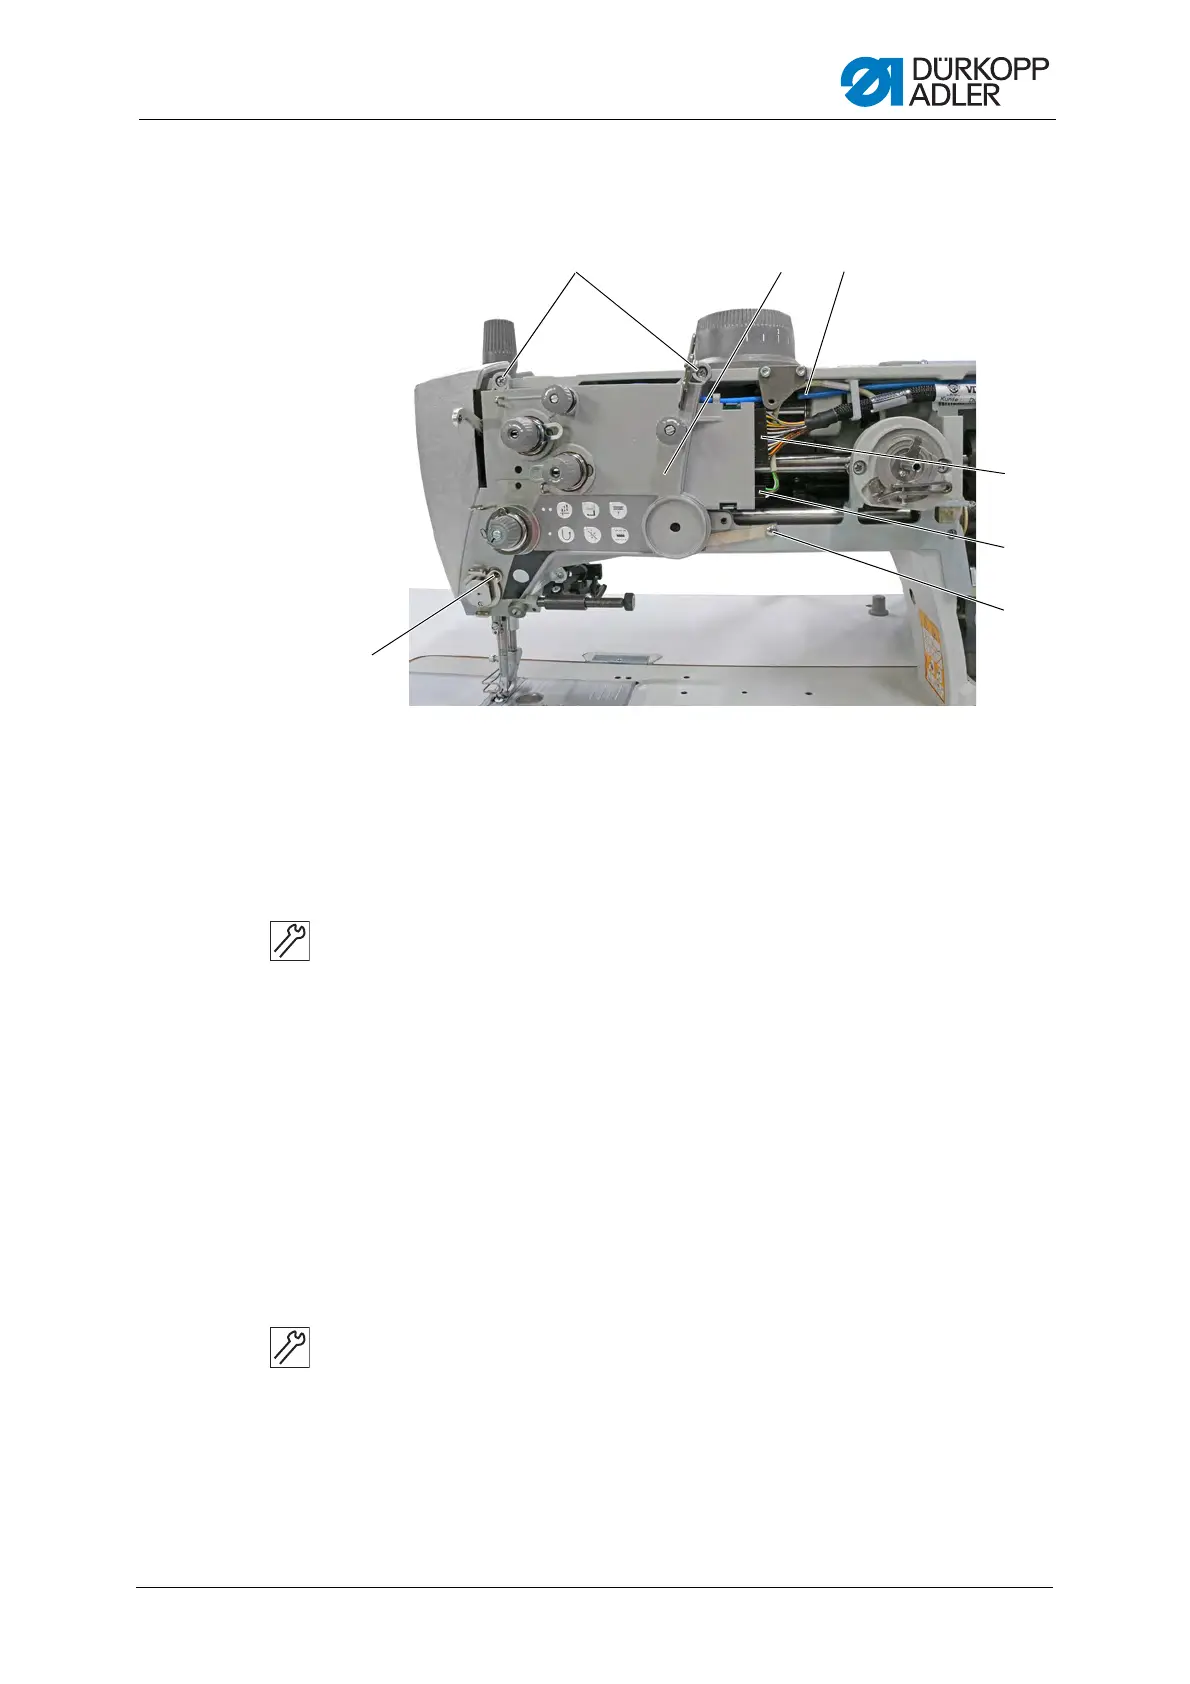
Fig. 6: Disassembling and assembling the tensioning plate
Disassembling the tensioning plate
To disassemble the tensioning plate:
1. Remove the arm cover ( p. 15).
2. Remove the front cover ( p. 18).
3. Unscrew the thread regulator.
4. Remove the thread guide (2).
5. Loosen the equipotential bonding (3).
6. Pull off plug (4) and (5).
7. Disconnect the compressed air line (6).
8. Loosen the screws (1).
9. Remove the tensioning plate (7).
Assembling the tensioning plate
To assemble the tensioning plate:
1. Place the tensioning plate (7).
2. Tighten the screws (1).
3. Connect the compressed air line (6).
4. Insert plug (4) and (5).
5. Assemble the equipotential bonding (3).
(1) - Screws
(2) - Thread guide
(3) - Equipotential bonding
(4) - Plug
(5) - Plug
(6) - Compressed air line
(7) - Tensioning plate

 Loading...