Short thread cutter
84 Service Instructions 1767 - 00.0 - 12/2016
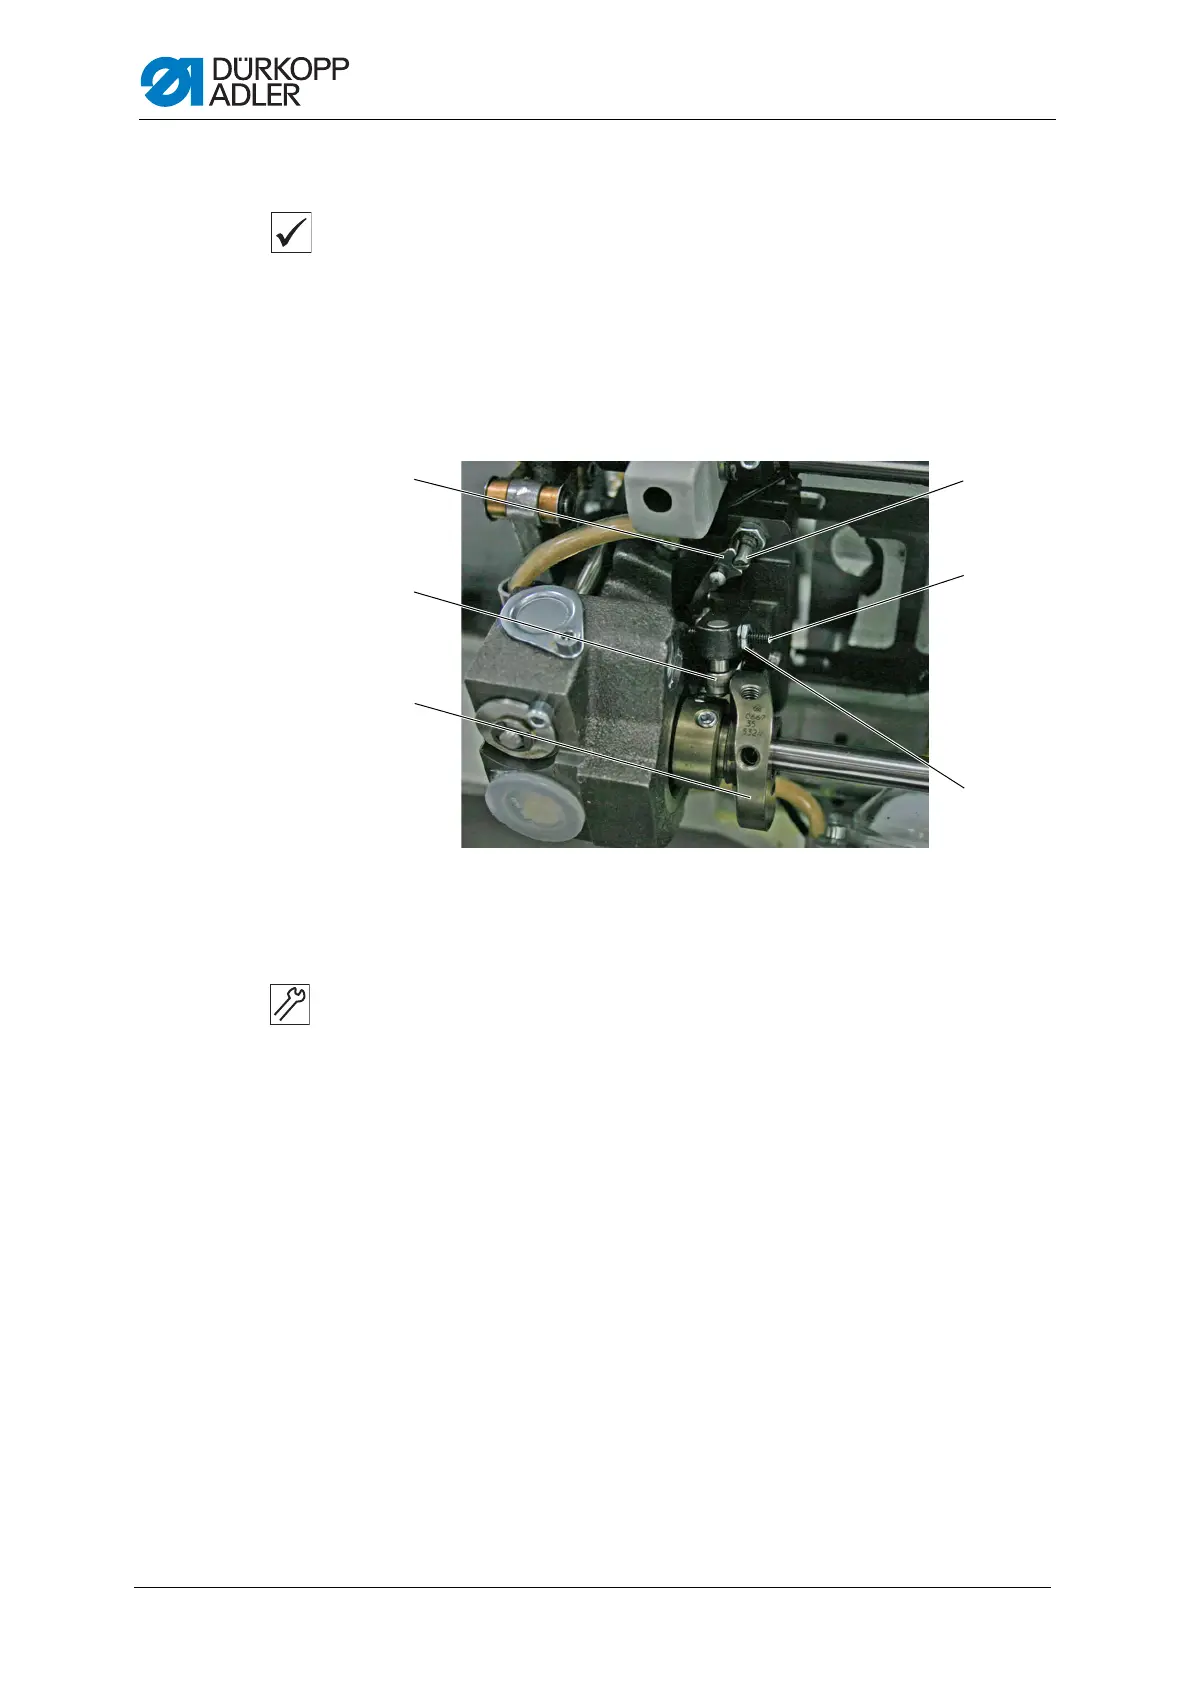
17.1 Setting the locking latch
Proper setting
1. Turn the handwheel until the roller (2) is at the highest point of the
control cam (3).
2. Press the roller (2) against the control cam (3).
The locking latch (1) can be swung out without clamping, and the
distance between the locking latch (1) and locking pin (6) is not
greater than 0.1 mm.
Fig. 67: Setting the locking latch
To set the locking latch:
1. Loosen the nut (4).
2. Turn the screw (5) and set the distance.
3. Tighten the nut (4).
(1) - Locking latch
(2) - Roller
(3) - Control cam
(4) - Nut
(5) - Screw
(6) - Locking pin

 Loading...