Aligning the needle bar linkage
48 Service Instructions 1767 - 00.0 - 12/2016
10 Aligning the needle bar linkage
Order
First, check the following setting:
• A straight and undamaged needle has to be inserted
( Operating Instructions)
Proper setting
1. Set the stitch length adjusting wheel to 0.
The needle pierces exactly in the center of the feed dog needle hole.
10.1 Aligning the needle bar linkage sideways
Cover
• Remove the arm cover ( p. 15)
• Remove the head cover ( p. 16)
• Disassemble the tensioning plate ( p. 19)
• Remove the front cover ( p. 18)
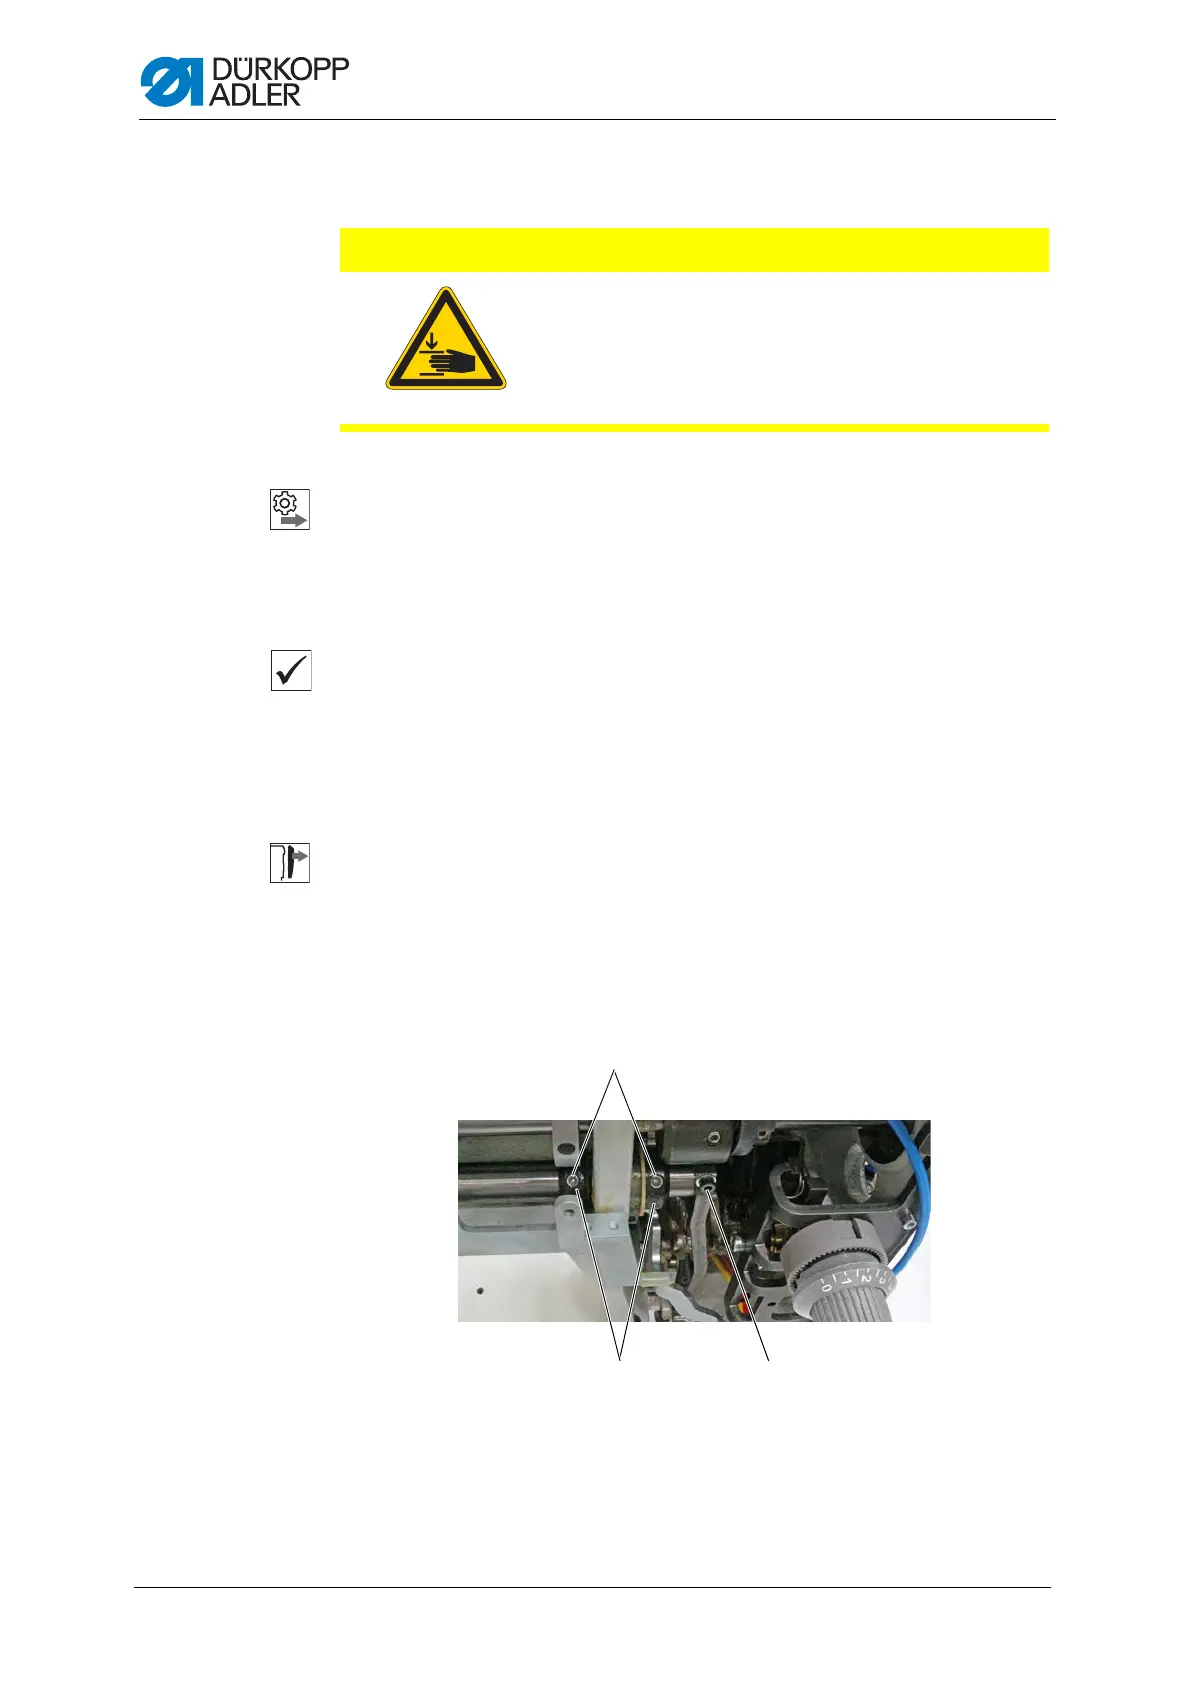
Fig. 34: Aligning the needle bar linkage sideways (1)
CAUTION
Risk of injury from moving parts!
Crushing possible.
Switch off the machine before aligning the needle
bar linkage.
(1) - Threaded pins
(2) - Adjusting rings
(3) - Screw

 Loading...