Aligning the needle bar linkage
Service Instructions 867-M PREMIUM - 03.0 - 05/2017 45
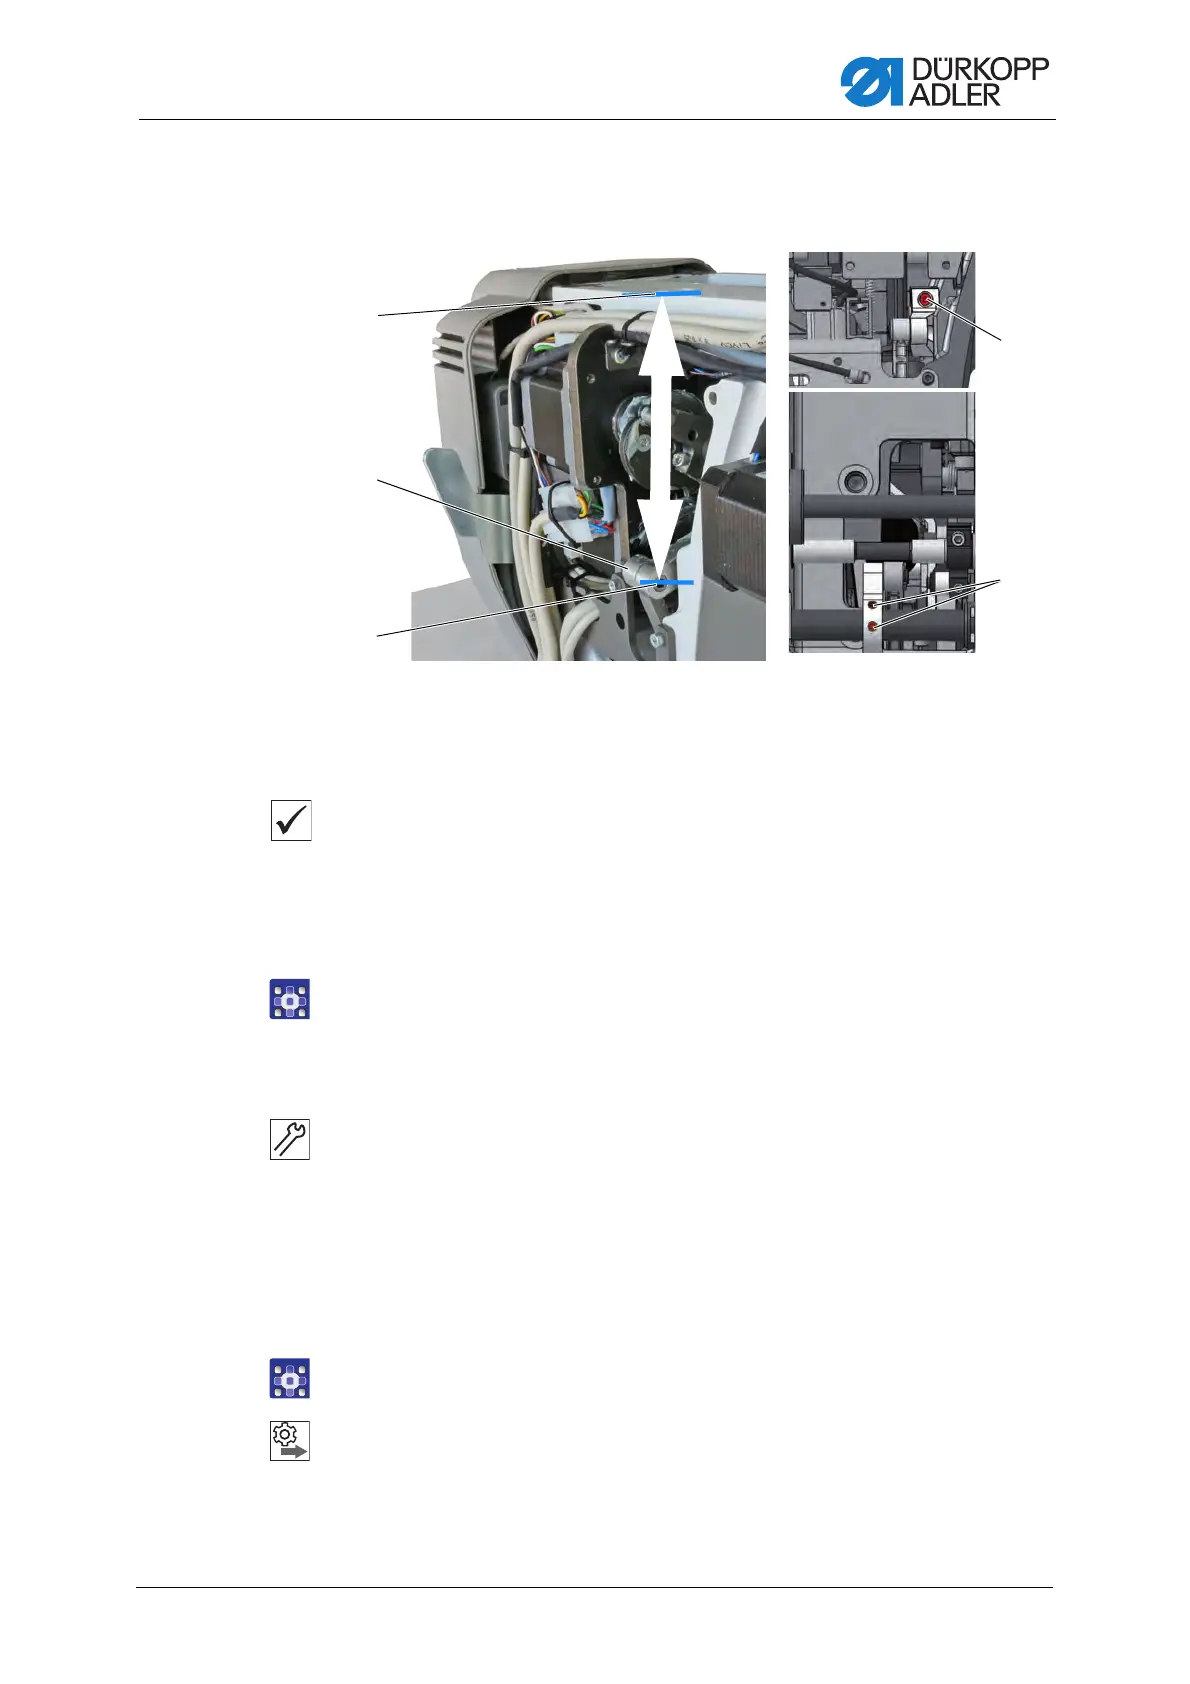
9.2 Aligning the needle bar linkage in the sewing direction
Fig. 33: Aligning the needle bar linkage in the sewing direction
Proper setting
The lever (2) is positioned so that the distance from the surface of the
arm (1) to the middle of the bolt (3) is 126.6 mm.
When the stitch length is set to 0, the feed dog is positioned in the center
and the needle pierces exactly in the center of the needle hole.
To align the needle bar linkage in the sewing direction:
1. Execute the service routine Needle Hook > Needlebar
( p. 14).
The software is used to define the necessary presettings on the
machine.
2. Remove the valve cover ( p. 19).
3. Tilt the machine head ( p. 16).
4. Loosen the threaded pins (4).
5. Loosen the screw (5).
6. Position the lever (2).
7. Tighten the threaded pins (4).
8. Tighten the screw (5).
9. Finish the service routine.
Order
Then, check the following settings:
• Loop stroke position ( p. 48)
(1) - Arm surface
(2) - Lever
(3) - Center of bolt
(4) - Threaded pins
(5) - Screw

 Loading...


