Short thread cutter
80 Service Instructions 867-M PREMIUM - 03.0 - 05/2017
10. Loosen all 4 screws (6) on the clamping ring and push the clamping
ring (6) as far as it will go and against the control cam (7).
11. Tighten all 4 screws on the clamping ring (6).
12. Check the loop stroke ( p. 48).
16.4 Setting the counter blade
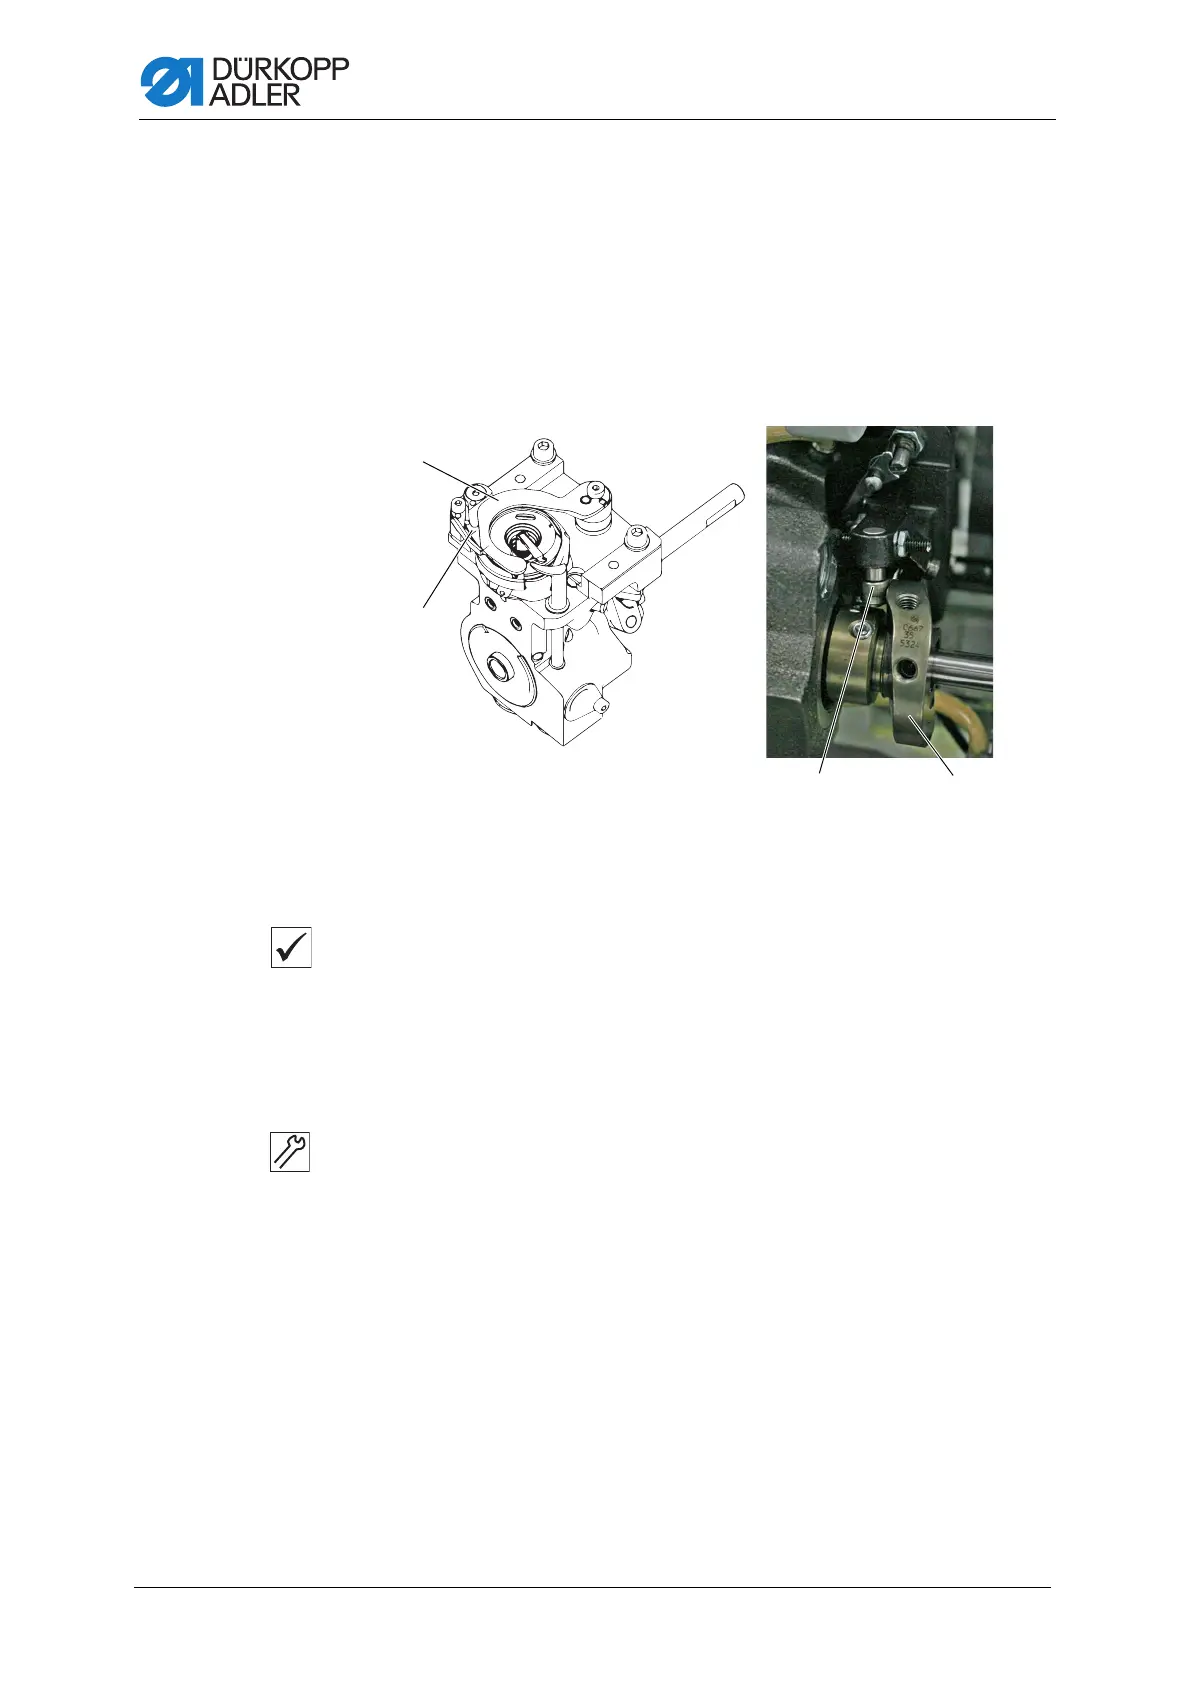
Fig. 67: Setting the counter blade (1).
Proper setting
The thread must be reliably cut using little pressure. The pressure is built
up starting at the marking (2).
Any 2 threads with the greatest strength used for sewing can be neatly cut
simultaneously.
Checking the proper setting
To check the correct setting of the counter blade:
1. Turn the handwheel until the thread-pulling knife (1) can be swung out
after the latch is triggered.
2. Swing out the thread-pulling knife (1) manually. To do this, press the
lever with the roller (3) to the right against the control cam (4).
3. Insert 2 threads into the thread-pulling knife (1).
4. Turn the handwheel until the cutter swivels down.
5. Check whether the sewing threads have been cleanly cut and pressure
is built up starting at the marking (2).
(1) - Thread-pulling knife
(2) - Marking
(3) - Roller
(4) - Control cam

 Loading...


