Aligning the needle bar linkage
Service Instructions 867-M PREMIUM - 03.0 - 05/2017 43
9 Aligning the needle bar linkage
Order
First, check the following setting:
• A straight and undamaged needle has been inserted ( Operating
Instructions)
Proper setting
If the stitch length is 0, the needle pierces exactly in the center of the nee-
dle hole.
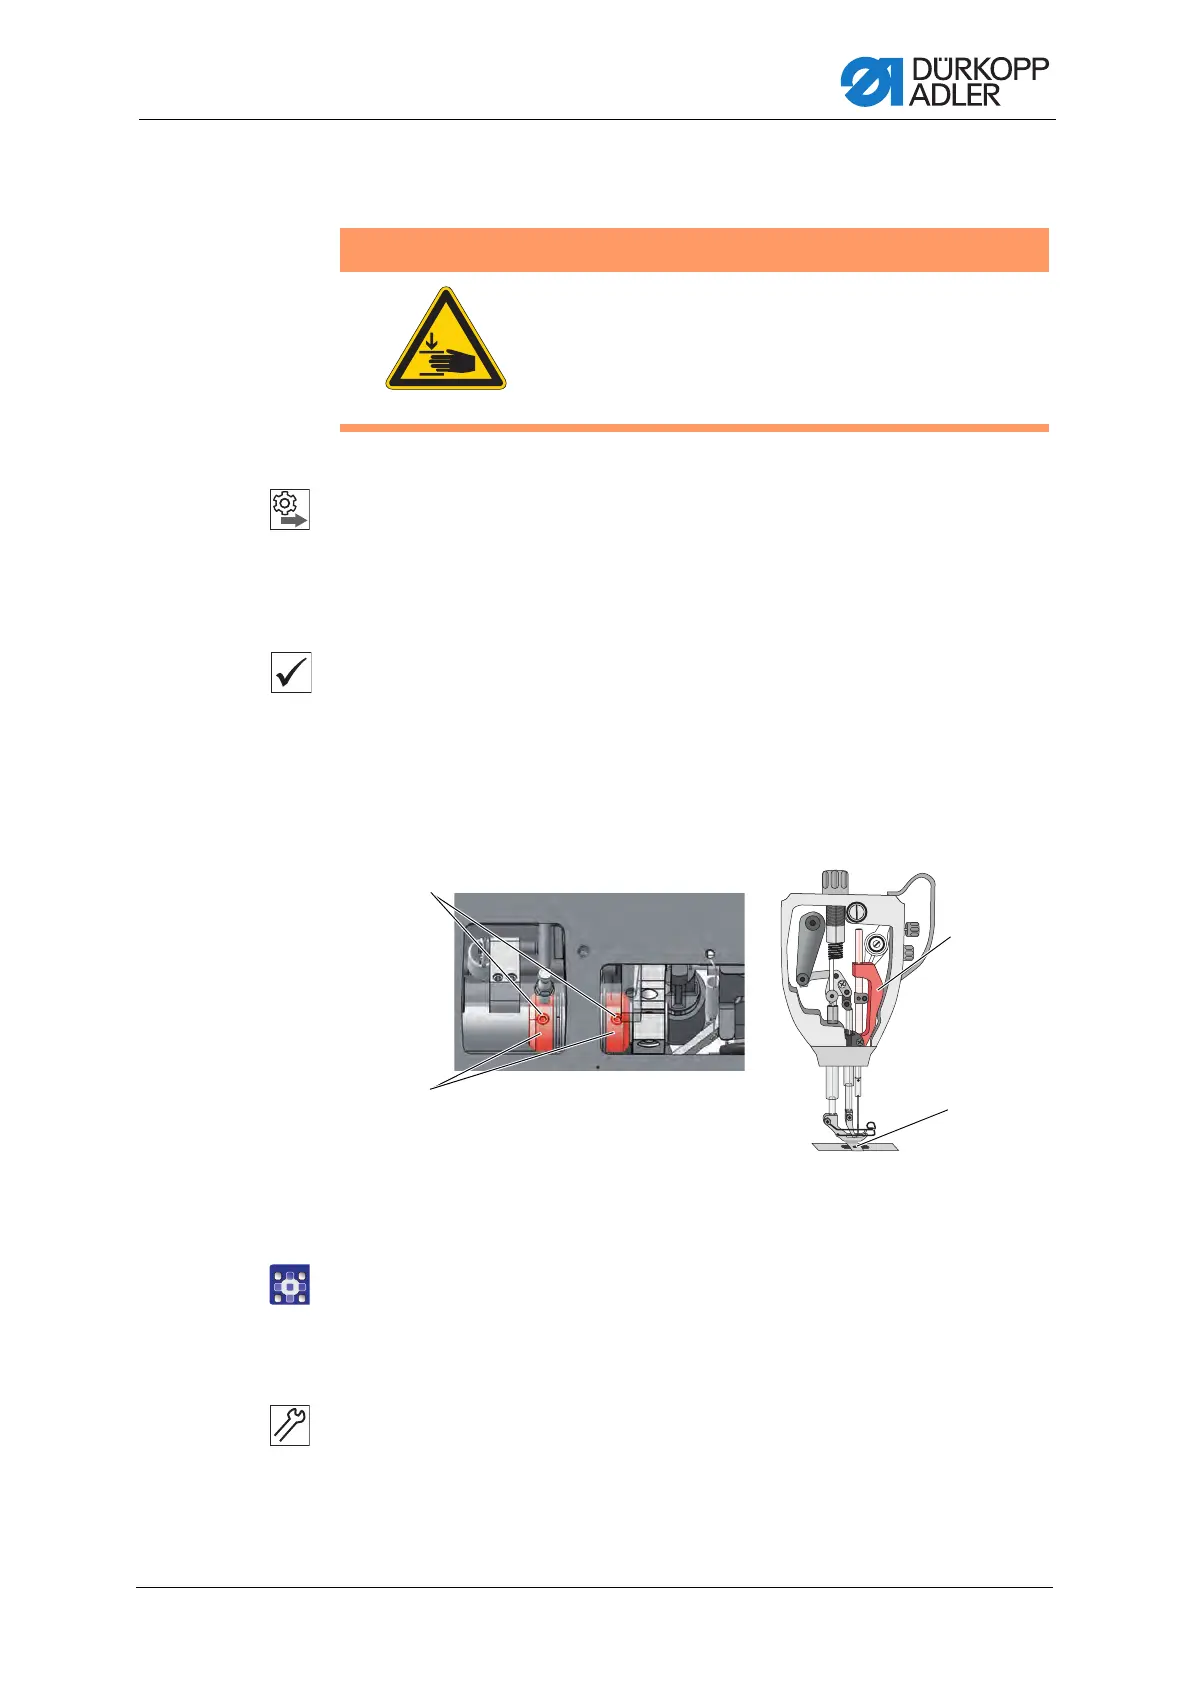
9.1 Aligning the needle bar linkage sideways
Fig. 31: Aligning the needle bar linkage sideways (1)
To align the needle bar linkage sideways:
1. Execute the service routine Needle Hook > Needlebar
( p. 14).
The software is used to define the necessary presettings on the
machine.
2. Remove the arm cover ( p. 17).
3. Remove the head cover ( p. 18).
4. Loosen the threaded pins (1) on the two adjusting rings (2) at the right-
hand end of the shaft for the needle bar linkage.
WARNING
Risk of injury from moving parts!
Crushing possible.
Move the machine into the service routine before
aligning the needle bar linkage.
(1) - Threaded pins
(2) - Adjusting rings
(3) - Throat plate
(4) - Needle bar linkage

 Loading...


