Winder
Service Instructions 867-M PREMIUM - 03.0 - 05/2017 65
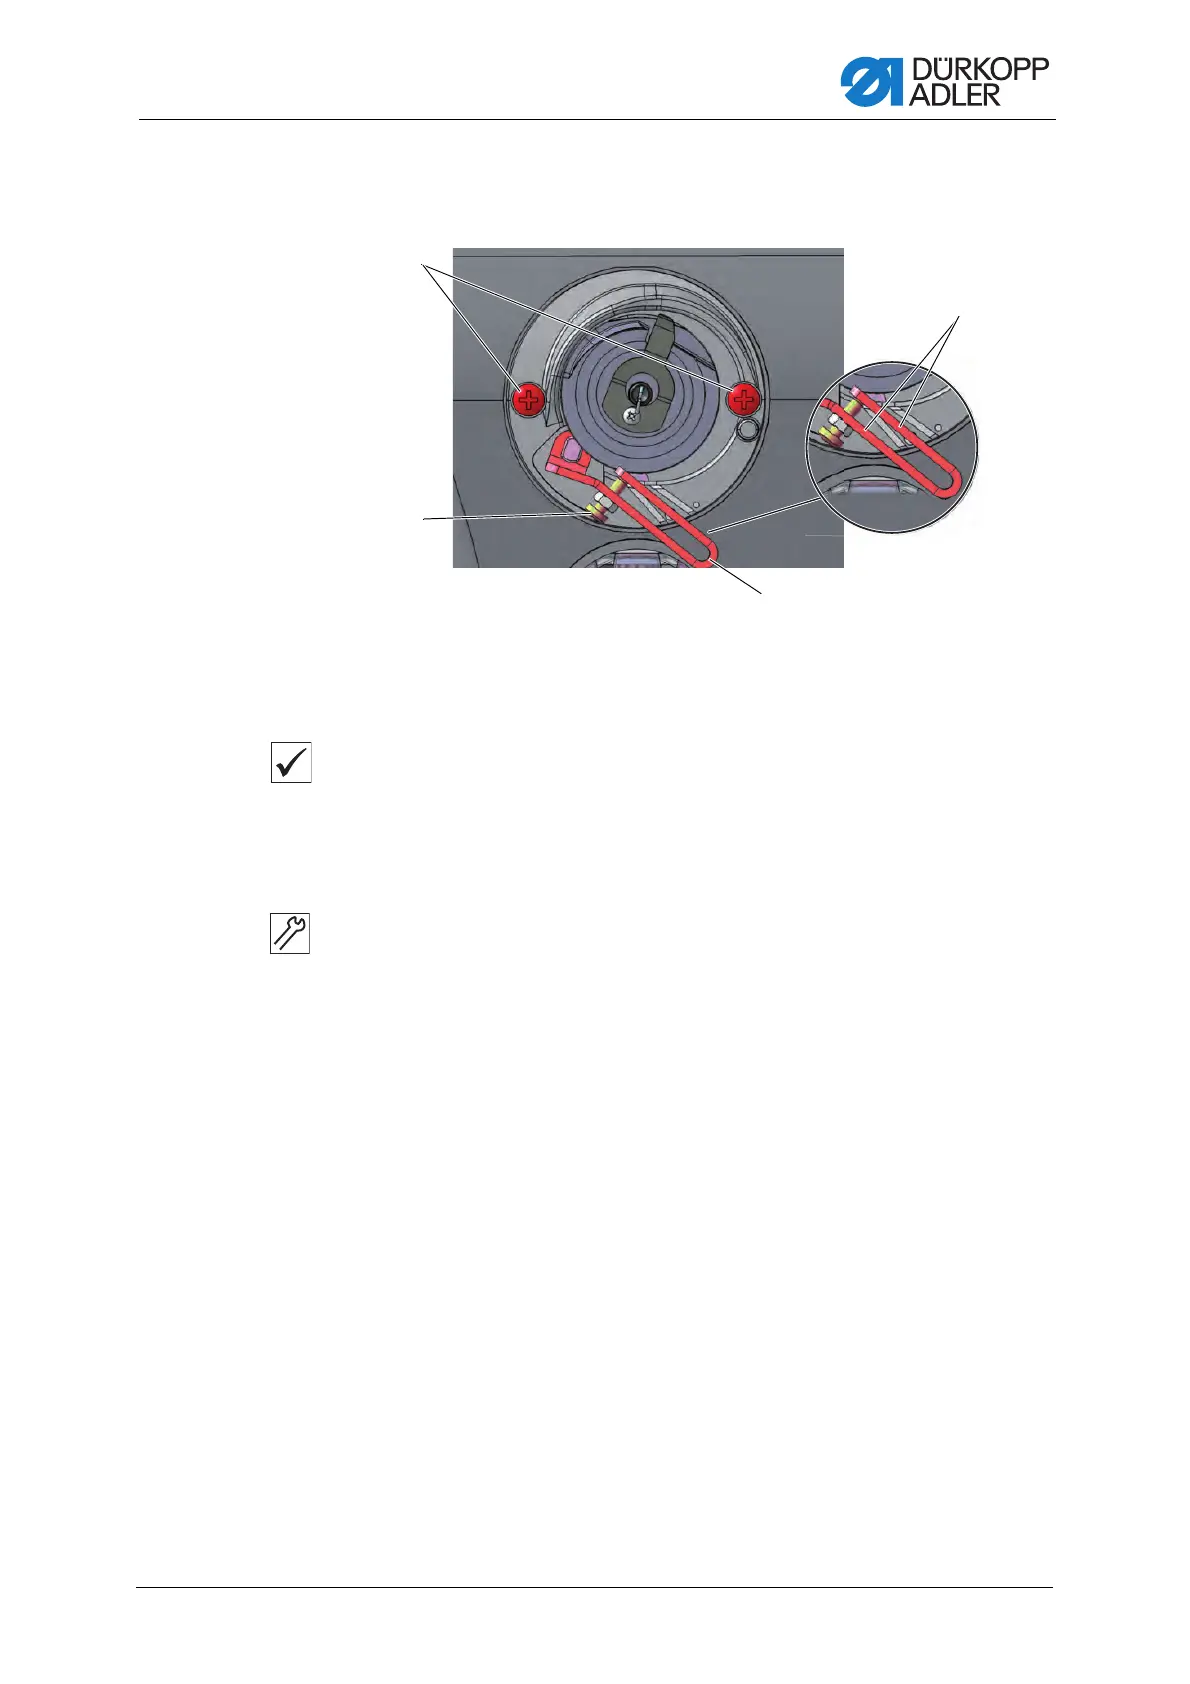
14.2 Setting the winder
Fig. 52: Setting the winder (1)
Proper setting
The winder wheel runs smoothly and without axial play.
The winding process will stop automatically when the required filling quantity
of the bobbin is reached.
To set the winder:
1. Remove the arm cover ( p. 17).
Removing the winder
2. Loosen the screws (1).
3. Remove the winder.
Setting the winder filling quantity
The position of the arms (4) on the winder lever (3) determines the filling
quantity:
• Parallel: Automatic winding stop at 0.5 mm below the edge of the
winder
• Closer together: Automatic stop with larger filling quantity
• Further apart from each other: Automatic stop with smaller filling
quantity
4. Turn the screw (2):
• Arms (4) closer together: turn counterclockwise
• Arms (4) further apart from each other: turn clockwise
5. Put the completely filled bobbin onto the winder.
6. Fold the winder lever (3) upwards as far as it will go to the thread.
(1) - Screws
(2) - Screw
(3) - Winder lever
(4) - Arm

 Loading...


