Machine description
4812164901_A.pdf2022-11-14
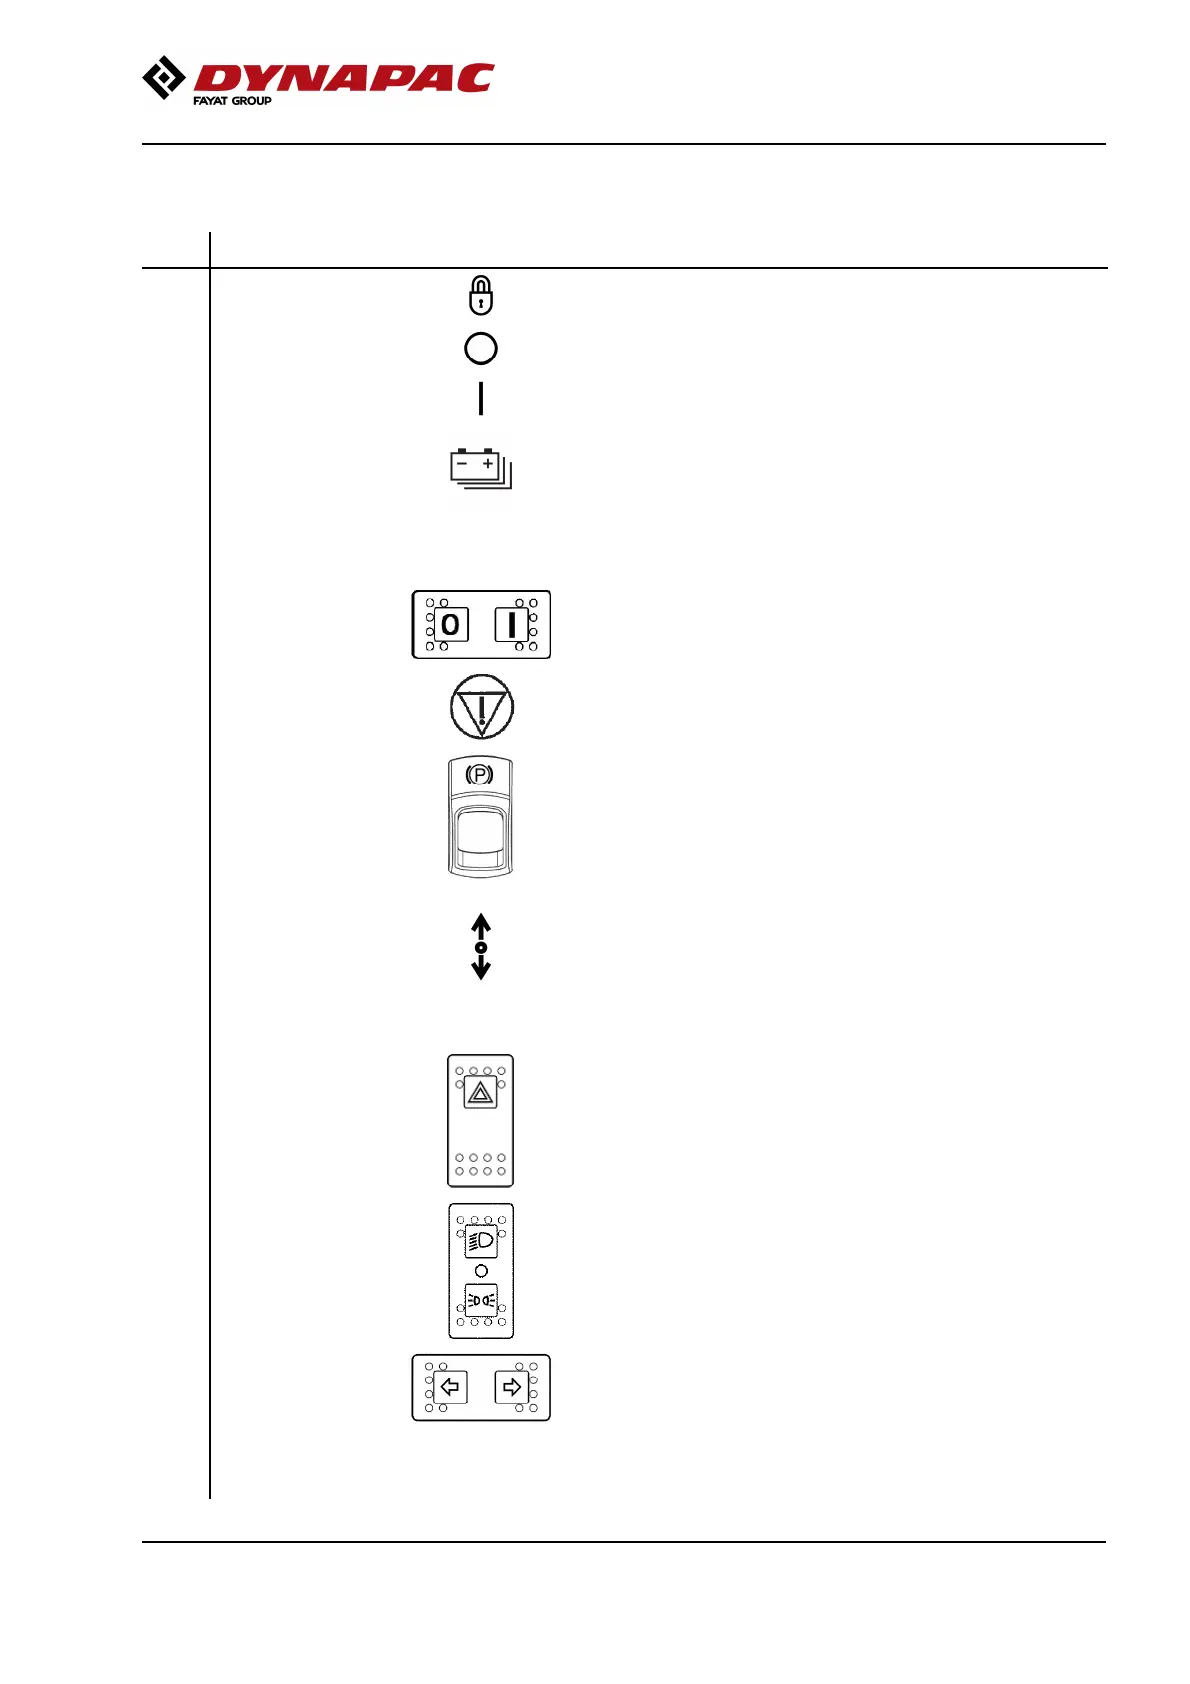
Function description
No Designation Symbol FunctionNo Designation Symbol Function
1. Instrument cover Folds over the instrument panel to provide weather and
instrument protection. Lockable
1. Instrument cover Folds over the instrument panel to provide weather and
instrument protection. Lockable
3. Ignition key,
instrument panel
The electric circuit is broken3. Ignition key,
instrument panel
The electric circuit is broken
All instruments and electric controls are supplied with powerAll instruments and electric controls are supplied with power
4. Battery status light Flashing during the start-up of the battery pack; changes to a
solid light on completion of start-up.
4. Battery status light Flashing during the start-up of the battery pack; changes to a
solid light on completion of start-up.
When switched off, the light remains on for a few seconds, then
briefly flashes and then turns off when the battery pack is
completely switched off.
When switched off, the light remains on for a few seconds, then
briefly flashes and then turns off when the battery pack is
completely switched off.
5. Battery ON/OFF Press to the left to turn off the battery, and press to the right to
start the battery.
5. Battery ON/OFF Press to the left to turn off the battery, and press to the right to
start the battery.
6. Emergency stop When pressed, the emergency stop is activated. The brakes are
applied and the drive stops. Brace yourself for a sudden stop.
6. Emergency stop When pressed, the emergency stop is activated. The brakes are
applied and the drive stops. Brace yourself for a sudden stop.
7. Parking brake
On/Off, switch
To activate the brakes, press the top of the switch to change the
position of the lever.
To disengage the brakes, press down the red part at the same
time as the switch, and change the position of the lever.
NOTE: When starting the machine, the parking brake must be
activated.
Always use the parking brake when the machine is
stationary on a sloping surface.
10. Forward/reverse
lever
NB: When starting the machine, the control must be in neutral.
Direction of travel and speed of the roller is regulated with the
forward/reverse lever. If the lever is moved forward, the roller
moves forward, if the lever is moved backward, the roller moves
backward. The speed of the roller is proportional to the distance
the lever is from the neutral position. The further the lever is from
neutral, the higher the speed.
11. Hazard warning
lights, switch
(Optional)
Where depressed, the hazard warning lights are on11. Hazard warning
lights, switch
(Optional)
Where depressed, the hazard warning lights are on
12. Driving lights, switch
(Optional)
Upper position = Traffic lighting goes on
Intermediate position = Lighting switched off
Lower position = Parking light goes on
12. Driving lights, switch
(Optional)
Upper position = Traffic lighting goes on
Intermediate position = Lighting switched off
Lower position = Parking light goes on
13. Direction indicators,
switch (Optional)
When depressed to the left, the left direction indicators are on
etc. In the middle position the function is shut off.
13. Direction indicators,
switch (Optional)
When depressed to the left, the left direction indicators are on
etc. In the middle position the function is shut off.
14. Seat switch Remain seated at all times when operating the roller. If the
operator stands up during operation, a buzzer sounds. After 4
seconds the brakes are activated and the engine stops.
14. Seat switch Remain seated at all times when operating the roller. If the
operator stands up during operation, a buzzer sounds. After 4
seconds the brakes are activated and the engine stops.
27