D 40
D F6C.GB 40-50 0504
Set the switches, levers and controls listed below to the specified positions when the
screed has reached its operating temperature and a sufficient amount of material lies
in front of the screed:
- Push the drive lever (14) all the way to the front and start driving.
- Observe the distribution of the material and adjust the limit switches if necessary.
- Set the compacting elements (tamper and/or vibration) according to the required
compaction ratio.
- Let the paving master check the layer thickness after 5–6 meters and correct if nec-
essary.
Carry out the check in the area of the drive chains or wheels as the screed tends to
level an uneven ground. The reference points for the layer thickness are the drive
chains or wheels.
The basic setting of the screed must be corrected if the actual paving height deviates
significantly from the values indicated by the scales (see screed operating instruc-
tions).
The basic setting is for asphalt material.
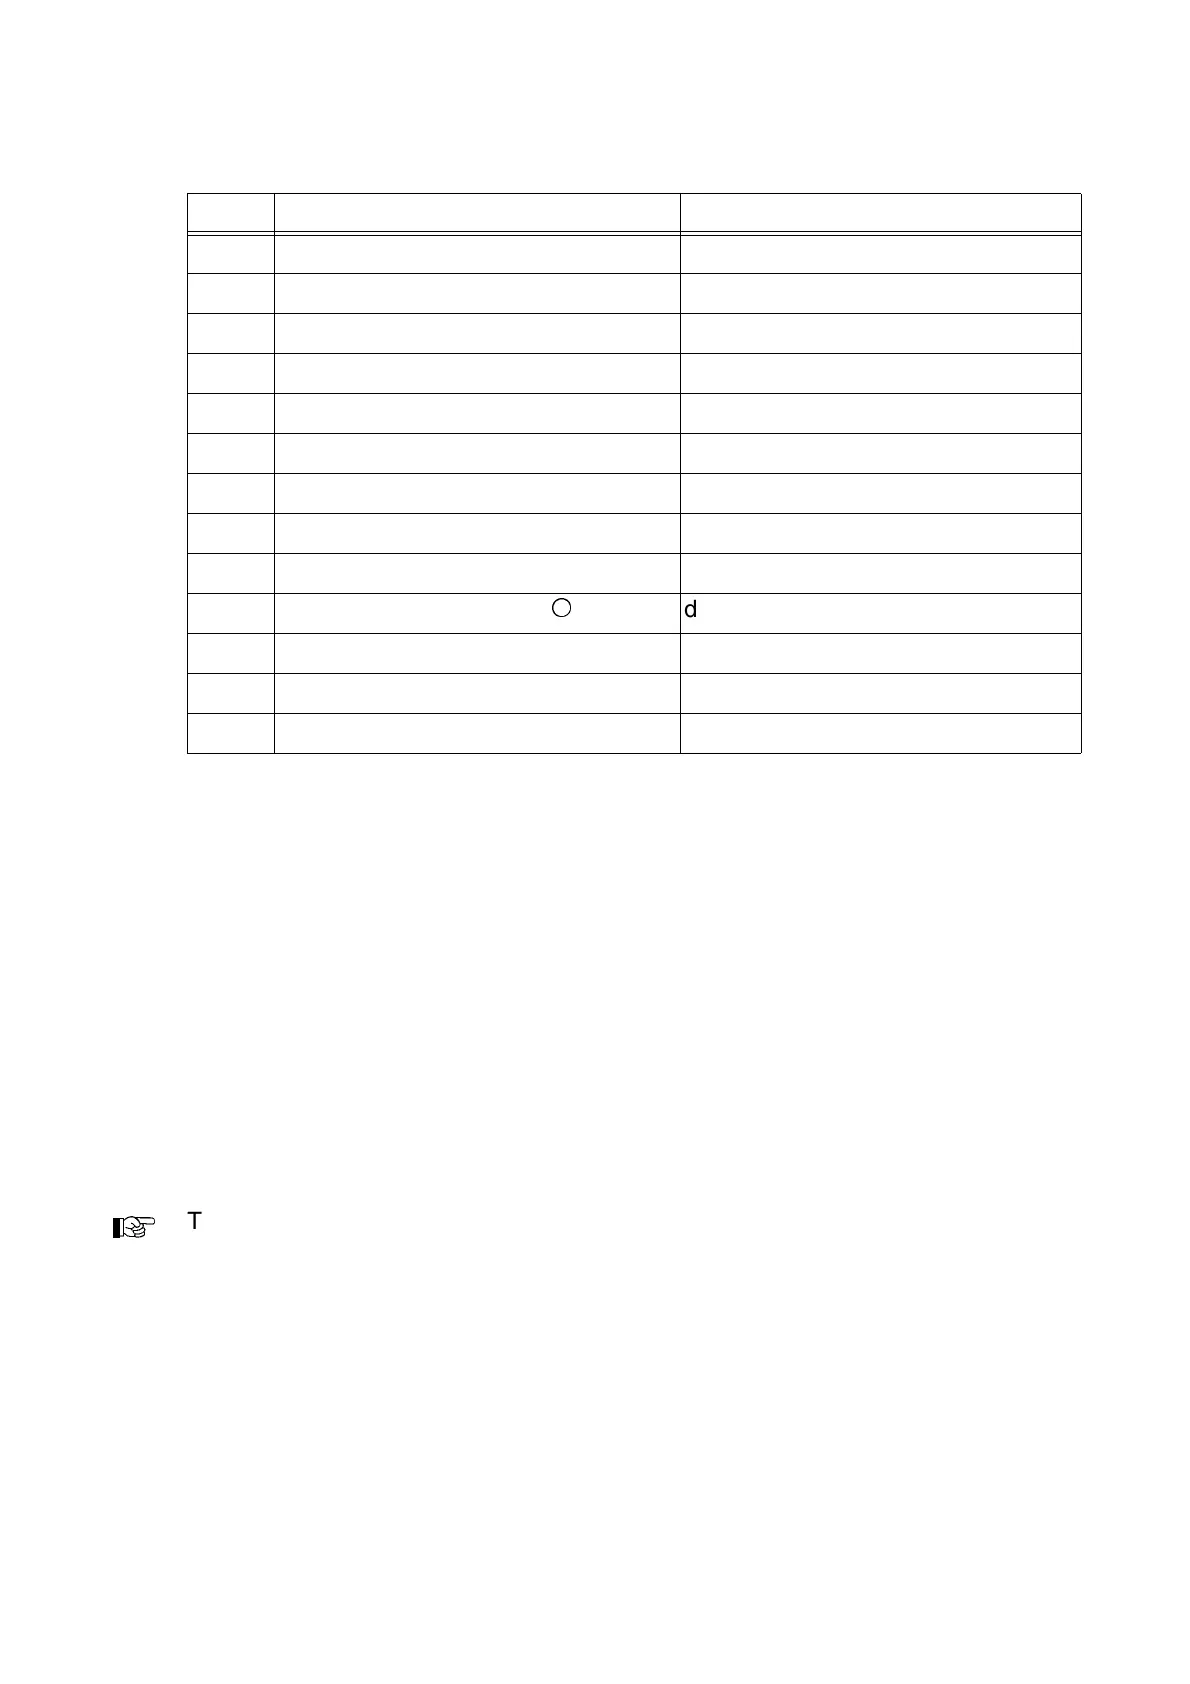
Item Switch Position
1 Traction drive speed - fast/slow slow (“Tortoise”)
2 Traction drive preselector depending on installation situation
3 Engine speed Maximum
4 Screed stop auto
5 Screed position Floating position
6 Vibration auto
7 Tamper auto
8 Auger left/right auto
9 Conveyor left/right auto
10 Speed regulator, tamper (
&
) depending on installation situation
11 Speed regulation for vibration depending on installation situation
12 Conveyor (remote control) auto
13 Auger (remote control) auto