10
Section A - Installation
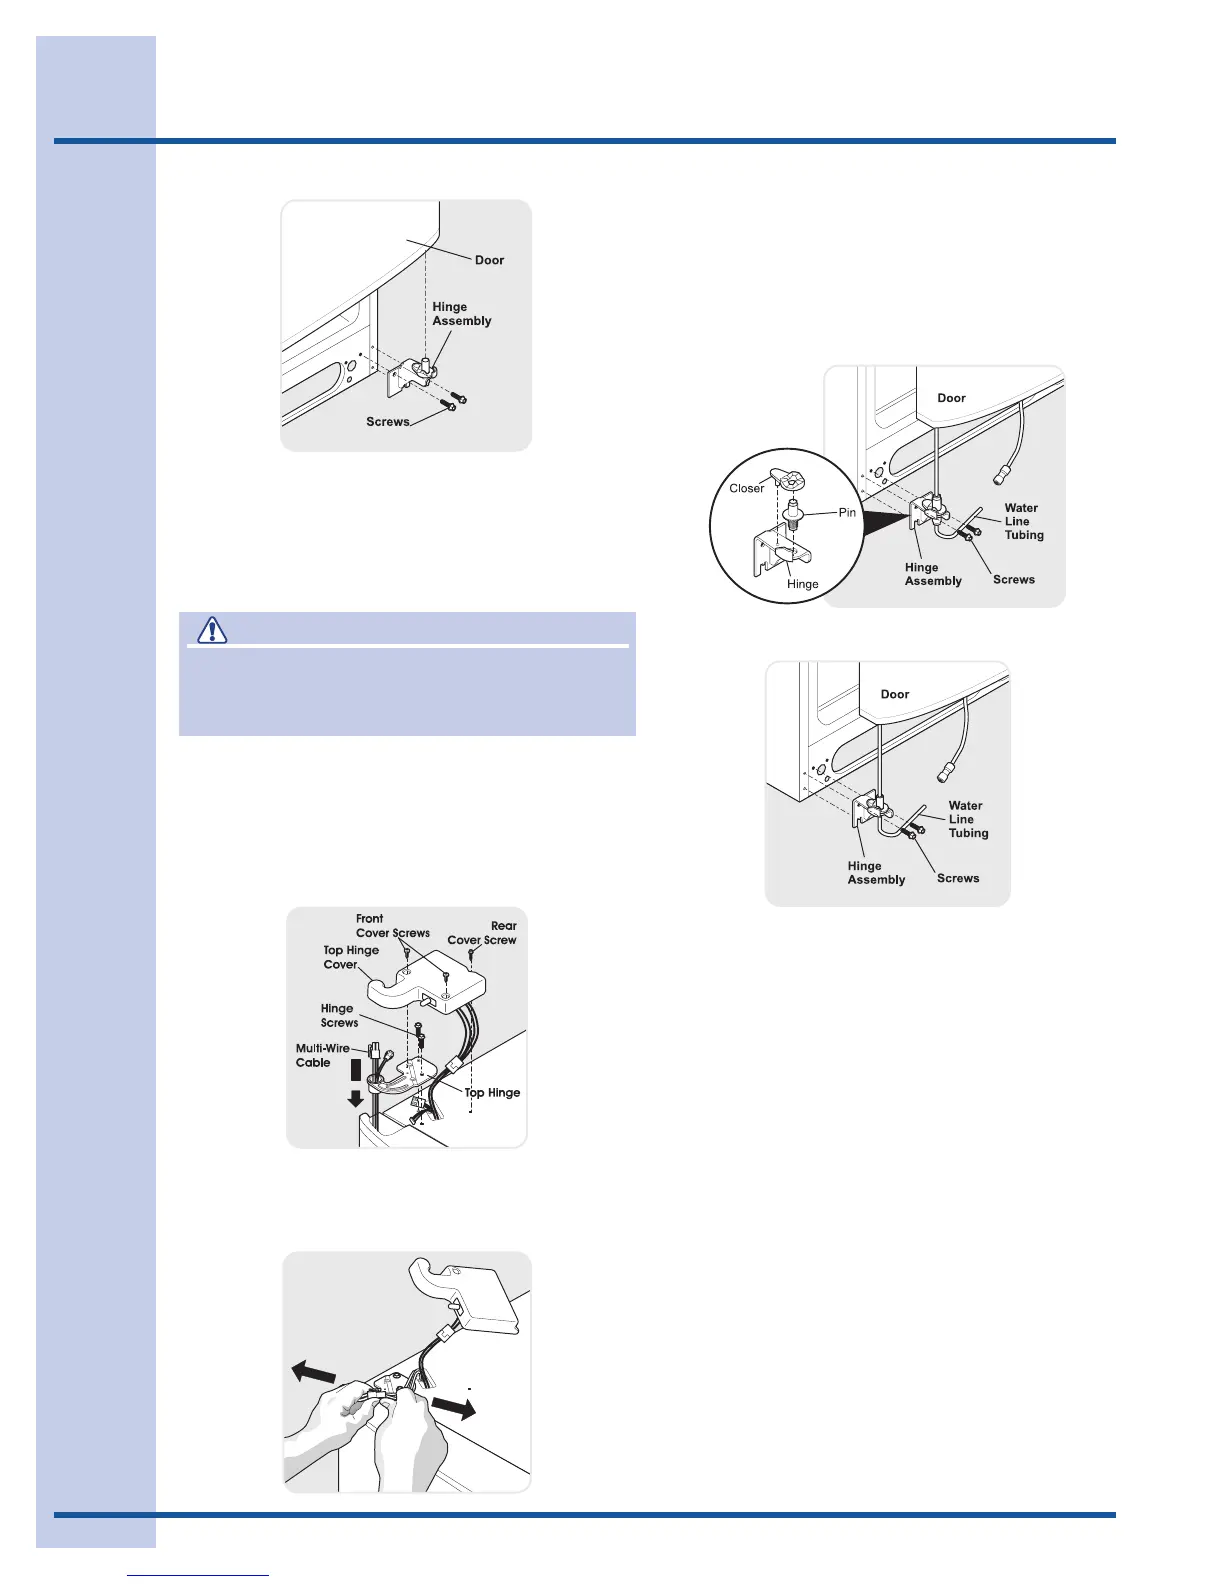
To remove the freezer top hinge cover:
1 Removethetwoscrewsfromeachcover
overthetopdoorhinges.
2 Lifthingecoverstraightupandoff.
To remove the freezer door:
1 Detachthemulti-wirecableconnector
locatedabovethetophinge.Graspboth
sidesoftheconnectorrmlyandpullapart.
2 Tracelightlyaroundthehingewithapencil.
Thismakesreinstallationeasier.
3 Detachthewatertubefromtheconnector
locatedbelowthefreezerdoor.The
connectorreleaseswhenyoupressitsouter
sleeveinward.
4 Removethescrewsfromthetophingeand
pullthemulti-wirecablethroughit.Liftthe
dooroffofthebottomhinge.
5 Removethetwobottomhingescrewsand
hingeifnecessary.
6 Laythedooronitssidetoavoiddamageto
thewatertubeextendingfromthebottom
hinge.
Toreinstallthefreezerdoor,reversetheabove
steps.
Oncebothdoorsareinplace,ensuretheyare
alignedwitheachotherandlevel(Pleasesee“To
levelthedoorsusingthelowerhinge”formodels
withadjustablelowerhingesor“Tolevelthecabinet
usingthefrontrollers”formodelswiththenon-
adjustablelowerhingesintheInstallationsection.),
thenreplacethetophingecover.
CAUTION
Be sure doors are set aside in a secure
position where they cannot fall and cause
personal injury.
3 Removethetwobottomhingescrewsand
hingeifnecessary.
Toreinstalltherefrigeratordoor,reversetheabove
steps.
Non-Adjusting Hinge (some models)
Non-Adjusting Hinge (some models)
Adjustable Hinge (some models)