12
Connecting The Water Supply
About your refrigerator’s water supply
Theautomaticice&waterdispenseronyour
refrigeratorrequiresapermanentwatersupply
tofunctioncorrectly.Duringinstallation,you
(oraserviceprofessional)establishthiswater
supplybyconnectingacoppertubefromyour
householdwatersystemtoavalveattherearof
therefrigerator.
Youmayhavealreadyfollowedthedirectionsin
theInstallationInstructionstoconnectthewater
supply.Thisinformationisrepeatedhereforfuture
referenceifyouneedtorelocateyourrefrigerator.
What you will need:
• Accesstoacoldwaterlinewithpressureof
30-100psi.(Systemsuppliedwithcoldwateronly.)
• Coppertubingwith¼inch(6.4mm)Outside
Diameter(OD).Lengthforthistubingisthe
distancefromtherearoftherefrigeratorto
yourhouseholdwatersupplylineplusseven
feet(2.1meters).
• Ashut-offvalvefortheconnectionbetween
yourhouseholdwaterlineandtherefrigerator
supplyline.
Donotuseaself-piercingshut-offvalve.
• Acompressionnutandferrule(sleeve)for
thewatersupplyconnectionattherearof
yourrefrigerator.
3 Unscrewtheplasticcapfromthewatervalve
inletattherearofyourrefrigerator.Discard
thecap.
4 Slidethebrasscompressionnut,thenthe
ferrule(sleeve)ontocoppertube.
5 Pushthecoppertubeintowatervalveinletas
farasitwillgo(¼inch).
6 Slidetheferrule(sleeve)intovalveand
nger-tightenthecompressionnutontovalve.
Tightenanotherhalfturnwithawrench.Do
notover-tighten.
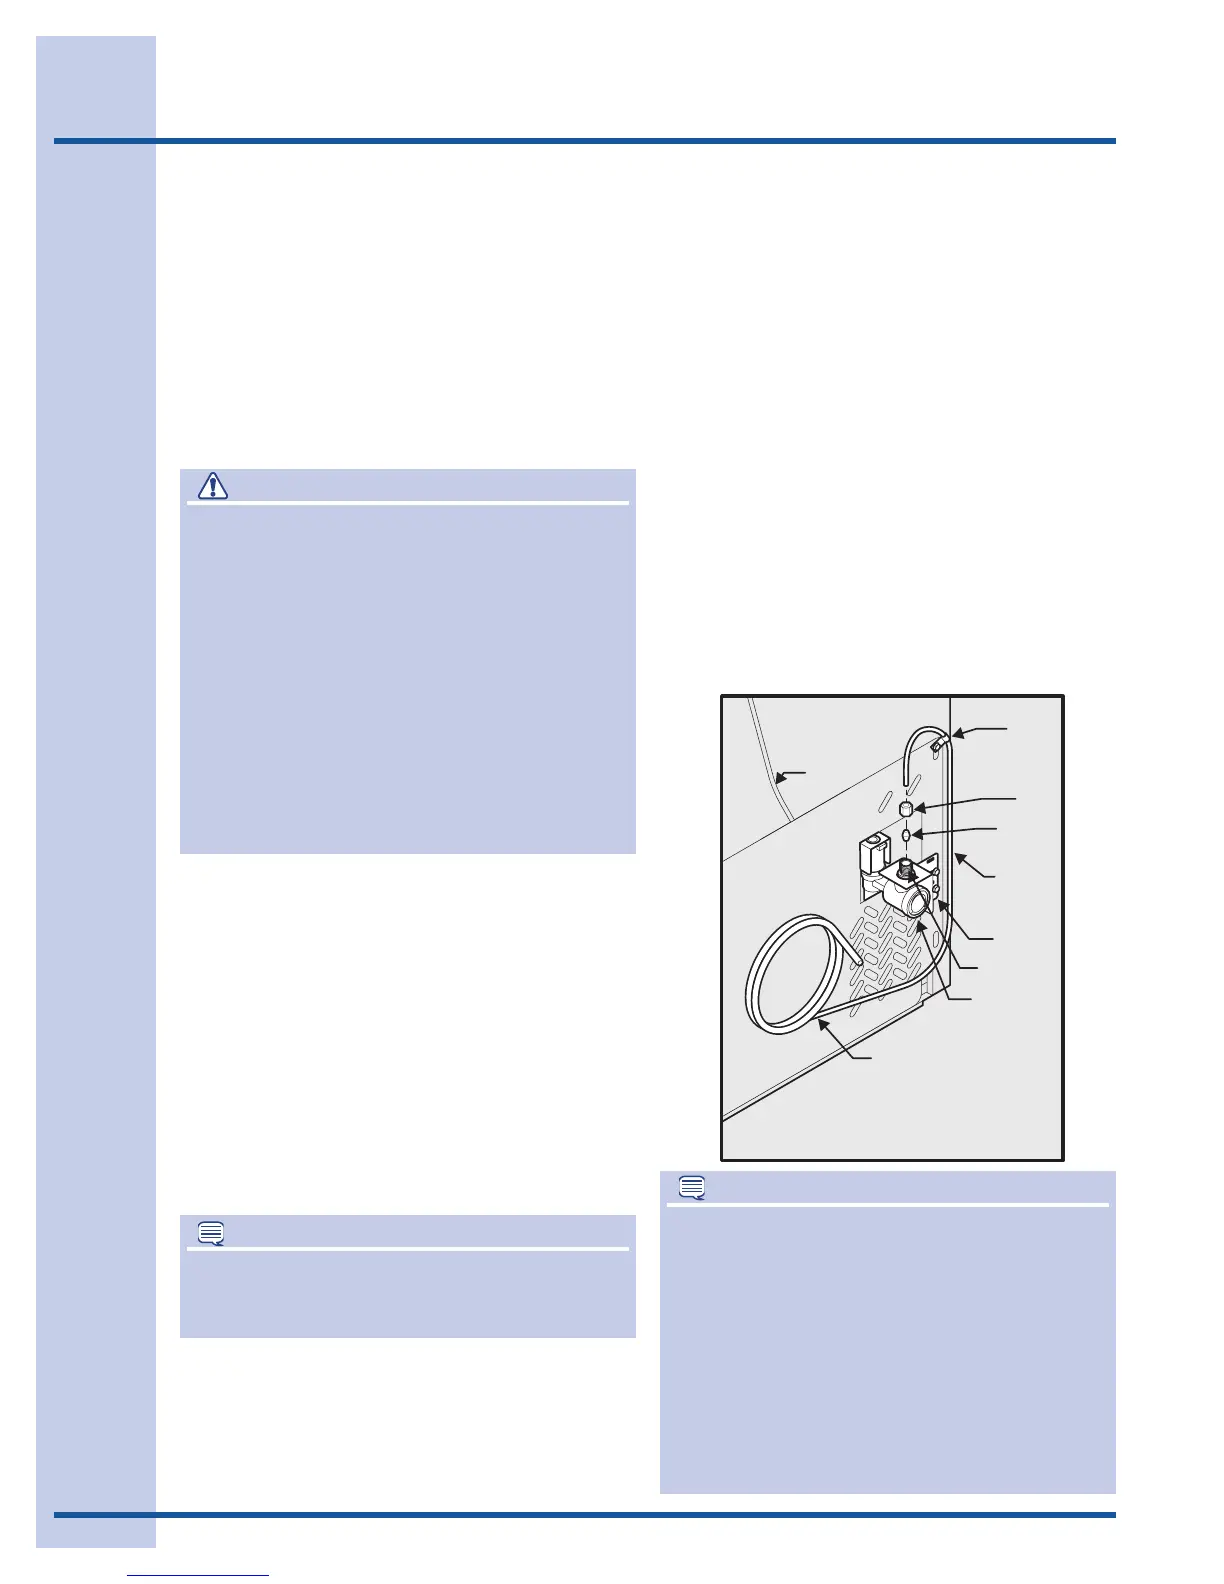
7 Securethecoppertubetoyourrefrigerator’s
rearpanelwithasteelclampandscrew(see
illustration).
8 Coiltheexcesscoppertubing(about2½
turns)behindyourrefrigeratorasshown.
Arrangecoiledtubingtoavoidvibrationor
wearagainstothersurfaces.
9 Openwatersupplyshut-offvalveandtighten
anyconnectionsthatleak.
Copper water line
from household water supply
(Includeenough tubing in loop to allow
moving refrigerator out for cleaning.)
Ferrule
(Sleeve)
Copper
water line
WaterValve
Valve Inlet
Water Valve
Bracket
Steel
Clamp
Plastic Water Tubing
to Ice Maker
Fill Tube
Brass
Compression
Nut
CAUTION
To avoid property damage:
• Usecoppertubingforthewatersupply
line (plastic tubing is more likely to leak).
Manufacturer is not responsible for any
damage if plastic tubing is used for supply
line.
• Ensurewatersupplyandinstallationcomply
with state and local laws and regulations.
• Forproperdispenseroperation,
recommended water supply pressure
should fall between 30 psi and 100 psi.
Excessive pressure may cause water filter
to malfunction.
NOTE
Afterconnectingthewatersupply,referto“How
toPrimetheWaterSupplySystem”forimportant
informationaboutpriminganemptywatersupply
system.
Yourrefrigerator’swatersupplysystemincludes
severaltubinglines,awaterlter,awatervalve
andawatertank.Toensurethatyourwater
dispenserworksproperly,thissystemmustbe
completelylledwithwaterwhenyourrefrigerator
isrstconnectedtothehouseholdwatersupply
line.
NOTE
Akitisavailablefromyourdealerthatprovidesall
materialsforawatersupplyinstallation,including
25feetofcoppertubingandfullinstructions.
To connect the water supply to the rear
of your refrigerator:
1 Ensurethattherefrigeratorisnotpluggedin.
2 Flushthesupplylineuntilwaterisclearby
placingtheendofthecoppertubeinasink
orbucketandopeningtheshut-offvalve.