103
Section G - Ice and Water Dispenser
toSolenoidAssemblyonthebackofMotor
Cover.(SeeFigureG1)
6. Disconnecttwo(2)leadshookedtosolenoid
coil(Leadsarebluewithawhitestripeand
white-SeeFigureG1).
7. Removefour(4)mountingscrewsonfront
ofMotorCoverandpullSolenoidAssembly
free.(SeeFigureG3)
8. Replaceassemblyinreverseorder.
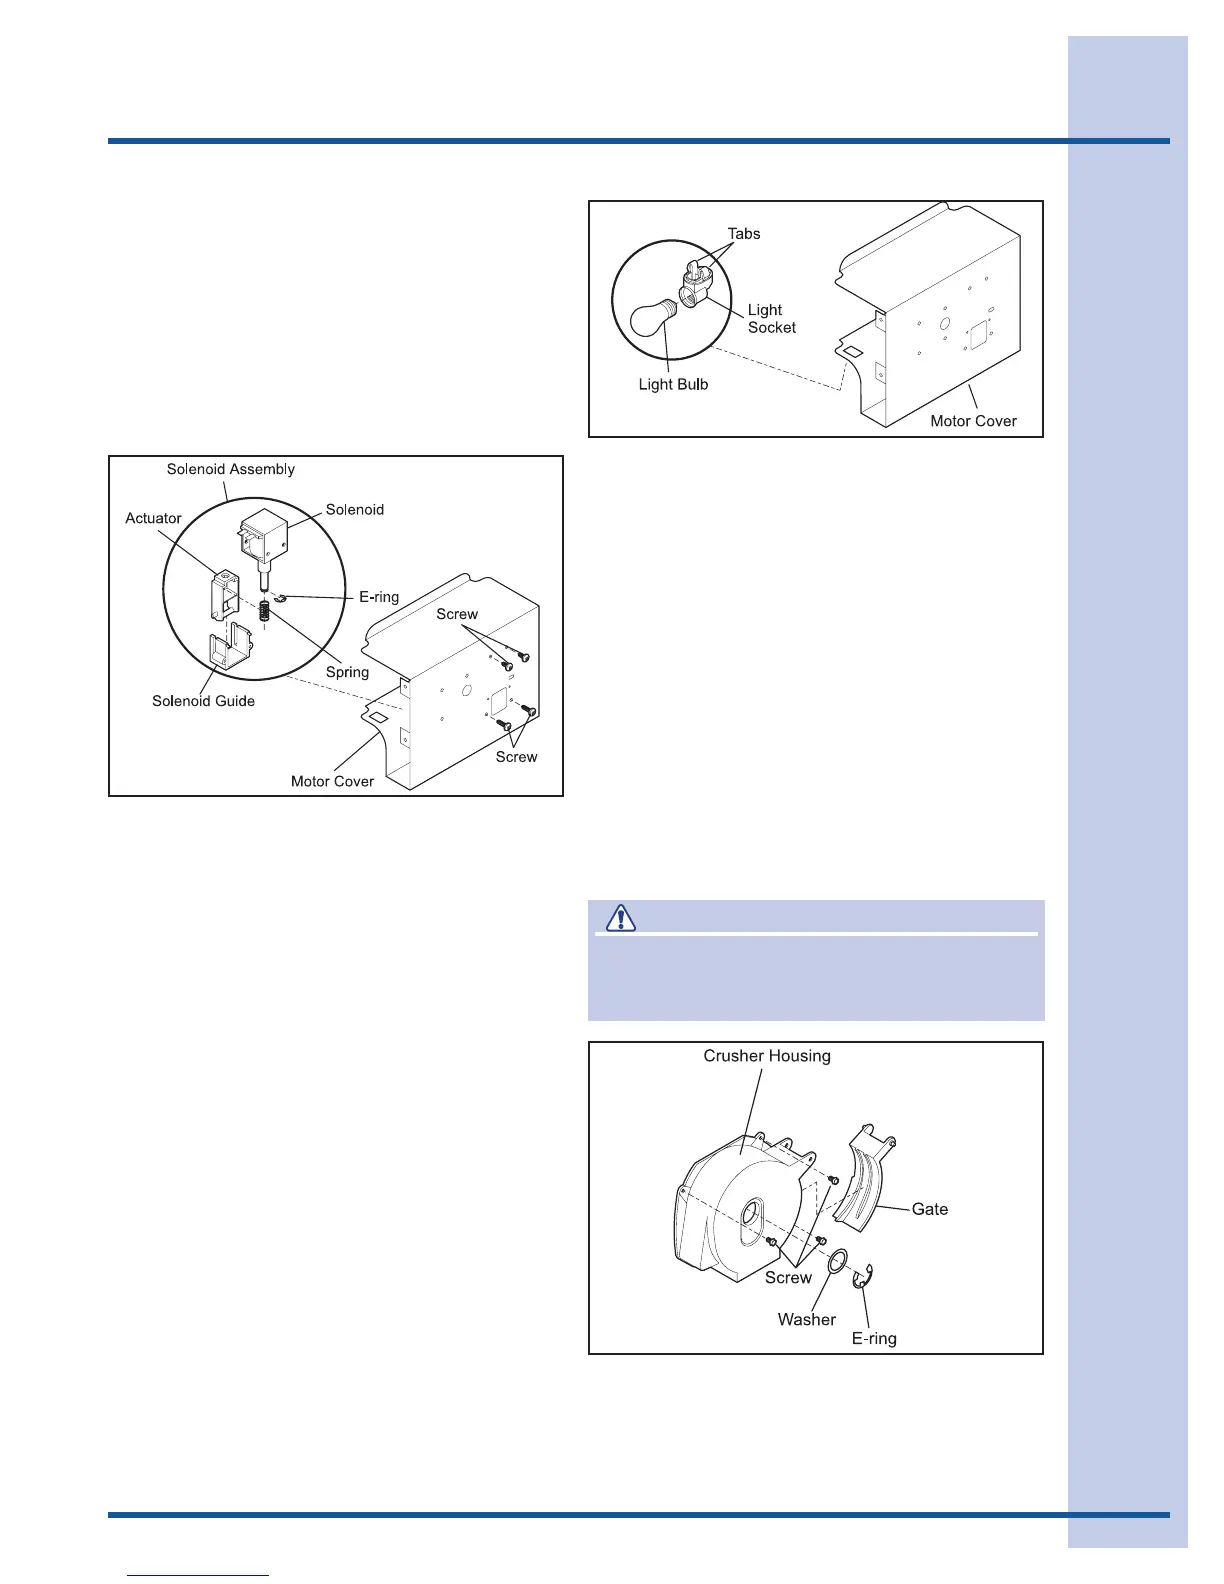
Ice Auger & Crusher Assembly
To remove Ice Auger & Crusher Assembly:
1. Removefour(4)screwsholdingIce
ContainerFronttoIceContainer.
2. Removetwo(2)screwsonundersideofIce
Container,holdingCrusherHousingto
container.
3. RemovescrewholdingControlRodto
container,locatedonundersideofcontainer.
4. Removethree(3)Hexheadscrewsholding
CrusherHousingtoFrontPlate.(SeeFigure
G5)
5. RemoveE-ringandwasheronfrontof
CrusherHousing.(SeeFigureG5)
6. SlideControlRodfreeofCrusherHousing
Gate.
Figure G3
Figure G4
Figure G5
To Test Solenoid Assembly:
1. ReadohmsvalueofsolenoidcoilusingMulti
meteronresistencescale.(Puttestleadson
terminalswherebluewithwhitestripeand
whitewiresweredisconnectedfromStep6of
procedure“ToRemoveSolenoidAssembly”).
2. Ifresistencereadingisextremelyhighorlow,
replacesolenoidcoil.
To Remove Lamp Socket and Light
Bulb:
1. Disconnectrefrigeratorfromelectricalsupply.
2. SlideIceContainerforwardandoffofRail
Assembly.Removetwo(2)screwsmounting
therailassemblytotheEvaporatorCover.
3. LiftuponRailAssemblyandpullforward,
freeingitfrommountingbrackets.
4. DisconnectMolexconnectorlocatedatback
ofRailAssemblyandpullRailAssemblyfree.
5. Disconnectyellowandwhitewiresconnected
tolampsocketlocatedbehindMotorCover.
6. Pressinontwotabsonbottomoflamp
socketbaseandpushthroughmountinghole.
(SeeFigureG4)
7. Replacelampsocketinreverseorder.
CAUTION
The Crusher Blades are very sharp. Use
protective gloves when handling Crusher
Blades.