70
Section E - Refrigeration System
9. Removerivetinretainerattopofold
evaporator.Slideevaporatorouttopofdrain
trough.
10. Transferdefrostheaterfromoldevaporator
tonewevaporator,thenslideevaporatorinto
topofdraintrough.
11. Slideevaporatoranddraintroughinplace
andpushdraintroughoverheatshield.This
willhelpholdshieldinplace.(SeeFigure3.)
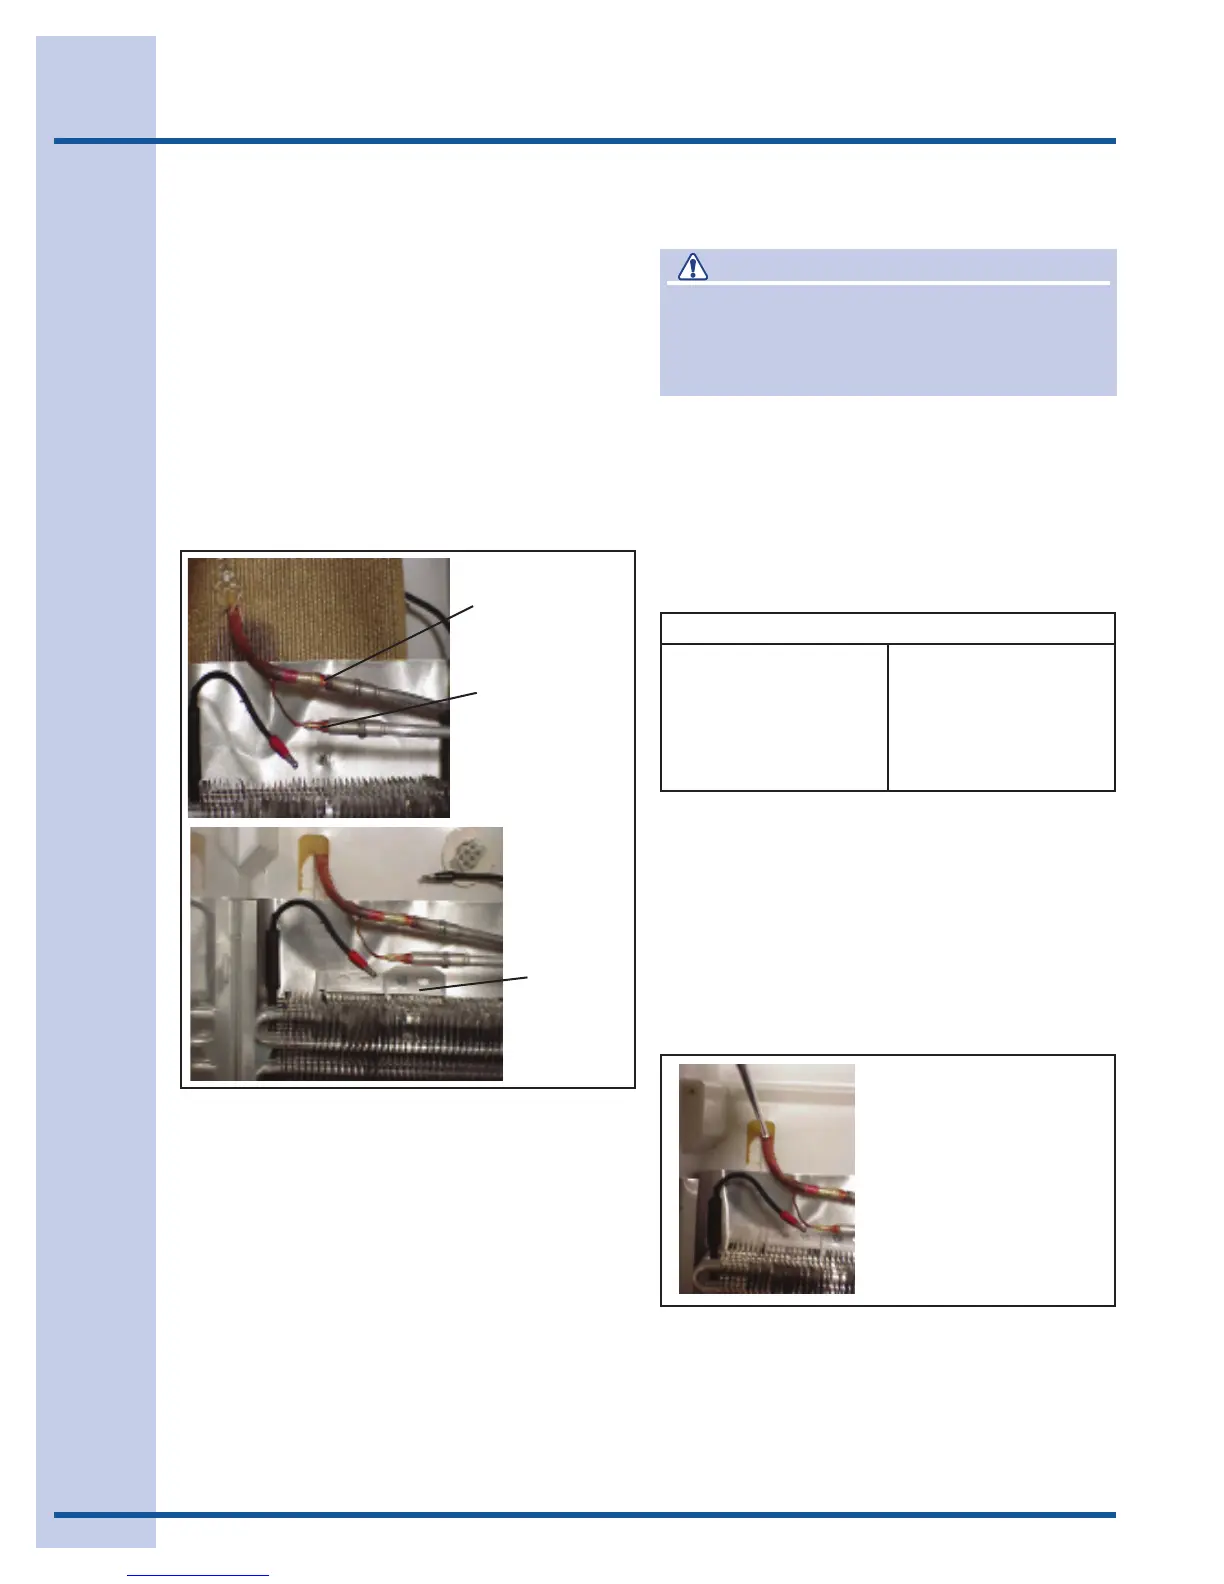
12. Placecaptubeinnewevaporatorandweld
inplace.
13. Placesuctionlineinnewevaporatorand
weldinplace.
Make your weld
on the cap tube.
Now make your
weld on the
suction line.
Figure 4
Remove
the heat
shield and
reinstall the
evaporator
clamp.
14. Withasharpknife,cutalongaseamon
theheatshieldfromcenterholetoedgeof
shield.Slideshieldfrombetweenliner,drain
troughandsuctionlineassembly.
15. Pushevaporatorbackinplaceandreinstall
plasticclampattop.(SeeFigure4.)
16. Slidefanandbracketassemblyinplaceand
connectdefrostheater.Mountlimitswitch
onevaporator.Plugwiringharnessinto
connectoronliner.
17. ReplaceDrier-Filter.Pumpdownand
rechargesystem.
18. Allowproducttorunandmakesure
refrigerantiscirculating.Reinstallevaporator
coverandmachinecompartmentcover.
Figure 1
Cut suction line off at
liner. Remove evaporator
and save for reuse.
Heat Exchanger Replacement
CAUTION
Always use the TORCH GUARD heat shield
behind evaporator before attempting to solder.
The excessive heat from soldering will warp
the plastic liner.
Theoriginalheatexchanger(SuctionLine&Cap
TubeAssembly)inthisproductisenclosedin
theinsulationbetweenthelinerandthecabinet
back.Becauseofthis,theoriginalpartcannot
beremoved.Thereisaservicekittobypassthe
internalheatexchanger.Itwillbenecessaryto
runanewheatexchangerdownthebackofthe
productandbypasstheinternalheatexchanger.
Heat Exchanger Kit Contents
1HeatExchanger
1Drier-Filter
1ArmorFlex
2Tape
6Screws
1Cover
1PackagePermagum
1InstructionSheet
To replace the heat exchanger:
1. Recoverrefrigerantfromsealedsystem.
2. Disconnectwiringharnessatlinerplug.
3. Removedefrostlimiteranddisconnect
defrostheater.
4. Removefanmotorandwiring.
5. Cutheatexchangeroffushwithliner.(See
Figure1.)
6. Removeevaporatoranddraintrough.NOTE:
Youdonotneedtoremoverivetordefrost
heater.
7. Usinga1/4”drillbit,drillholethroughcabinet
frominsideatlocationshowninFigure2.