123
DiodeReplacementKit5303918287ForIce&WaterModelSidebySidesWithAWaterFilter
Figure H8
90
The Diode kit part number is 5304418384, this kit will contain:
(2) Crimp Connectors
(2) Pieces of heat shrink
(1) Instruction sheet
(1) Diode Harness
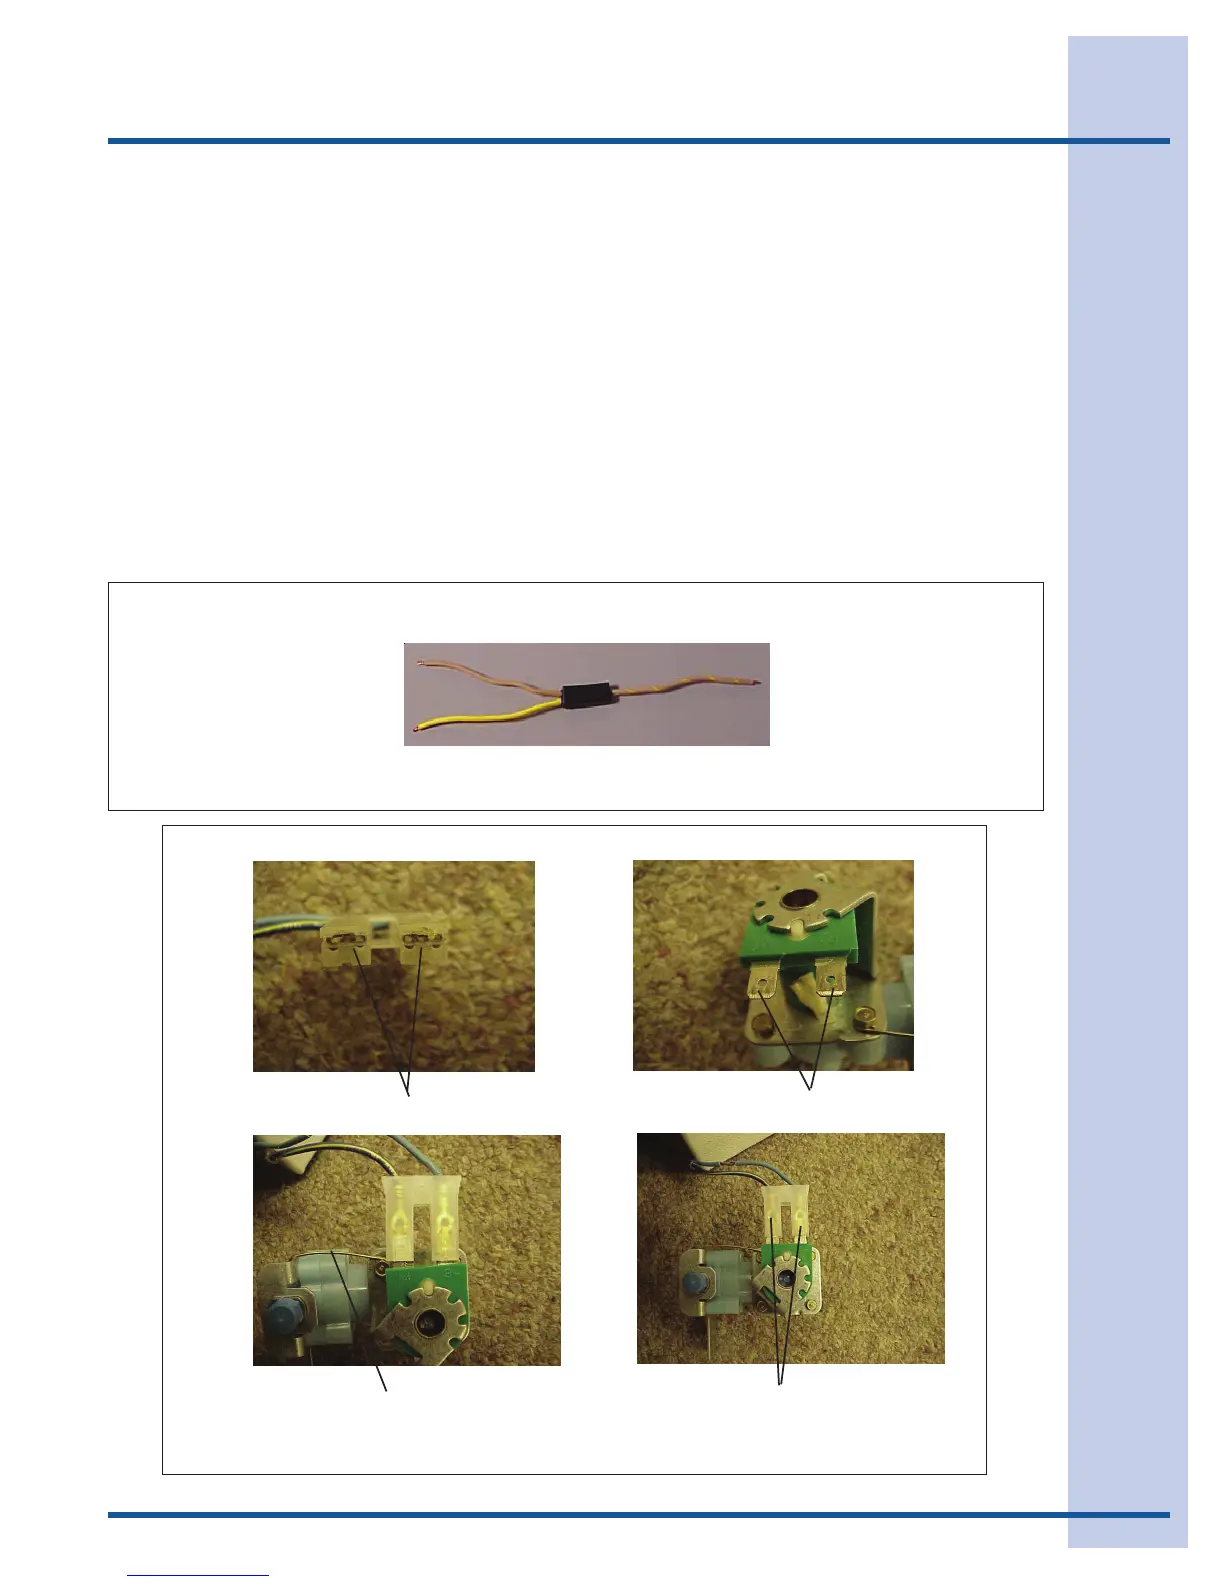
Low/No Voltage One point we need to cover in our testing is good connections at all points in the ice and water
At Coil(s) wiring. There are a number of connections in the wiring of a refrigerator. On the ice maker, the
wiring runs through the plug by the condenser fan motor up to the ice maker, back down to the
same plug and into the diode harness. On the water dispenser the wiring runs from the plug by
the condenser fan motor to the plug at the bottom of the freezer door up to the dispenser and
back down through the same plugs to the diode harness. A bad connection at any of the plugs
or wire terminals can stop the valves from operating. One of the problems we have found is at
the connector on the water valve coils is pushed on with the valve terminal over top the terminal
in the plug. (See Figure H9.)
Terminals on Coil
Terminals in Connector
Terminals and Plug
Installed Correctly
Terminal on Coil is Installed Over
Top of Terminal on Left Side of Plug
Figure H8
Figure H9
Section H - Water System
Chilled Water Valve
Placeaglassagainsttheactuatorandpushinto
seeifwaterwillpassthroughthevalve(Yellow
Coil) andthelterintoabucket.Ifitdoes,replace
thesecondaryvalve.Ifitdoesnot,removethe
primaryvalve,disconnecttheoutletlinefrom
theprimaryvalve,thenplaceaglassagainst the
actuator and push. If there is still no water, replace
the primary valve. If water is coming through,
replace the water filter.
Low/No Voltage At Coil(s)
Onepointweneedtocoverinourtestingisgood
connectionsatallpointsintheiceandwaterwiring.
Thereareanumberofconnectionsinthewiring
ofarefrigerator.Ontheicemaker,thewiringruns
throughtheplugbythecondenserfanmotorup
totheicemaker,backdowntothesameplugand
intothediodeharness.Onthewaterdispenser,
thewiringrunsfromtheplugbythecondenserfan
motortotheplugatthebottomofthefreezerdoor,
uptothedispenser,andbackdownthroughthe
sameplugstothediodeharness.Abadconnection
atanyoftheplugsorwireterminalscanstopthe
valvesfromoperating.Oneoftheproblemswe
havefoundisthattheconnectoronthewatervalve
coilsispushedonwiththevalveterminaloverthe
topoftheterminalintheplug.(SeeFigureH9.)
H 3
Diode Replacement Kit 5303918287 For Ice & Water Model Side by Sides With A Water Filter
Figure H8
TAN
YELLOW
TAN WITH
YELLOW TRACER
Terminals on
Terminals in Connect
Terminals and Plug
Terminal on Coil is Installed
Over
Figure H9
Figure H9