69
Section E - Refrigeration System
Evaporator Replacement
CAUTION
Always use the TORCH GUARD heat shield
part number 5304418872, behind evaporator
before attempting to solder. The excessive
heat from soldering will warp the plastic liner.
Theevaporatorislocatedinthelowersectionofthe
freezerandissecuredtothedrainpanbyabracket
atthetop.Styrofoamblocksarelocatedoneach
side,directlyacrossfromeachothertoensure
properairowthroughtheevaporator.
Theheatexchangeronthisstyleofrefrigerator
isintheinsulationbetweenthefoodlinerandthe
cabinetback.Youwillnotbeabletoremovethe
heatexchangerwiththeevaporator.Becauseof
this,alllineweldswillbemadeinsidethefreezer.
Theevaporatorkitcontainsaheatshieldtoprotect
thelinerfromdamagewhenbrazing.
Evaporator Kit Contents
1Evaporator
1Drier-Filter
1HeatShield
1InstructionSheet
1. Disconnectrefrigeratorfromelectricalsupply.
2. Removeallfreezersectionshelvesand
baskets.
3. Removebottomevaporatorcover.
4. Disconnectwiringharnessatlinerplug.
Removedefrostlimiteranddisconnect
defrostheater.(SeeFigure1)
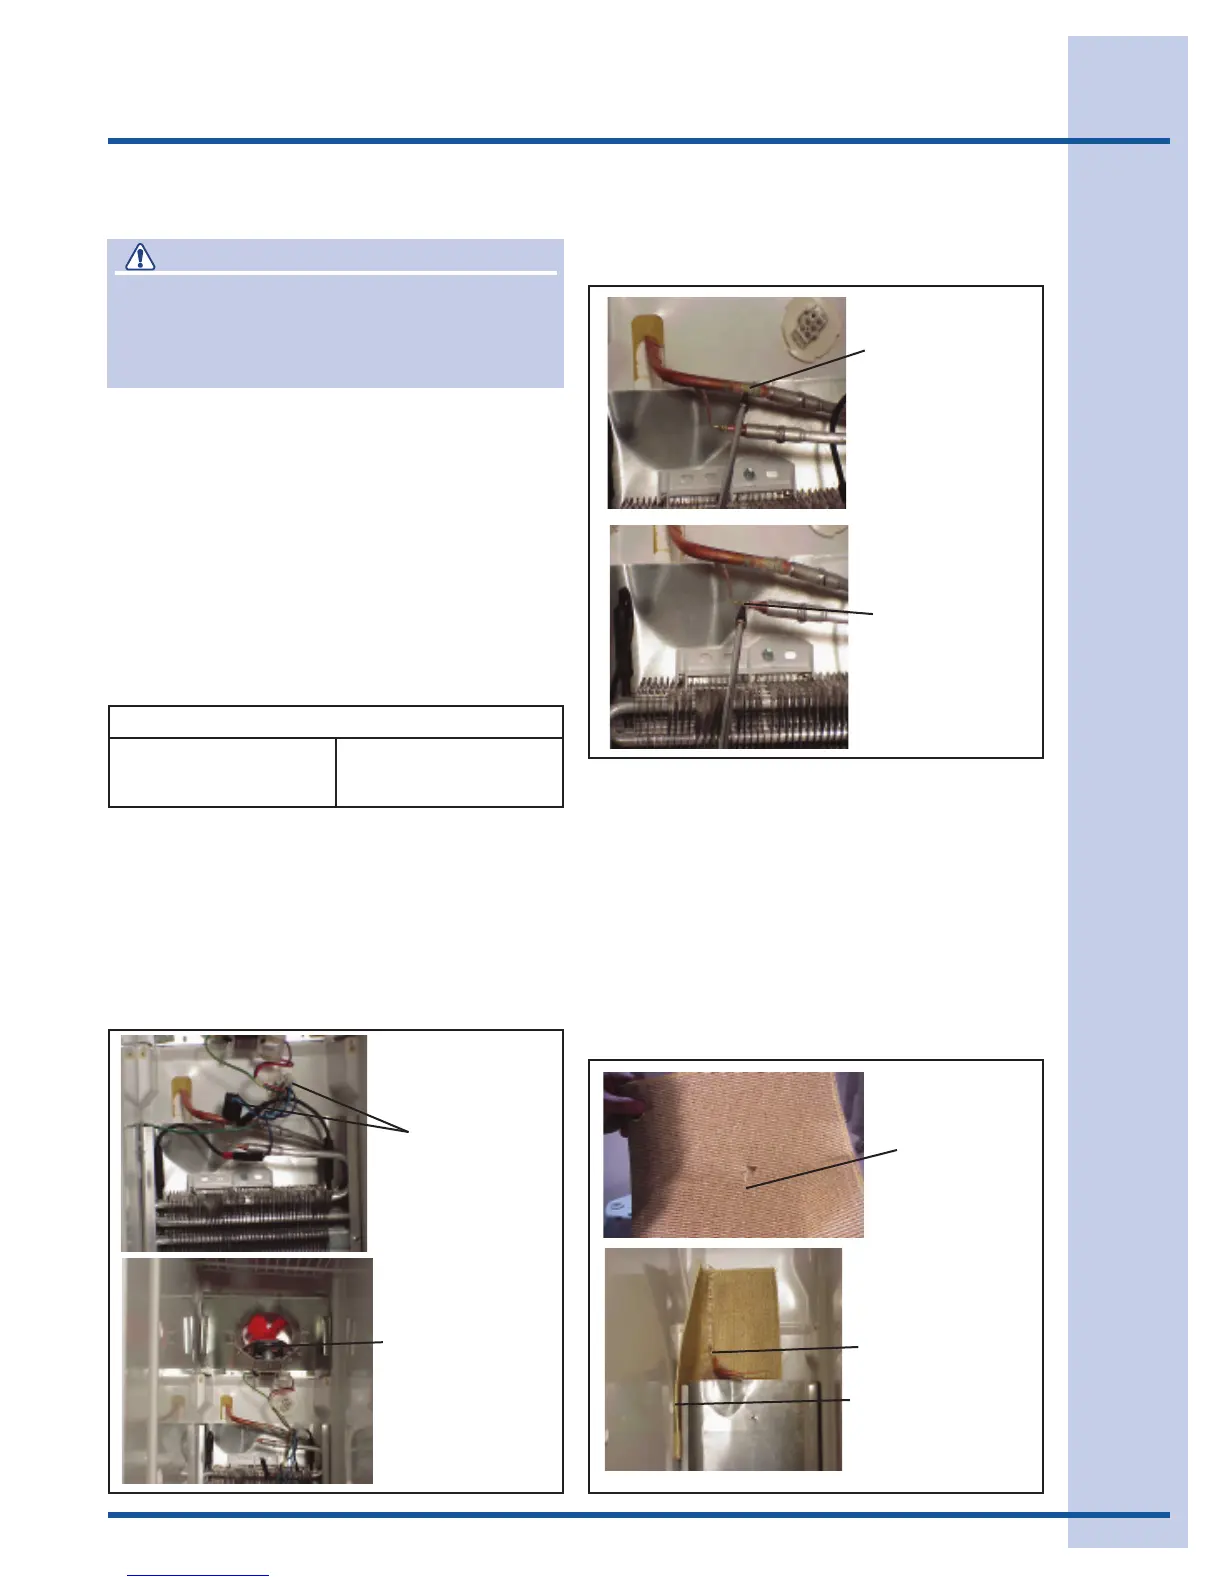
Figure 1
Disconnect plug
and remove
limit switch
Slide fan and
bracket out of liner.
5. Cutsuctionlineinfrontofweldatevaporator.
Usingale,scoreandbreakthecaptube
justinfrontoftheweld.(SeeFigure2.)
To replace the
evaporator, cut
suction line
at this point.
Figure 2
Cut the cap tube
at this point.
6. Removedraintroughandevaporatorfrom
insidethefreezer.
7. Cleanendofsuctionlineandcaptube.
Straightenlineandslightlybendtowardfront
ofcabinettoaidininstallingshield.
8. Cutasmall“X”inheatshield,thenslidecap
tubeandsuctionlinethroughhole.Packheat
shieldinbackcornerofliner.(SeeFigure3.)
Note:Youmayneedtouseasmallpairof
vise-gripsonthesuctionlinetohelpholdthe
heatshieldinplace.
Cut a small
hole in the
middle of the
shield.
Place shield over
the heat exchanger.
Figure 3
Place new evaporator
in drain trough and
slide in place over
heat shield.