68
Section E - Refrigeration System
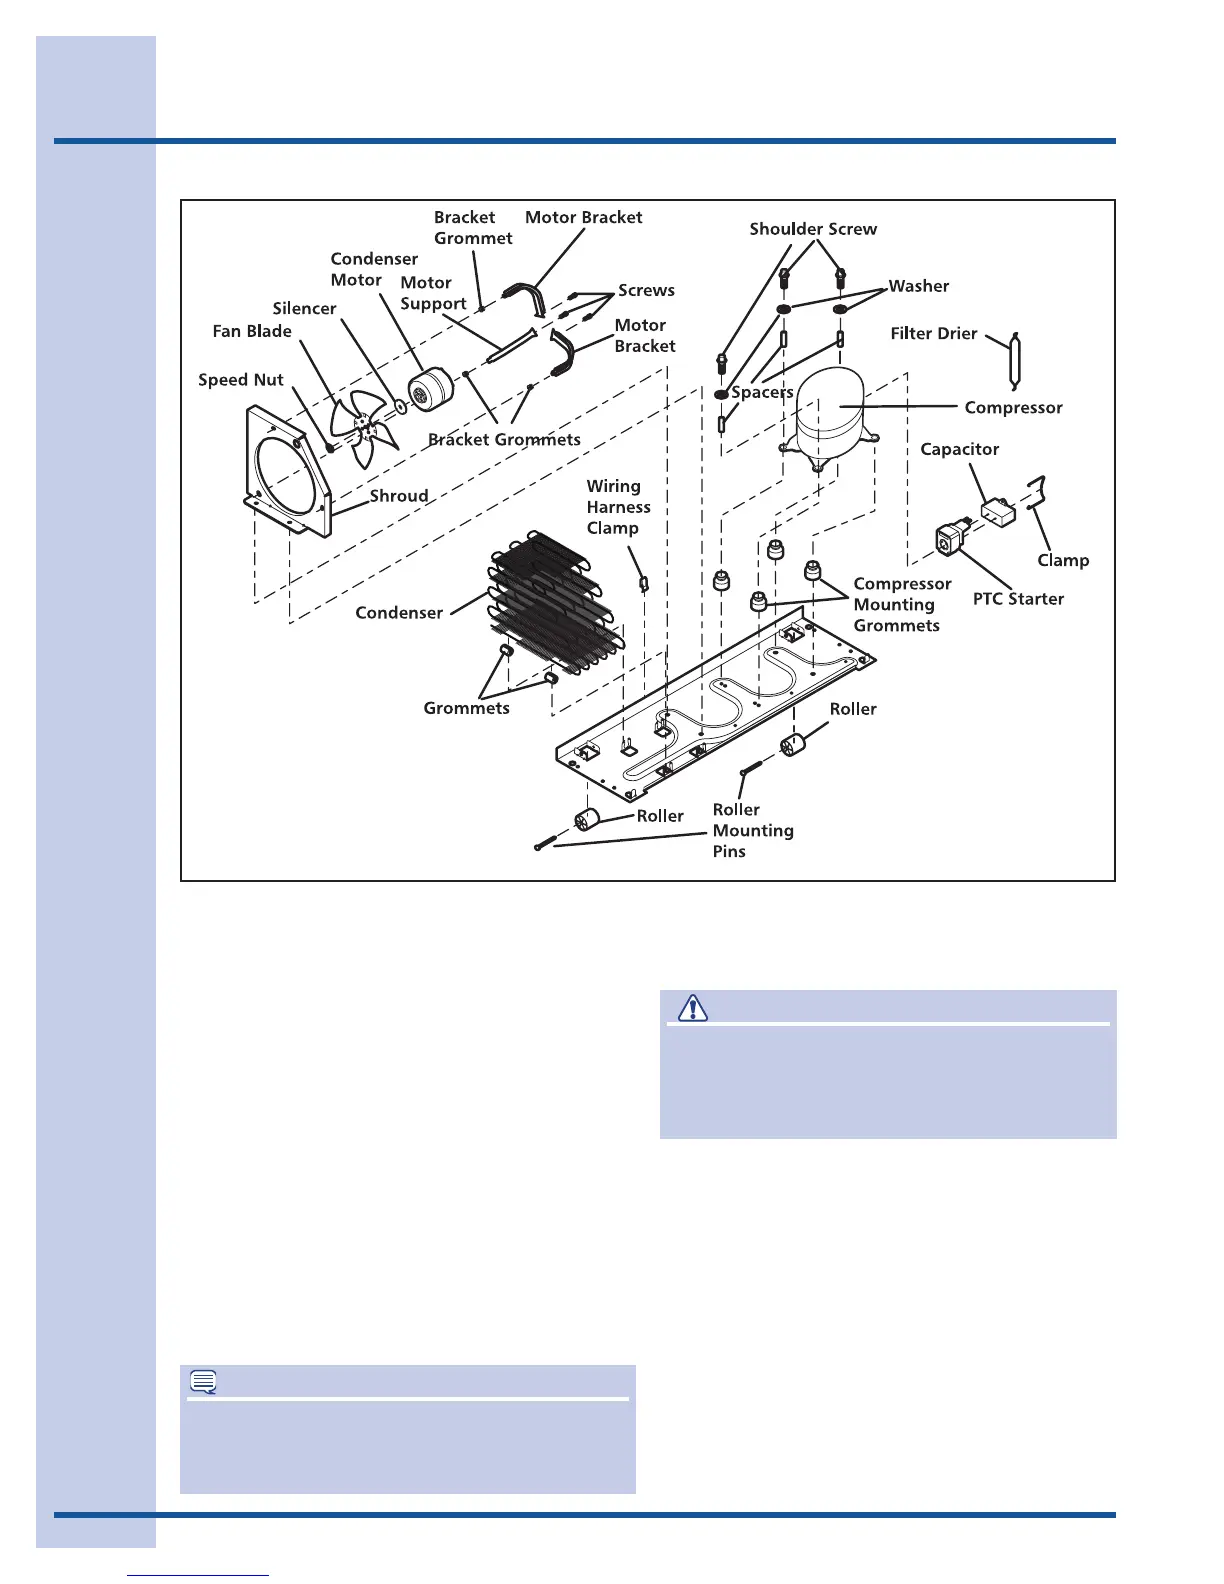
9. Afterrefrigerantiscompletelyrecovered,
cutsuctionanddischargelinesasclose
tocompressoraspossible.Leaveonly
enoughtubingtopinchoffandsealdefective
compressor.Plugortapeanyopensystem
tubingtoavoidentranceofmoistureandair
intosystem.Removeinoperablecompressor
andtransfermountingpartstonew
compressor.
10. Installnewcompressorinexactsame
mannerasoriginalcompressor.
11. Reformbothsuctionanddischargelinesto
alignwithnewcompressor.Iftheyaretoo
short,useadditionallengthsoftubing.Joints
shouldoverlap0.5”toprovidesufcientarea
forgoodsolderjoint.Cleanandmarkarea
wheretubingshouldbecut.Cuttubingwith
tubingcutter.Workasquicklyaspossibleto
avoidlettingmoistureandairintosystem.
14. Installnewlter-drieratcondenseroutlet.
15. Evacuateandchargesystemusing
recommendedproceduredescribedunder
EvacuatingandRecharging.
16. Reconnectcompressorterminalleadsin
accordancewithrefrigeratorwiringdiagram.
17. Reassembleunit.
Figure E1
NOTE
Iflow-sideprocesstubeistooshort,silversolder
fourinchpieceoftubingontoprocesstubeatthis
time.
12. Solderallconnectionsaccordingtosoldering
procedure.
13. Removeoriginallter-drier.
CAUTION
DO NOT unbraze old filter-drier from system.
This will vaporize and drive moisture from
desiccant back into system. The old filter-drier
should be cut out of system.