128
To replace the control board:
1. Disconnectallharnessconnectionsfrom
controlboard.
2. Placeasmallscrewdriverunderblack
retainerincenterofcontrolboard.
3. Carefullypryitoffpostcomingthrough
controlboard.
4. Liftcontrolboardoutofhousing.
Thedamper3wattdamperheaterispartofthe
damperassemblyandnotavailableseparetly.
Fan and Motor Assembly
Damper
Figure 11
A12VDCsteppermotorisusedtoopenandclose
thedamperdoor.
HeaterAssembly
Damperheaterwiringharness
Figure 12
DamperHeater
NOTE
Whenreinstallingthedamperusecautionwhen
installingtheheaterwiringharnessbackinthe
channel.
To replace the damper:
1. Disconnectharnessconnectionfrom
controlboard.
2. Liftheaterassemblystraightupandoutof
housing.
3. Removecontrolboard.(See“Toreplacethe
controlboard”.)
4. Disconnectdamperheaterfromcontrol
board.
5. Slidedamperanddamperheaterassembly
straightupoutofcontrolhousing.Remove
heaterwiringharnessfromhousing.
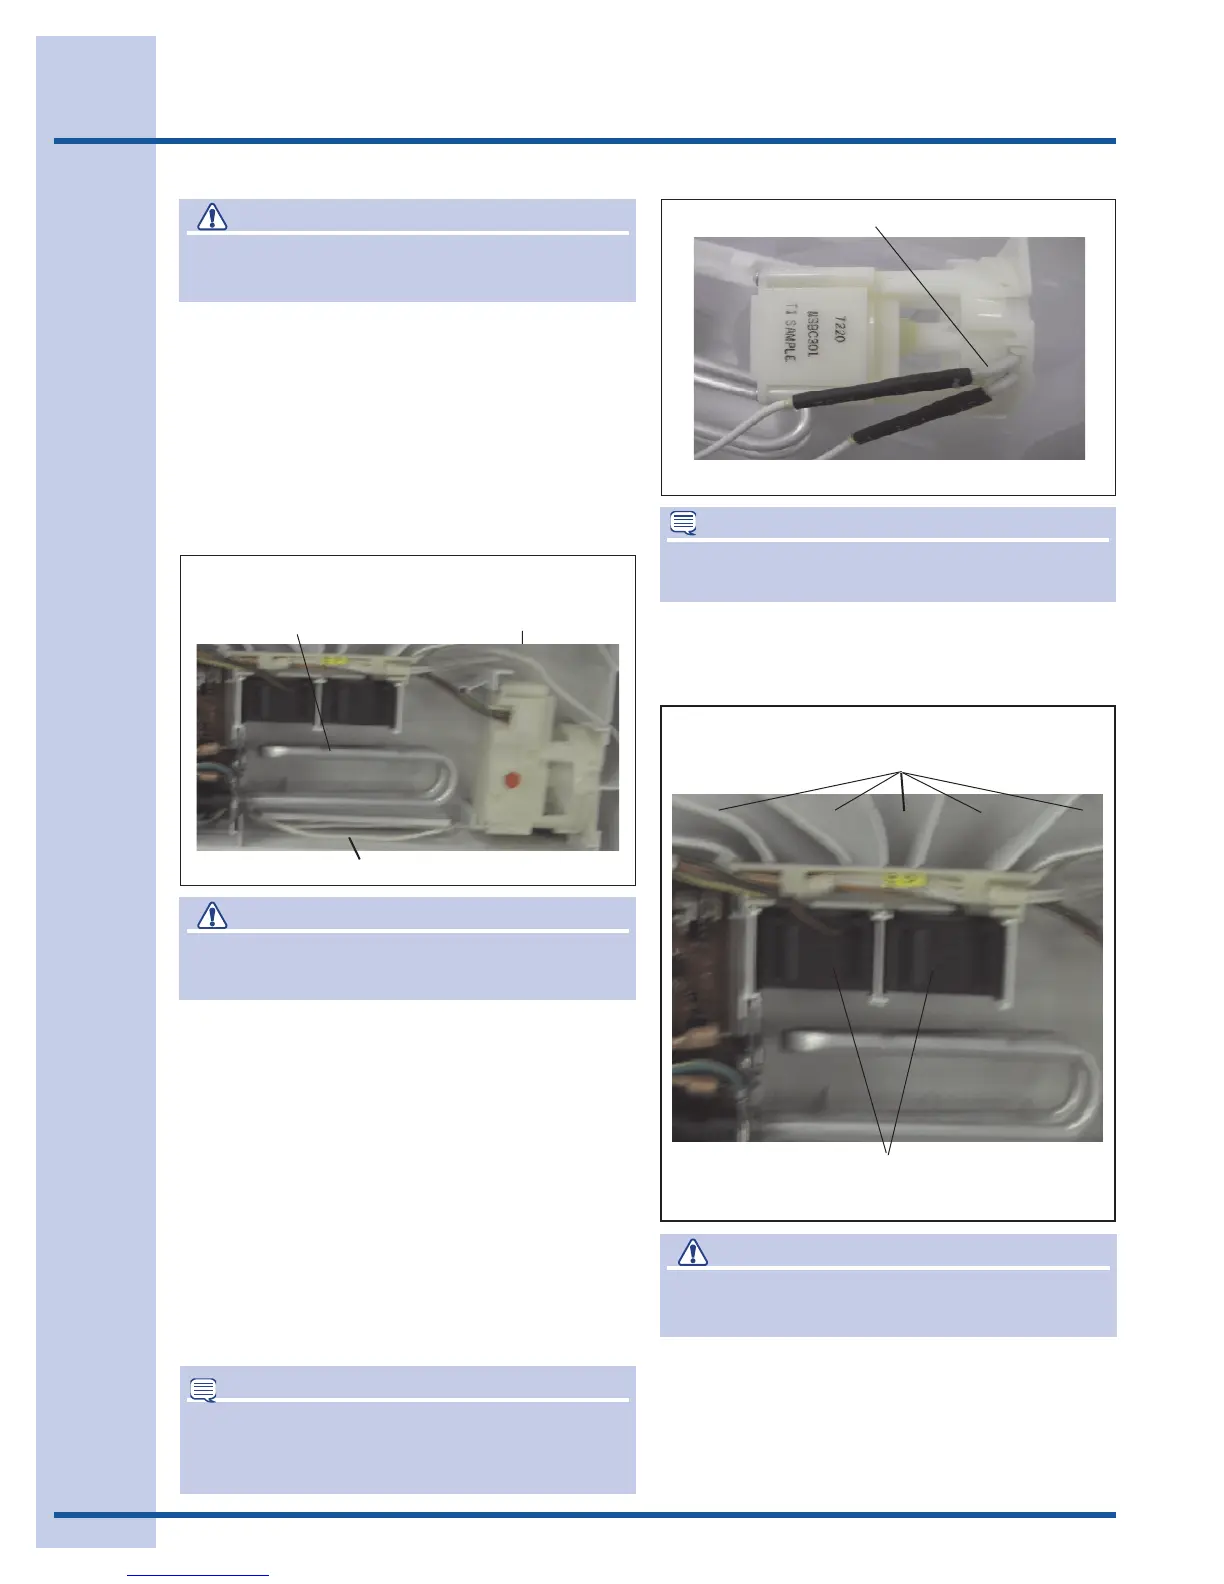
Thefanbladeandmotorareasingleunitwithtwo
unitsinthecontrolboxforallmodels.Thefans
circulateairthroughthecontrolandthedrawer.
Ifthedamperisopen,callingforcoolinginthe
drawer,thefanwillmixthereturnairfromthe
drawerwiththecoldaircominginfromthefreezer.
Figure 13
12VDCAirCirculatingFanandMotors
All Models use 2 Fan and Motor Assemblies
DischargeVanes
Addendum A - Perfect Temperature Drawer
CAUTION
Ground yourself to the refrigerator cabinet
before dissembling any electronic parts.
NOTE
Makesuredamperheaterwireisroutedunder
thePCBA.
CAUTION
Ground yourself to the refrigerator cabinet
before dissembling any electronic parts.
CAUTION
Ground yourself to the refrigerator cabinet
before dissembling any electronic parts.