[15] Resume mode ON/OFF
When resume mode is enabled, the last stitch of the pattern
sewn before turning the power off will be resumed when the
power is turned on again.
Press the right or left arrow button to turn [ON] or
[OFF] the resume mode.
NOTE:
When you turn the power on, the conrmation window will open.
Press the OK key to resume the last stitch of the pattern sewn.
Press the ENTER button to register the new setting.
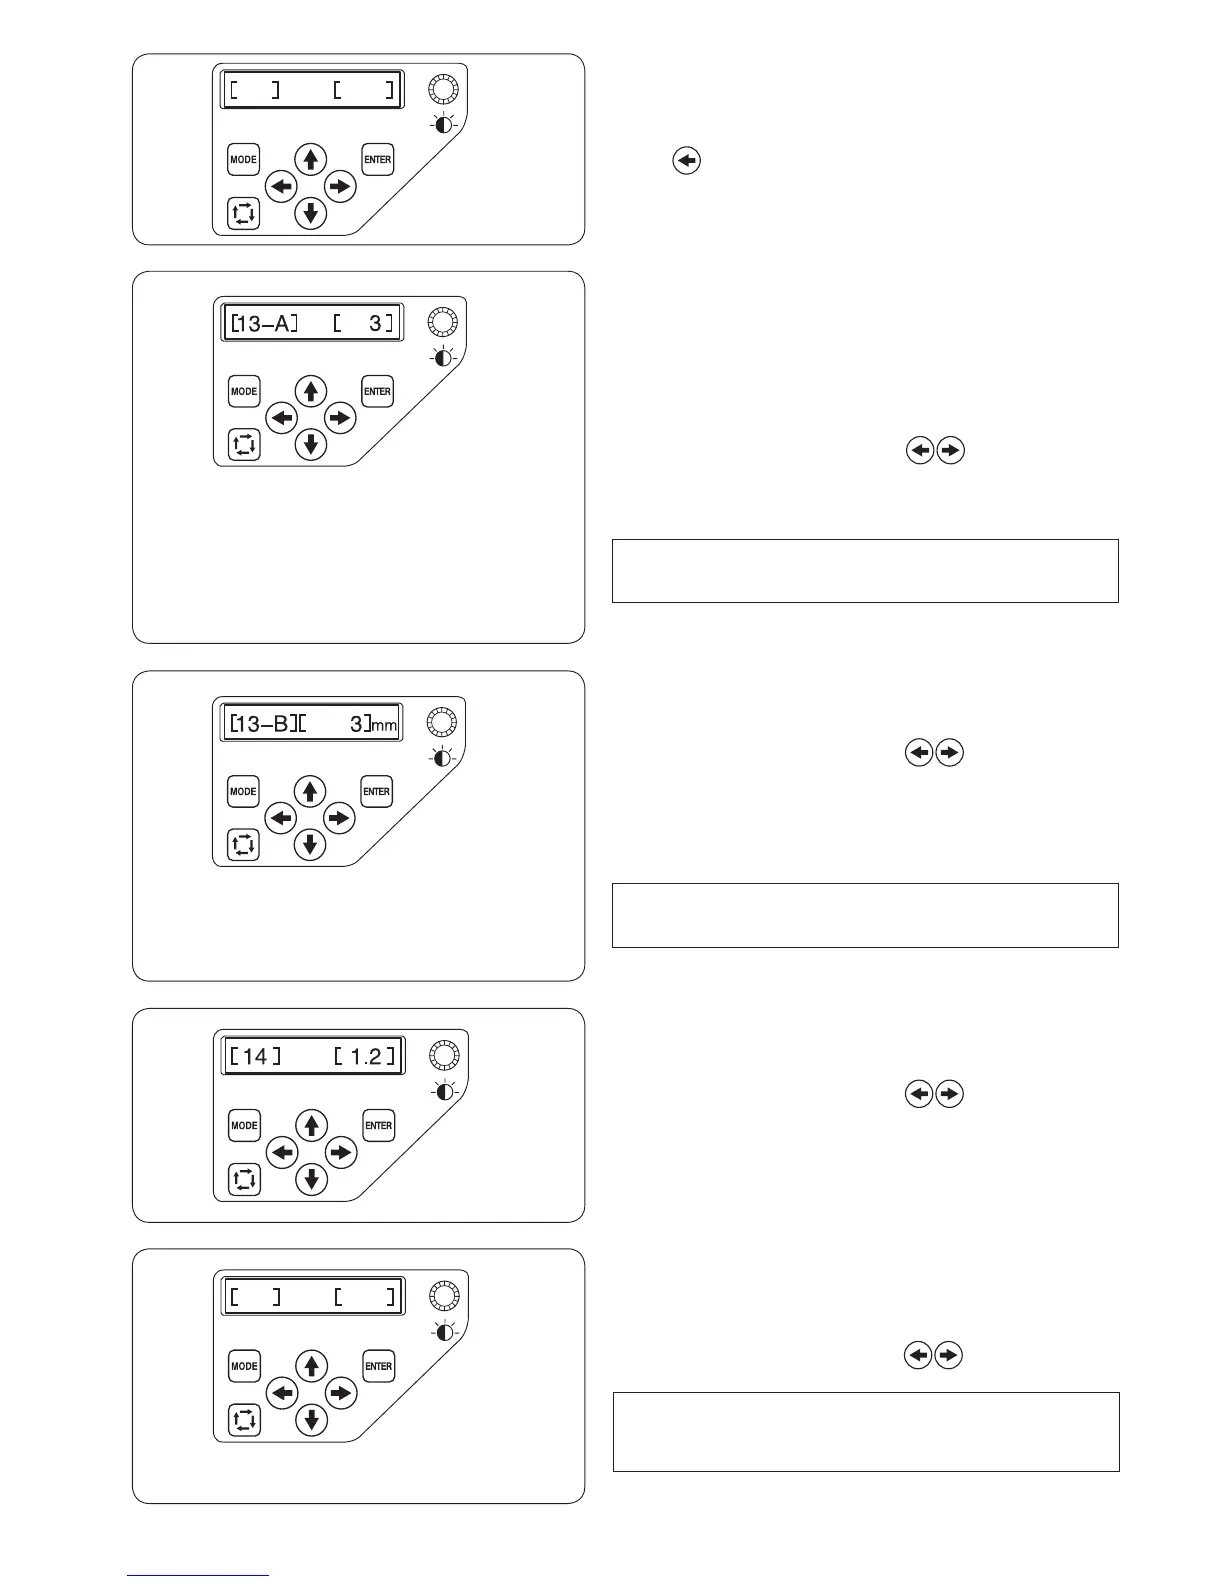
[13-A] Jump thread trimming threshold
If you insert jump codes when creating a custom design
embroidery pattern using a digitizing software, you can
adjust the position of jump thread trimming by setting the
number of jump codes.
The machine will trim the jump thread automatically after the
specied number of jump codes.
Press the right or left arrow button to adjust the
number of jumps.
The default setting is 3 and adjustable range is from 1 to 8.
The lower the number, the shorter the jump thread trimmed.
NOTE:
Turn off the setting [13-B] when using this function.
Press the ENTER button to register the new setting.
[13-B] Jump thread trimming threshold (length)
If you do not have a digitizing software, you can adjust jump
thread trimming by length.
Press the right or left arrow button to set the
minimum length of jump thread to cut. The machine will
automatically cut jump threads longer than the length
selected.
The adjustable range is from 1 mm to 30 mm.
The default setting is 3 mm.
NOTE:
Set the jump code number to 8 when using this function.
Press the ENTER button to register the new setting.
[14] Thread trimming position
If the machine fails to trim the threads properly, adjust the
needle drop position where the threads being trimmed.
Press the right or left arrow button to set a distance
between the thread trimming position and the last stitch of
the pattern section or select [OFF] to turn off the function.
The default setting is 1.2 mm.
The adjustable range is from 0.5 to 1.5.
Press the ENTER button to register the new setting.