EasyManuals Logo

Epson RC180 User Manual

Epson RC180
264 pages
To Next Page IconTo Next Page
To Previous Page IconTo Previous Page
Page #165 background imageLoading...
Page #165 background image
Maintenance 6. Maintenance Parts Replacement Procedures
RC180 Rev.17 153
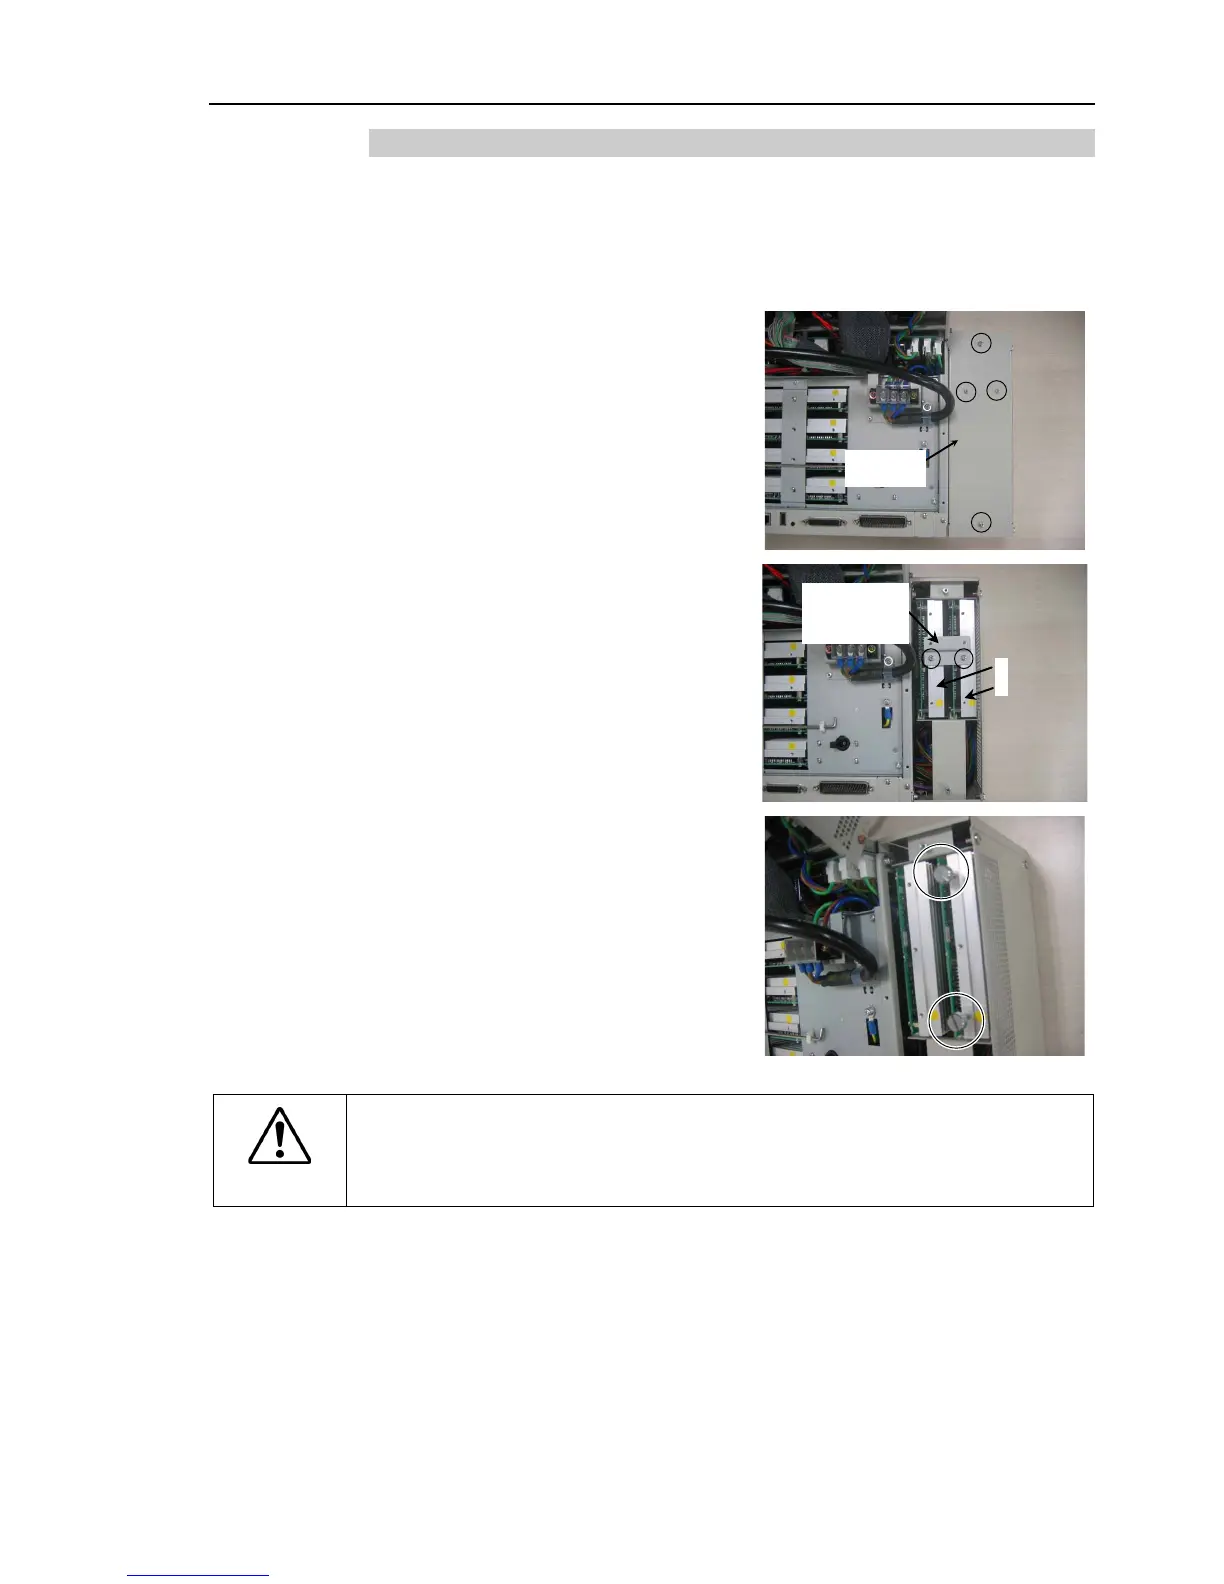
6.3.3 Replacing the Motor Driver (Axis 5 and 6)
Motor Driver
(Axis 5 and 6)
Remove
(1)
Turn
OFF the Controller and unplug the power connector.
(2)
Open the front cover.
Refer
: Maintenance 6.3.2 Replacing Motor Driver (Axis 1 to 4)
Removing procedure from (2) to (7)
(3)
Remove the
four screws shown to
remove the
top cover of the ProSix
Driver
Unit.
ProSix
Driver Unit
(4)
Remove
two screws to remove the
Motor Driver mounting bracket.
Motor Driver
5: Axis 5
6: Axis 6
5
6
Motor Driver
Mounting
Bracket
(5)
Secure the two thumb head screws
removed in step (2) to the Motor Driver
heat
sink as shown.
(6)
Pull out the Motor Driver by pulling the
two thumb head screws together evenly.
CAUTION
Be careful not to cut your
fingers.
The Motor Driver connector may be connected tightly. The connector may
be
disconnected suddenly by a strong pull and may cause your finger to be cut by
the Motor Driver heat sink.

Table of Contents

Other manuals for Epson RC180

Questions and Answers:

Question and Answer IconNeed help?

Do you have a question about the Epson RC180 and is the answer not in the manual?

Epson RC180 Specifications

General IconGeneral
BrandEpson
ModelRC180
CategoryController
LanguageEnglish

Related product manuals