Epson Stylus NX510/515/SX510W/515W/TX550W/NX415/SX410/415/TX410/419/NX215/SX210/215/TX210/213/219/ME OFFICE 510 Revision A
DISASSEMBLY/ASSEMBLY Removing the Circuit Boards 107
Confidential
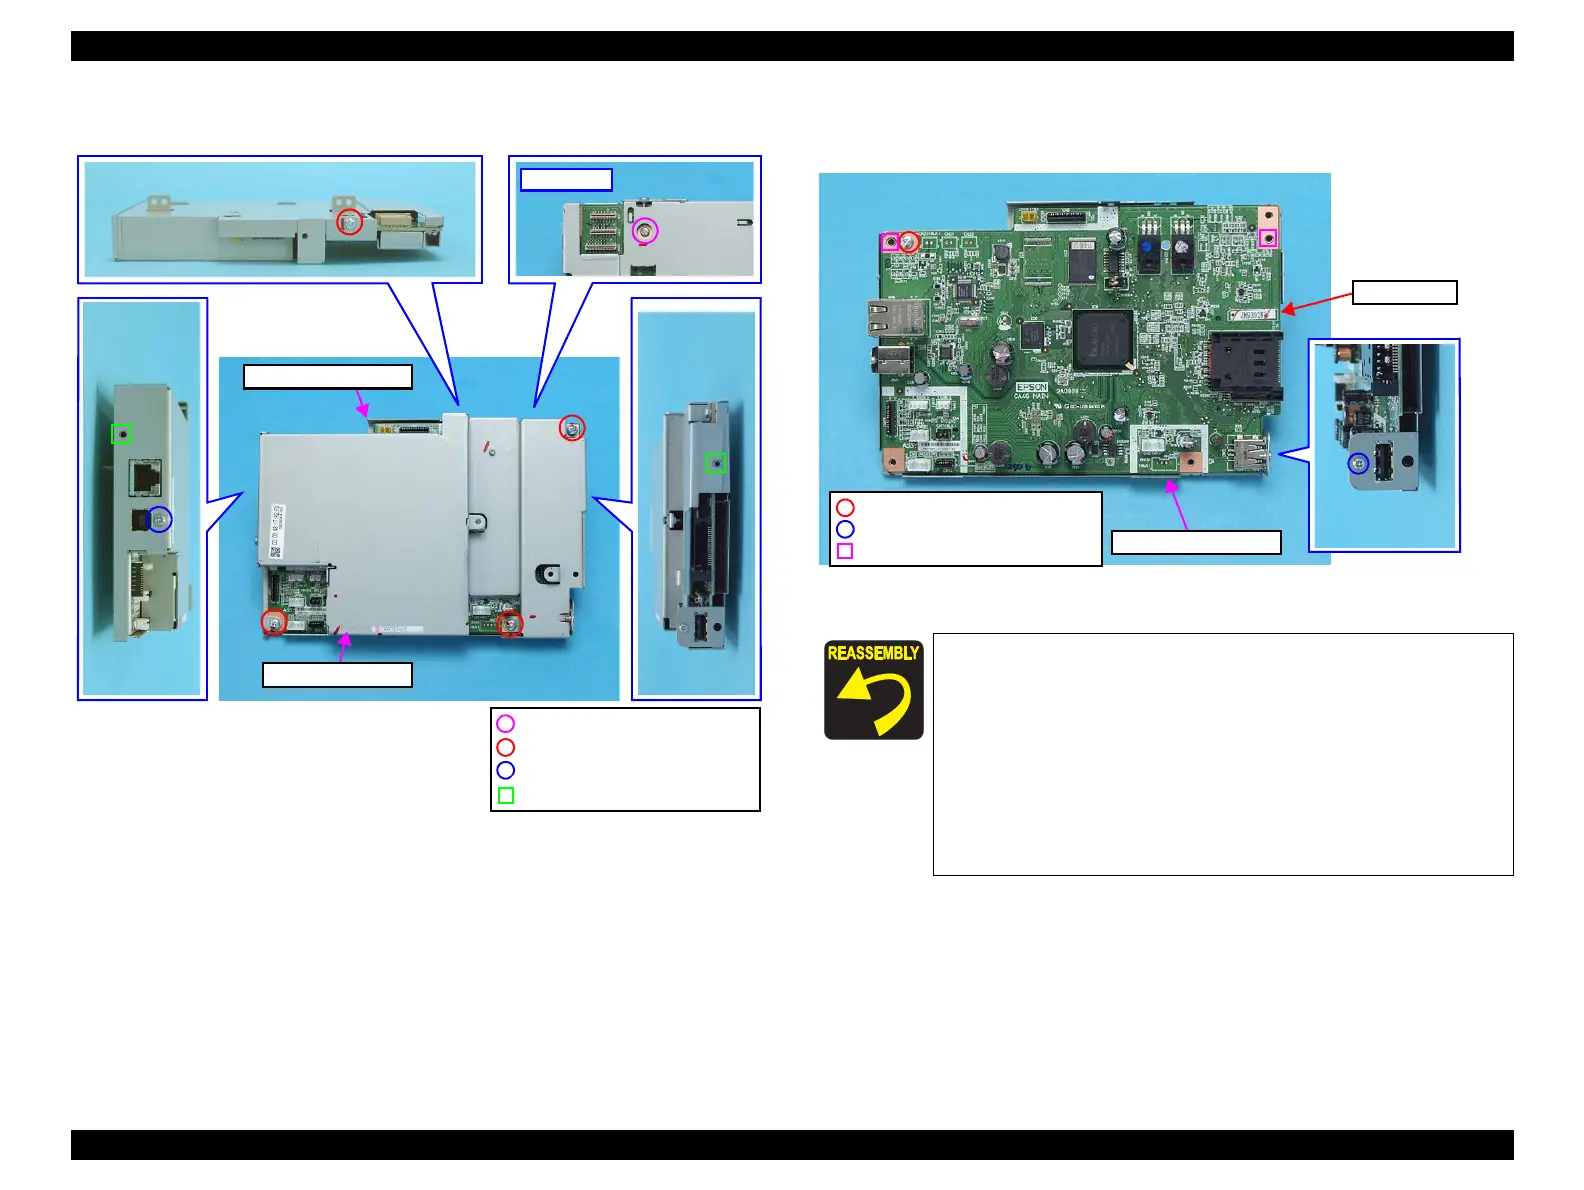
4. Remove the screws (x6) and remove the Upper Shield Plate.
Figure 4-22. Removing the Main Board (1)
5. Remove the screw (x2) that secures the Main Board, and remove the Main
Board.
Figure 4-23. Removing the Main Board (2)
Upper Shield Plate
C.P. 3x4, F/Zn-3C (2.7±1kgfcm)
C.B.S. 3x6, F/Zn-3C (4±0.5kgfcm)
Positioning Hole and Guide Pin
C.B.S. 3x10, F/Zn-3C (8±1kgfcm)
When installing the Main Board, pay attention to the following
instructions.
Align the positioning holes of the Upper Shield Plate with the
guide pins of the Main Board as shown in
Figure 4-23.
Align the positioning holes (x2) of the Upper Shield Plate and
the guide pins (x2) of the MB Lower Shield Plate as shown in
Figure 4-22.
Install the Main Board with the Upper Shield Plate over the
MB Lower Shield Plate as shown in
Figure 4-22.
C.P. 2.5x4, F/Zn-3C (2.7±1kgfcm)
Positioning Hole and Guide Pin
Main Board
C.B.S. 3x6, F/Zn-3C (4±0.5kgfcm)
MB Lower Shield Plate

 Loading...


