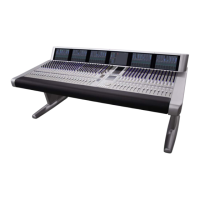
Euphonix Max Air Mixing Console Operations Manual Quickstart to Common Tasks
33
Select MF Masters 8. 1–16 and select the Main tab button beneath the lower bank of
Strip buttons.
Touch the Strip 9. 17 button in the lower bank to assign the rst 16 MF Master to
Main Strips 17–32.
Select MF Masters10. 17–32 and assign them to Swap Strips 17–32.
NOTE: To simply and quickly assign channels 1-x to Strips 1-x, press the 1:1 button.
However, use caution because this overwrites previous assignments!
Busses3.4
Create Main Sections and Audio Subgroups3.4.1
Max Air has 24 individual Main busses that can be grouped into 16 sections labeled
A–H and J–U (I, L, M, N, and O have been omitted to avoid being confused with similar
characters or numbers). Main sections can be setup in the following formats:
mono (M)
stereo (L, R)
LCRS (L, C, R, S)
5.1 (L, C, R, SL, SR, B)
6.1 (L, C, R, SL, SR, SC, B)
7.1 (L, LC, C, RC, R, SL, SC, SR, B)
Main sections can be set to different formats (i.e., A = stereo, B = mono, C =5.1). These
are the Main output busses of the console which can be monitored directly from the con-
trol room monitor section. They can also be used as audio subgroups and clean feeds.
Setup Subgroups and Main Program Output
This example creates four stereo subgroups using Main sections A–D and sets the Main
stereo program to Main section E.
Select 1. Busses from the Main Menu buttons.
Select the 2. Main tab at the bottom.
Select the 3. A–H Sections tab beneath the bank of buttons.
Make sure Main busses 1–16 are shown by using the arrows to locate page 1 of 4.
2.
Select Stereo in the Format Selector.5.
Touch Main Bus buttons 6. 1 and 2 in the rst row (Main section A).
 Loading...