DTP CrossPoint 84 Series Matrix Switchers • Matrix Software 101
Each individual volume control in the group can be set for that output, but when you move the
group fader, the faders for all three outputs move in tandem, retaining their relative levels.
NOTE: By default, group 1 (see figure51,
A
page100) is configured as the Program
Volume. Group 1 masters the Pre-mixer Gain control (see page 90), and parallels
the front panel Volume control. Group 2 (
B
) is configured as the Mic Volume. It
masters the Mic/line Pre-mixer Gain control block (see page92), and parallels
the front panel Mic volume control. These default groups can be overwritten if desired,
but not deleted (see the System reset SIS command on page 64).
If you overwrite groups 1 and 2, the front panel controls adjust the group masters that
you create in place of them.
An icon in the gain control indicates that that gain control is assigned to a group. In
figure51, the
icon (
C
) indicates group 3. The icon (
D
) in the output 3 control
indicates that that gain control is assigned to more than one group.
Grouped faders move together at relative levels to the top or bottom of their travel. If one
fader reaches the limit of its travel first, it retains that position while the other faders continue
to travel. When the grouped faders travel in the reverse direction, the fader that was at its
limit reverts to its position relative to the other faders. No gain block level fader can be set
beyond the upper or lower limits for that group fader, either the hard limits or the soft limits.
Any gain fader in the group can be set to a level below the group fader.
Soft limits (
,
E
) are adjustable, letting you set the ceiling and floor for the group.
NOTE: If a block is muted, that block remains muted when the group mute is released.
TIP: Extron recommends that if you include a control in multiple groups, that you do
so with care; overlapping group membership can quickly become unmanageable.
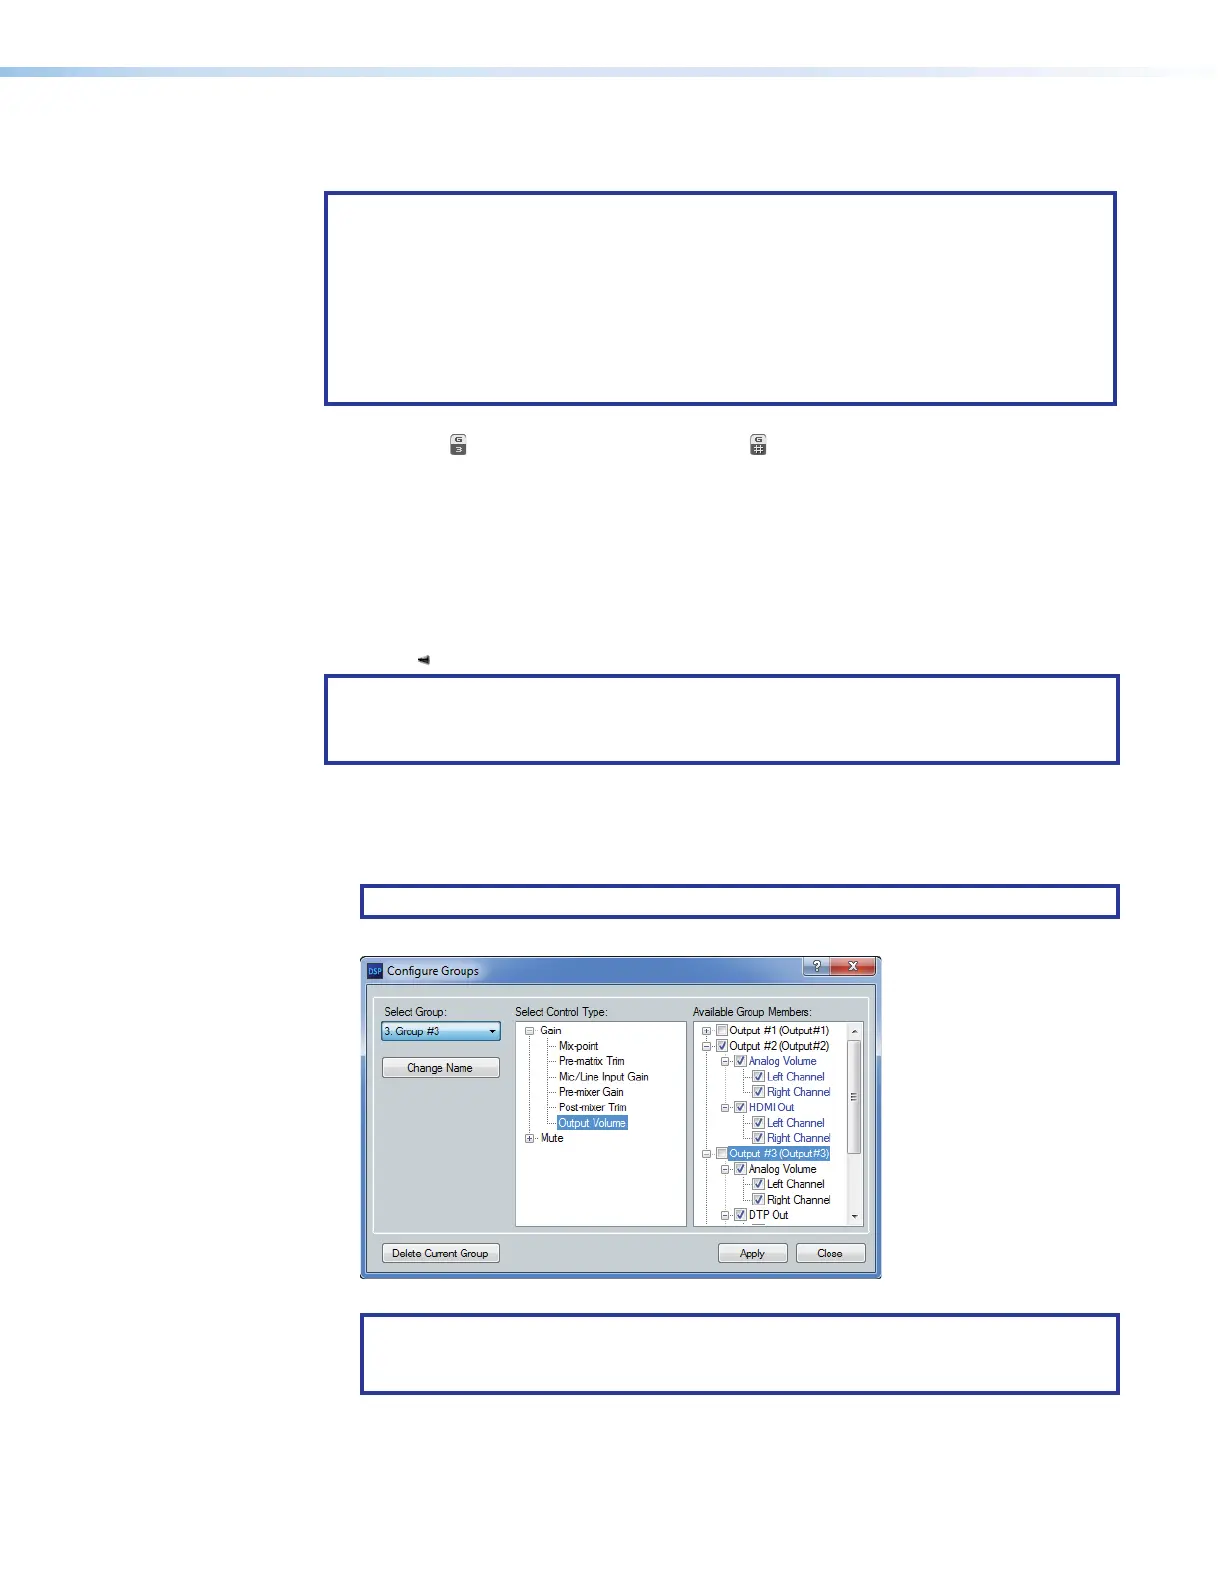
Configuring a group master
Configure a group as follows:
1. Click Tools > Configure Groups to open the Configure Groups dialog box.
NOTE: Or, click View > Group Controls and then click Add a Group.
2. In the Select Group drop-down box, click a group to select it (see figure53,
1
).
22
2222
2222
33
3333
3333
44
4444
4444
55
5555
5555 77
7777
7777
Figure 53. Configure Groups Dialog Box
NOTE: <empty> groups have no group members assigned. Numbered groups
(such as Group #) or otherwise named groups have controls assigned that may be
overwritten if you select them and continue.
3. In the Select Control Type field, click the + to expand the Gain or Mute tree and then
select a control to assign it to the group.
49