FIMER_PVS-175-TL A.1 Version_Product manual_EN_RevC-
F
114
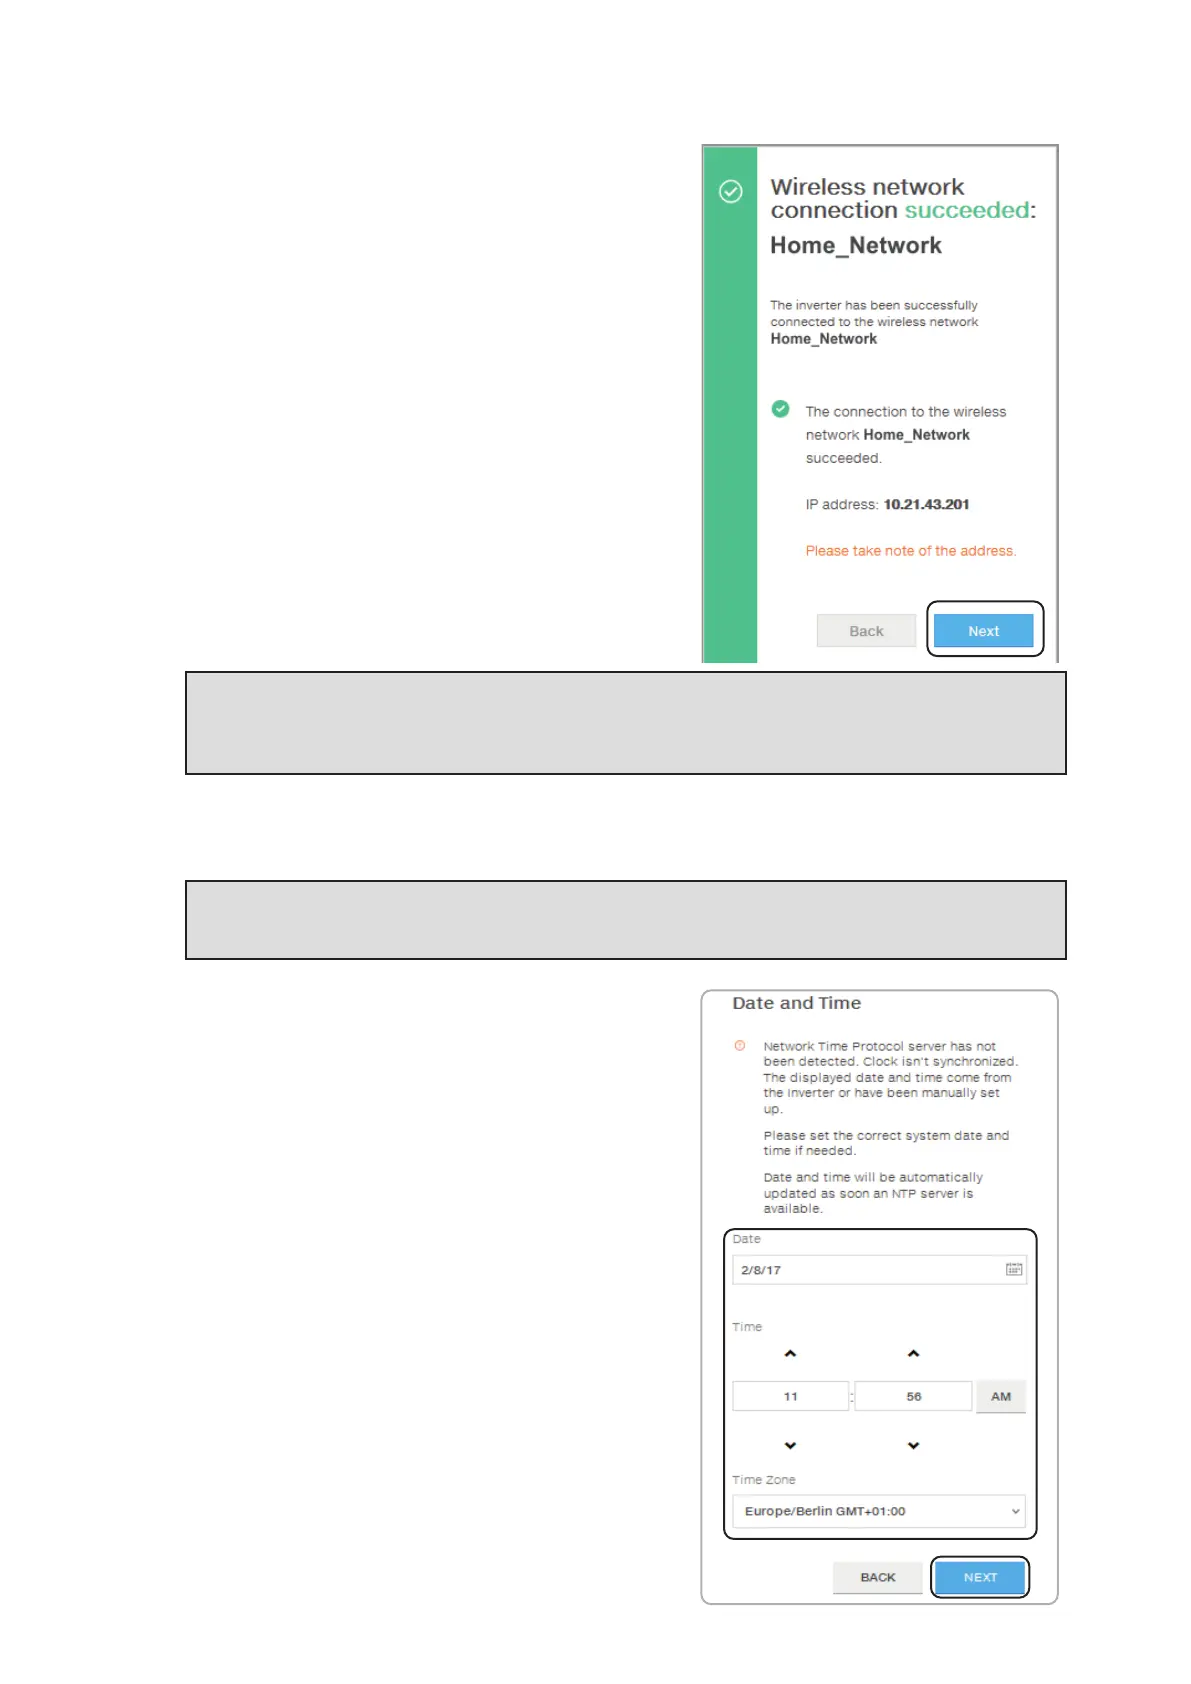
Once the inverter is connected to the wireless network, a
new message will confirm that the connection is acquired.
The message provides the IP Address assigned by the
wireless network router to the inverter which can be used
each time you want to access the Web User Interface.
Take note of it.
•
Click on “Next” button to proceed to the next stage of
the configuration wizard.
NOTE – D The IP address assigned may vary for reasons related to the wireless router setup
(for example, a very brief DHCP lease time). If verification of the address is required, it
is usually possible to obtain the client list (and the corresponding IP addresses) from the
wireless router administration panel.
If the inverter loses the connection with the wireless network (and therefore, loses the internet
connection), it will once again enable its own access point.
NOTE – D The most common causes of losing connectivity might be: change of wireless
network password, faulty or unreachable router, replacement of router (different SSID)
without the necessary setting updates.
STEP 3 - Date, Time and Time zone.
•
Set the Date, Time and Time zone (The inverter will
propose these fields when available; when it’s not
possible for the inverter to detect the time protocol,
these fields have to be manually entered).
•
Click on “Next” button to proceed to the next stage of
the configuration wizard.