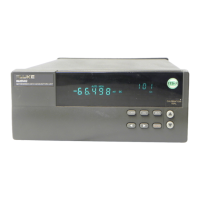
2640A/2645A NetDAQ
Users Manual
6-10
6. Verify Communications With the Communications Configuration File
dialog box still open, select instrument 01 on the Instruments on Network list
and click the Verify button. The message Connection Successful! is returned
for successful communications between the instrument and host computer. If
you receive an error message, refer to "Error and Status Messages" in
Appendix J. Click OK in the message box and then the Close button in the
Communications Configuration File dialog box to return to the Main
Window.
7. Configure Icon Note the Icon Bar in the Main Window. If the Icon Bar
shows instrument 01, complete Delete Instrument Icon below. If it does not
show instrument 01, complete Create Instrument Icon below.
Delete Instrument Icon Select Instrument 01 in the Icon Bar and then select
Delete Instrument Icon from the Setup menu. Click Yes in the warning
message. Complete Create Instrument Icon below. This sequence causes
NetDAQ Logger to reset the current setup for Instrument 01 to default
settings.
Create Instrument Icon Select the Create Instrument Icon from the Setup
menu. Select instrument 01 on the Available Instruments List. Click OK.
8. Select Reading Rate and Trigger Out Select Setup | Instrument
Configuration to open the Instrument Configuration dialog box. Select
Reading Rate = Slow, and check the Trigger Out box. Click OK to return to
the Main Window.
9. Connect DIGITAL I/O Test Leads Remove the 10-position DIGITAL I/O
connector from the instrument rear panel or from the connector kit supplied
with the instrument. Connect a test lead to each DIO line 0 to 7, plus a test
lead to the Σ (Totalizer) input and the common GND line. Reinstall the
DIGITAL I/O connector. (See "Digital I/O Connections" in Chapter 2 of this
manual)
10. Connect ALARM/TRIGGER I/O Test Leads Remove the 8-position
ALARM/TRIGGER I/O connector from the instrument rear panel. Connect a
test lead to each line, MA (Master Alarm), TO (Trigger Output), TI (Trigger
Input), plus a test lead to the common GND line. (See "Alarm/Trigger I/O
Connections" in Chapter 2 of this manual.)