2640A/2645A NetDAQ
Users Manual
2-54
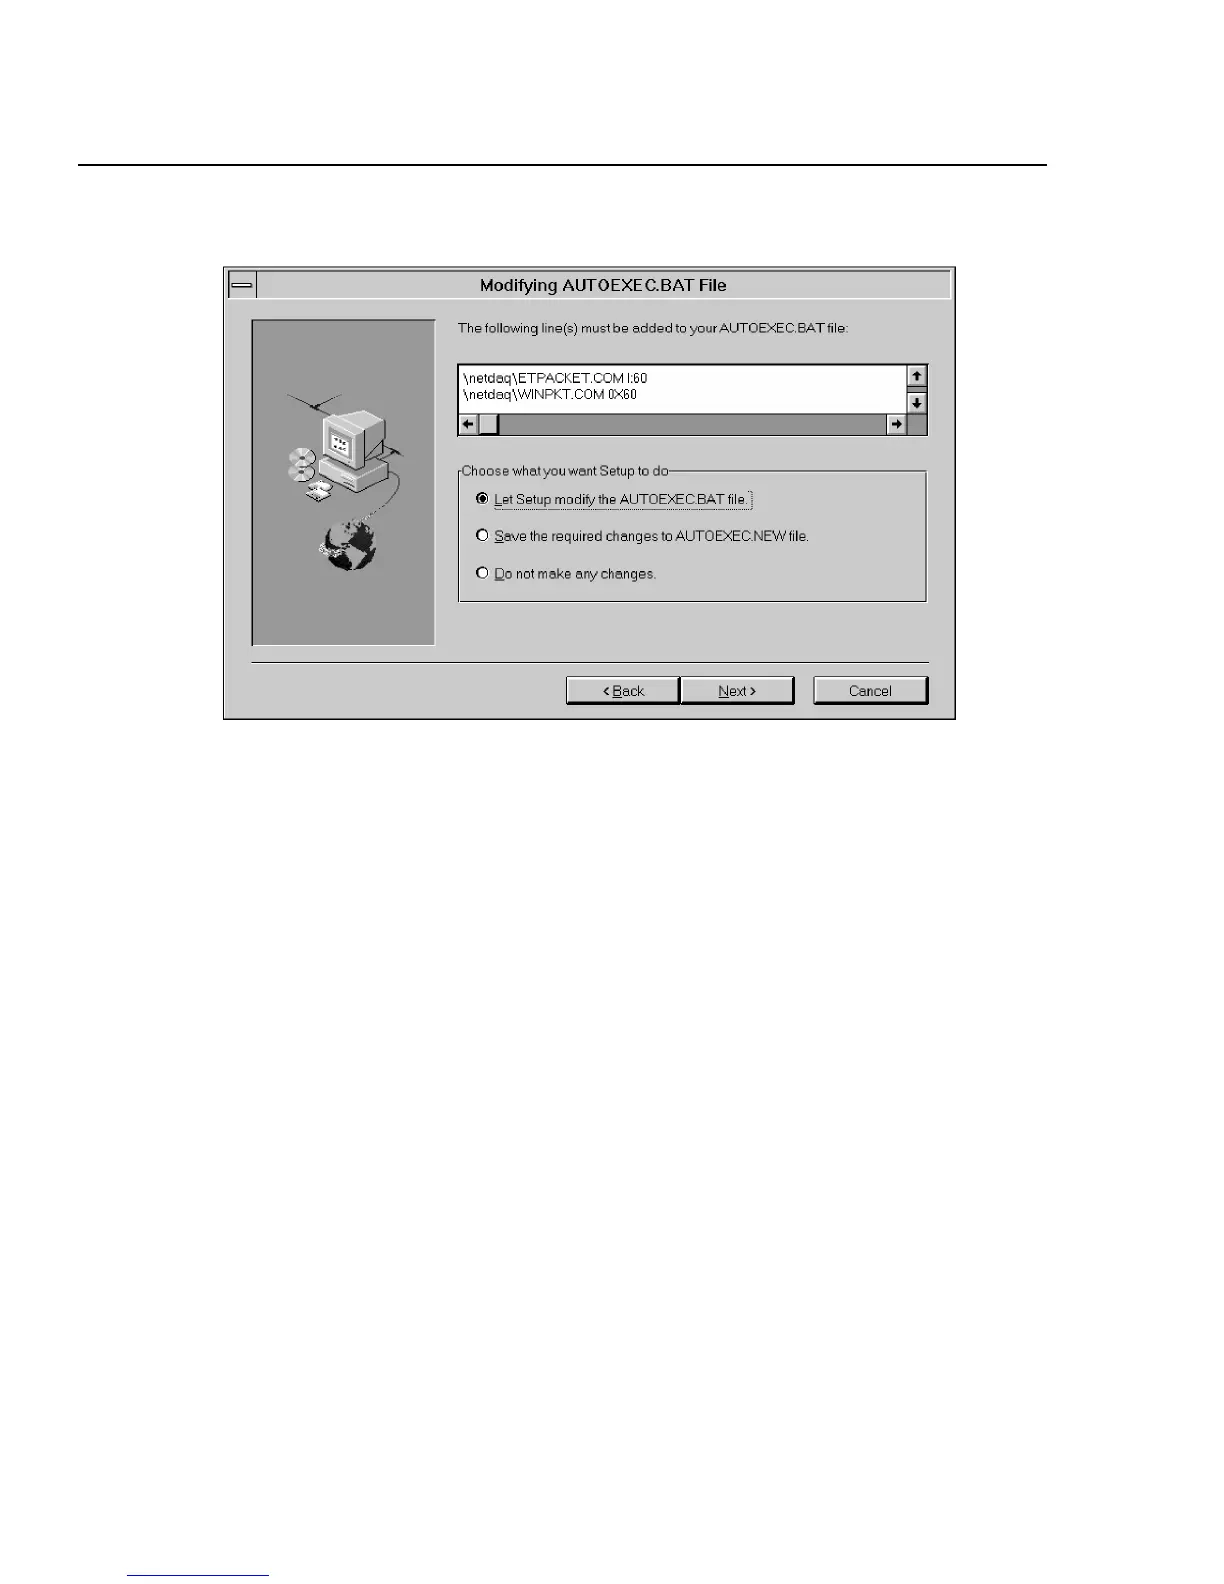
6. Tell the setup program whether to modify your autoexec.bat file for the packet
driver. Click Next.
7. Select the program folder. The default name of the program folder or program
group is Fluke NetDAQ Logger. You can select or type a different name.
Click Next.
8. Check the setup. If the setup is correct, click Next to begin file transfer.
If you want to change the setup, click Back to go to the appropriate screen and
make the changes. Click Next and check the setup again. If it is correct, click
Next to begin file transfer.
9. After you install NetDAQ Logger with Trumpet TCP/IP software and modify
the autoexec.bat file accordingly, reboot your computer to enable networking.
Changing from an Isolated Network to a General Network 2-47.
Use the following procedure to change from an isolated network to a general
network:
1. To remove your current NetDAQ Logger installation, click the Uninstall icon.
You may want to copy or backup your setup and data files first.
2. Reinstall NetDAQ Logger software and select General instead of Isolated.
3. Use the front panel procedures discussed earlier in this chapter to set each
NetDAQ instrument for general network operation. Also, if necessary, see