QUANTUM™ LX EVAPORATOR CONTROL PANEL
OPERATION
090.610-O (MAR 2016)
Page 18
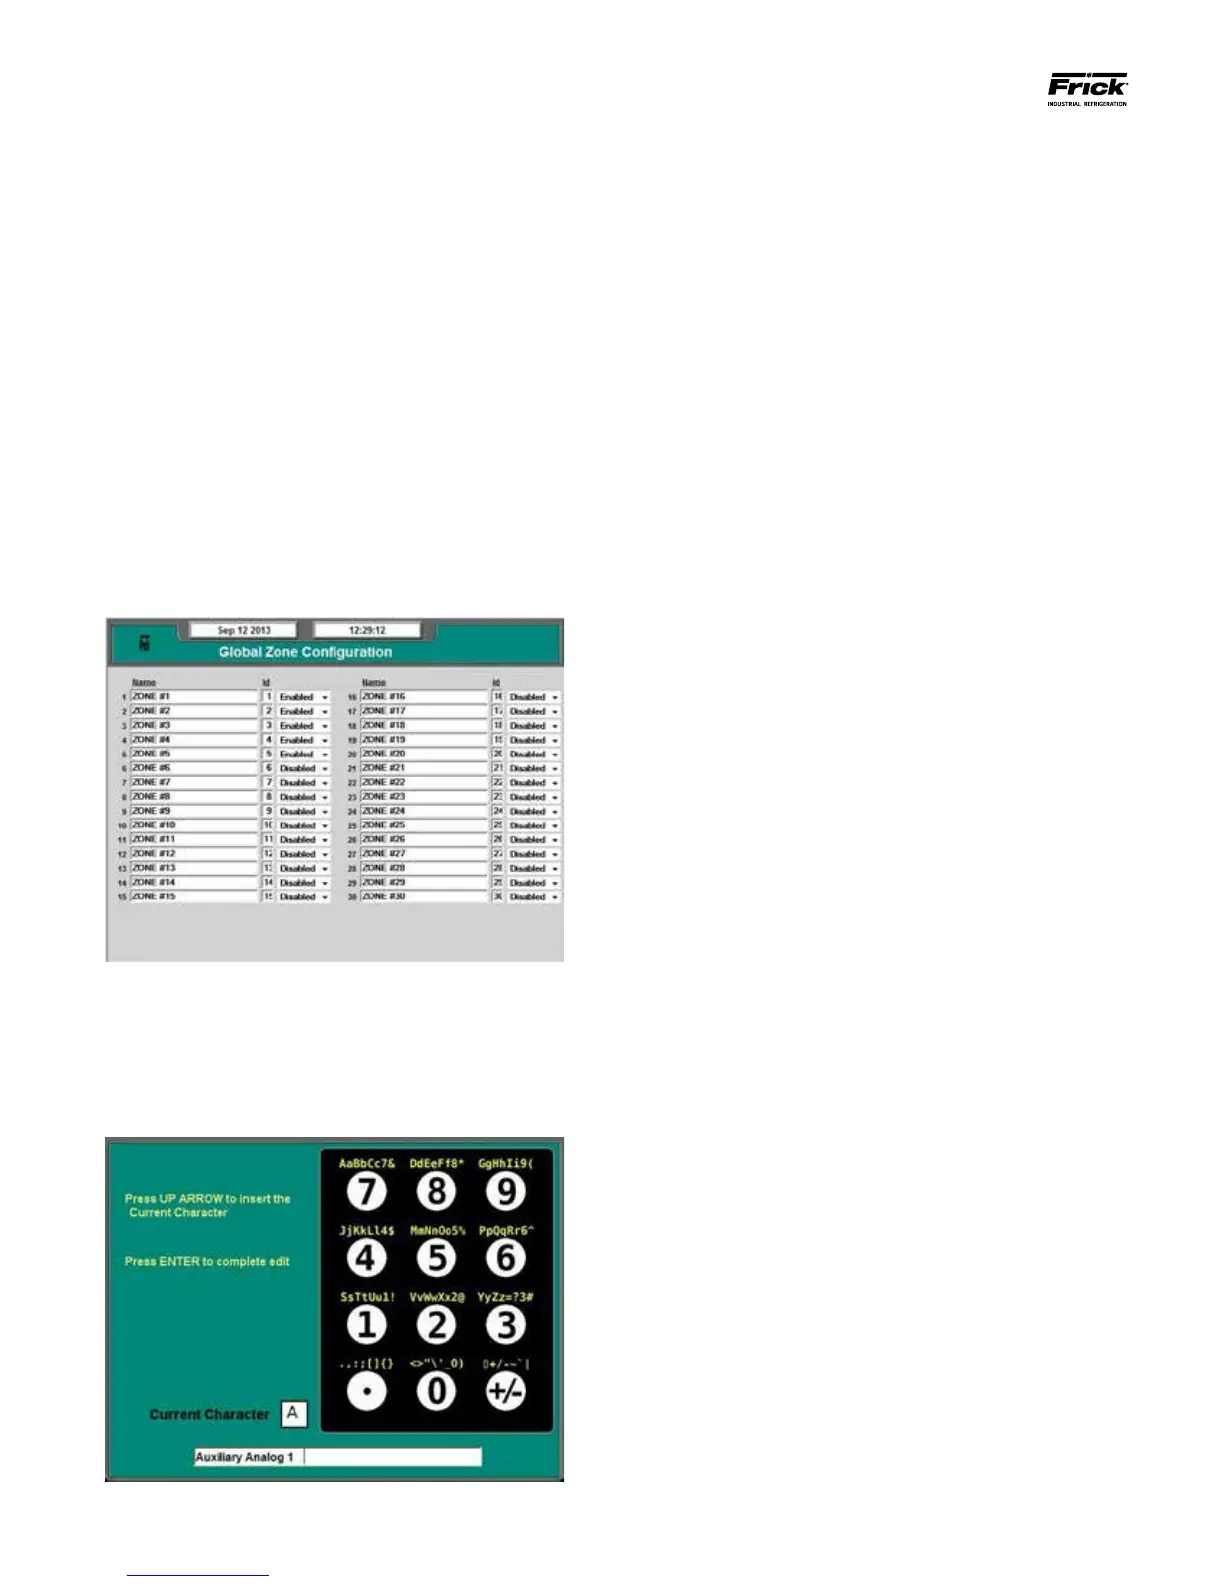
The Alpha screen shows a graphic representation of the
numerical keypad. The symbols that appear above each
key on this screen are the possible combinations of sym-
bols that are associated with the digital portion of the key.
As an example, suppose that you wanted to modify the
text line in the screen example shown. You want to
change the line from reading Auxiliary Analog 1, to Zone
1. The rst thing you would do, is to use the [Backspace]
key on the keypad to position the cursor (blinking vertical
line), to the far left side of the text. Notice as the cursor
backspaces, it erases the current line of text.
Press the number [3] key (notice that the capital Z is one
of the symbols in the line right above the [3] key). A capi-
tal Y will appear in the Current Character box. Continue to
press the [3] until the capital Z appears there. Now press
the [Up Arrow] key, and notice that the Z has been placed
on the text line in the rst position.
Next press the [6] key on the keypad, and continue press-
ing it until the small o appears in the Current Character
box. Press the [Up Arrow] key to place the o on to the
text line. Continue entering text until you are satised
with the changes that you have made, press the [Enter]
key to accept them, and you will be returned to the pre-
vious screen. Once all zones names have been entered,
press the [Submit] key.
NOTE: If many elds need to be renamed, the user
can plug a computer keyboard into the following
locations:
• For the Q4 controller - Use PS2 style plug,
and use the socket labeled PL7.
• For the Q5 controller - Use a USB compat-
ible keyboard, and plug it into one of the
two available USB connections.
ZONE CONFIGURATION
Zone Conguration is the process of setting the operating pa-
rameters of each of the installed zones.
• Global Zone Conguration – Use this screen to enable
or disable each independent zone. NOTE: If a zone is
installed, it MUST be enabled before it can be setup
and accessed. The screen also allows you to custom
name each zone.
• Current Zone Conguration –Once the Global Zone
Conguration has been setup, use this screen to set-
up the parameters for each of the individual zones (1
-30).
Global Zone Conguration
Access this screen from the Main Menu. Select Congura-
tion, then Global Zone Conguration. The following screen
will appear:
Each Evaporator zone that is in use should be set to En-
abled. The Global Zone conguration screen also provides
the ability to supply a unique name for each zone. After
moving the cursor to one of the Name elds, press the Up
Arrow key to access an alpha/numeric data entry screen,
as shown here: