QUANTUM™ LX EVAPORATOR CONTROL PANEL
OPERATION
090.610-O (MAR 2016)
Page 19
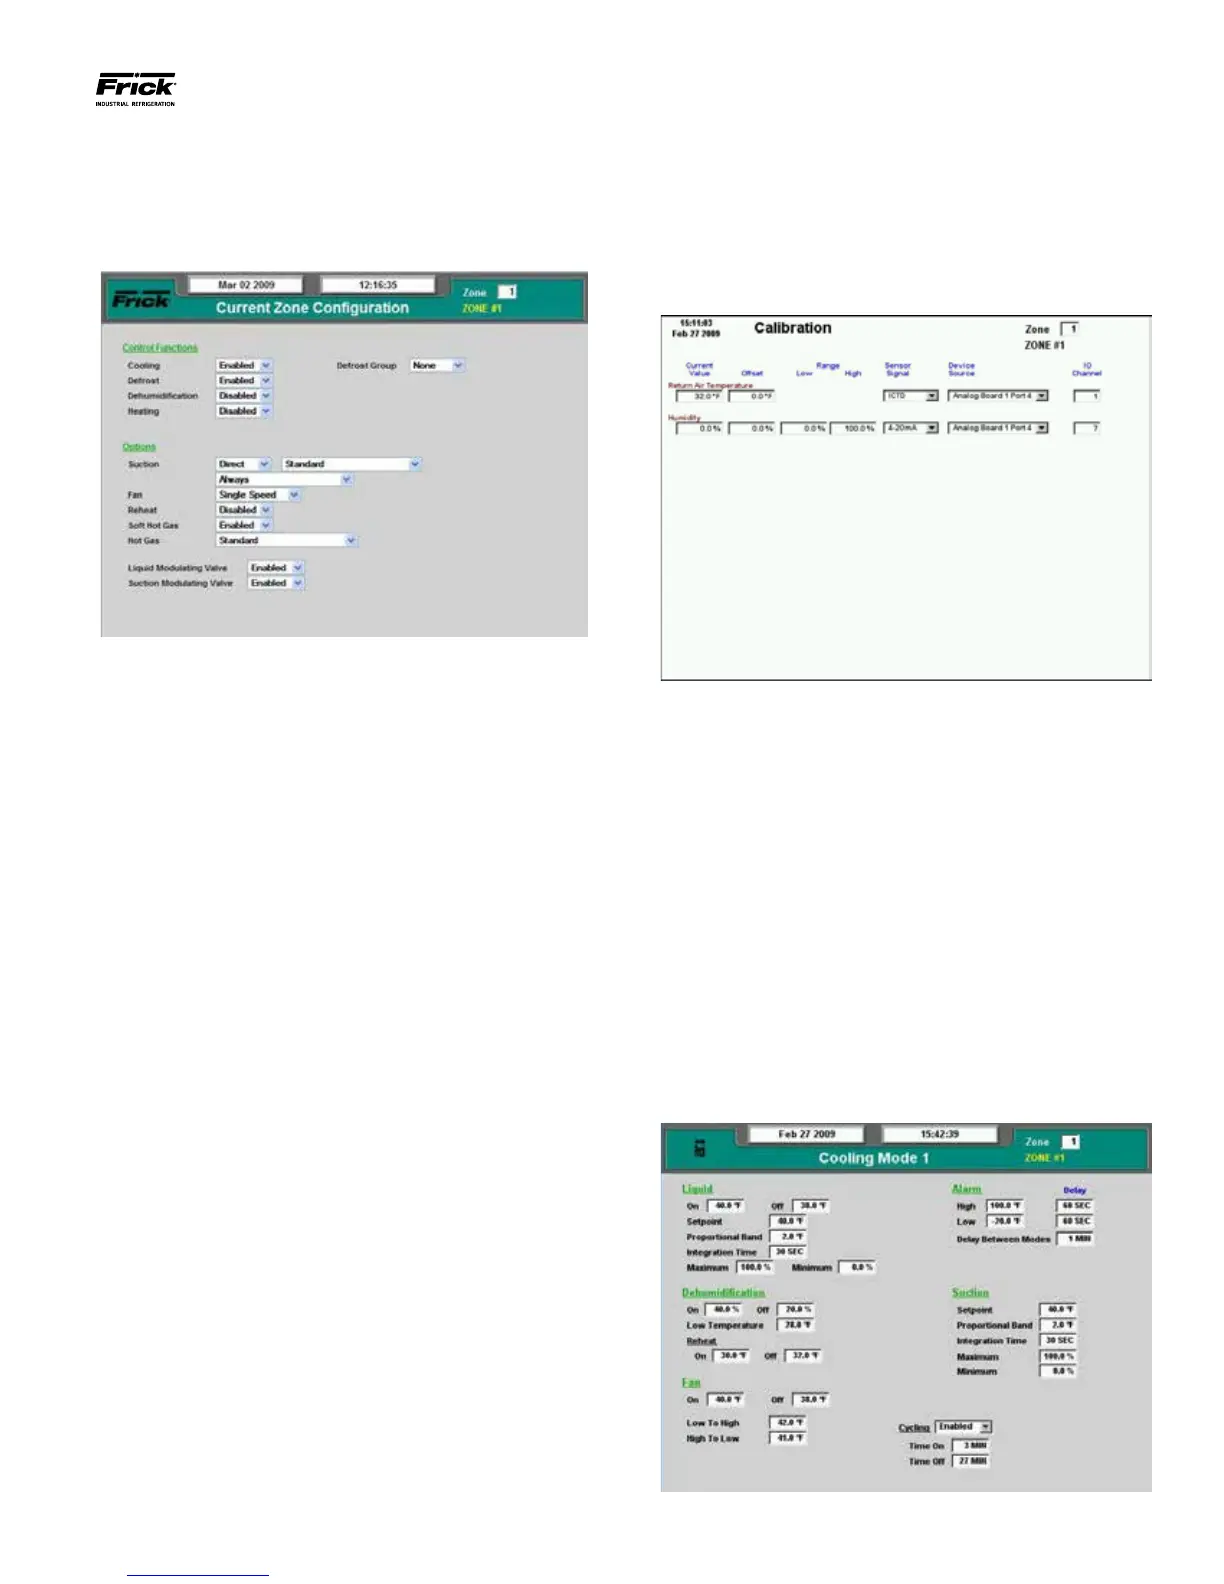
Current Zone Conguration
Access this screen from the Main Menu. Select Conguration,
then Current Zone Conguration. The following screen will
appear:
Notice in the upper right hand corner of this screen is a set-
point box that contains a value. You may change the value in
this box to the number of the zone that you wish to congure.
You must then press the [Submit] button for the screen to dis-
play that zone. In the above example, the number 1 is shown
on the box. Notice that right below the setpoint box, the words
ZONE #1 is displayed, so Zone 1 is the zone parameters that
are being shown.
Many other screens also show the Zone selection box in the
upper right corner. Any screen that displays this box presents
data that pertains exclusively to the selected zone. The selec-
tions on the Current Zone Conguration page must be made
for each Evaporator zone that has been enabled on the Global
Zone Conguration page.
The Current Zone Conguration page permits the user to en-
able any four control functions:
• Cooling
• Defrost
• Dehumidication
• Heating
The Options section allows the user to congure various me-
chanical aspects of the system, which include the type and
operation of valves as well as the fan type.
CALIBRATING SENSORS
Each temperature or humidity sensor in the Evaporator should
be calibrated before the system is put into operation.
Access this screen from the Main Menu. Select Calibration,
then Analog Inputs:
The process used for establishing calibration values is rela-
tively simple. It will however require a container of ice water
or an infrared digital temperature probe.
First, establish the temperature for a specic zone’s tempera-
ture sensor. If a digital infrared measurement device is used,
simply enter the calibrated temperature into the Current Value
box and press [Submit]. The system will automatically cal-
culate the correct offset value to use. If an ice bath is used,
simply allow the temperature of the sensor to stabilize, and
then enter 32 into the Current Value box and press [Submit].
This process should be repeated for each sensor in the system.
ESTABLISHING SETPOINTS
Cooling Setpoints
Access this screen from the Main Menu. Select Set-
points, then Cooling, and nally Mode (1-4):