How to Use the
Operator Panel
Various Ways to
Scan
Troubleshooting
Replacing the
Consumables
Daily Care
Operational
Settings
Chapter 5 Daily Care
Appendix
Glossary
Introduction
Index
Contents
TOP
69
How to Load
Documents
Scanner
Overview
Brake Roller (× 2)
Remove the roller from the scanner.
For details about removing the brake roller, refer to "6.2 Replacing the
Roller Set" (page 74).
Gently wipe off any dirt or dust along the grooves, taking care not to
damage the roller surface.
Ultrasonic Sensor (× 2)
Gently wipe the dirt and dust off the surface of the ultrasonic sensors. If
it is difficult to clean, use a cotton swab.
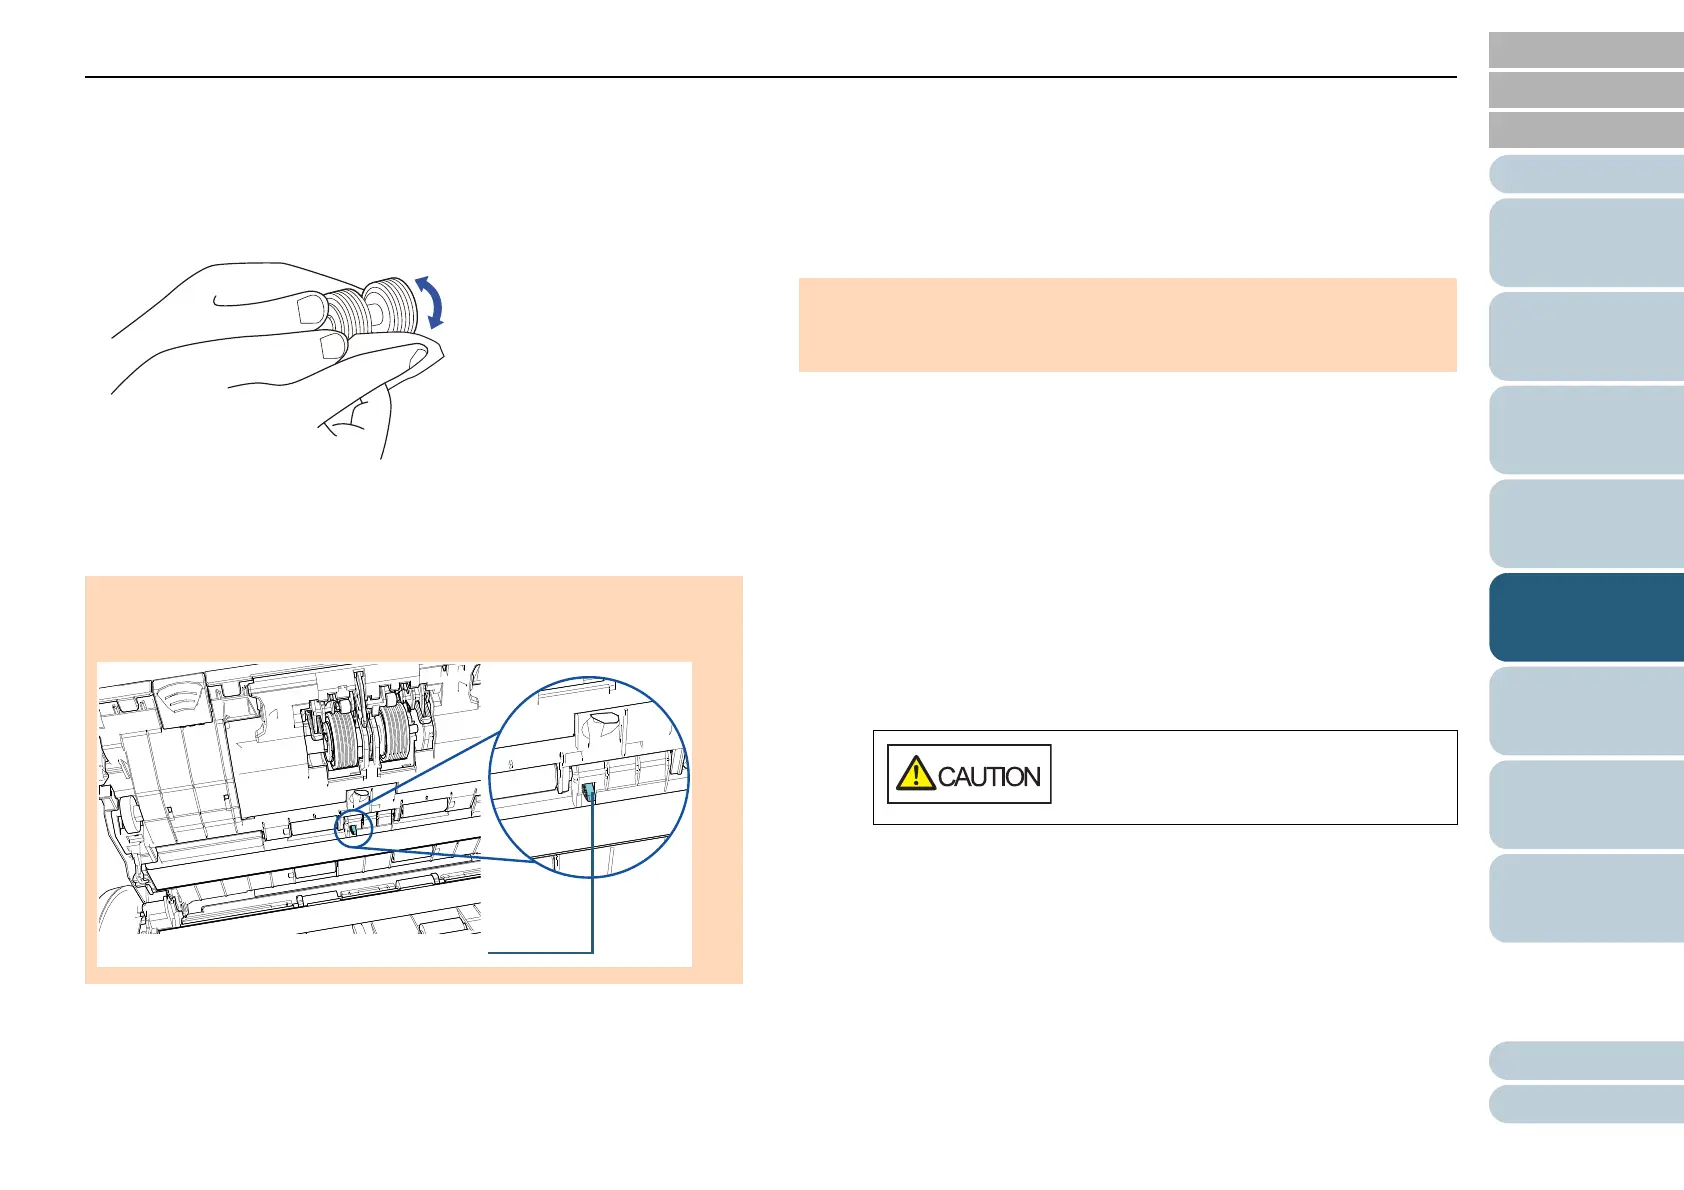
Plastic Idler Roller (× 4)
Gently wipe off any dirt or dust as you rotate the roller manually, taking
care not to damage the roller surface. Make sure that it is wiped properly
because black residue on the roller will affect the feeding performance.
Glass (× 2)
Gently wipe the dirt and dust off the surface of the glass sections.
Pick Roller (× 2)
Gently wipe off any dirt or dust along the grooves as you rotate the roller
manually, taking care not to damage the roller surface. Make sure that it
is wiped properly because black residue on the roller will affect the
feeding performance.
Feed Roller (× 2)/Eject Roller (× 2)
The power must be turned on to rotate the feed/eject rollers.
1 Plug the power cable, and turn on the scanner.
For details, refer to "1.3 Turning the Power ON/OFF" (page 19).
2 After "1" is displayed on the Function Number Display on the
operator panel, open the ADF.
For details, refer to "1.4 Opening/Closing the ADF" (page 21).
ATTENTION
When cleaning, be careful not to damage the document sensor with a
cloth or Cleaning Wipe.
ATTENTION
Vertical streaks may appear on the scanned image when the glass
sections are dirty.
When the ADF is open, it might close
accidentally. Be careful not to get your
fingers caught.
 Loading...