Chapter 6 Replacing the Consumables
Appendix
Glossary
Introduction
Index
Contents
TOP
77
How to Load
Documents
How to Use the
Operator Panel
Various Ways to
Scan
Daily Care
Troubleshooting
Operational
Settings
Scanner
Overview
Replacing the
Consumables
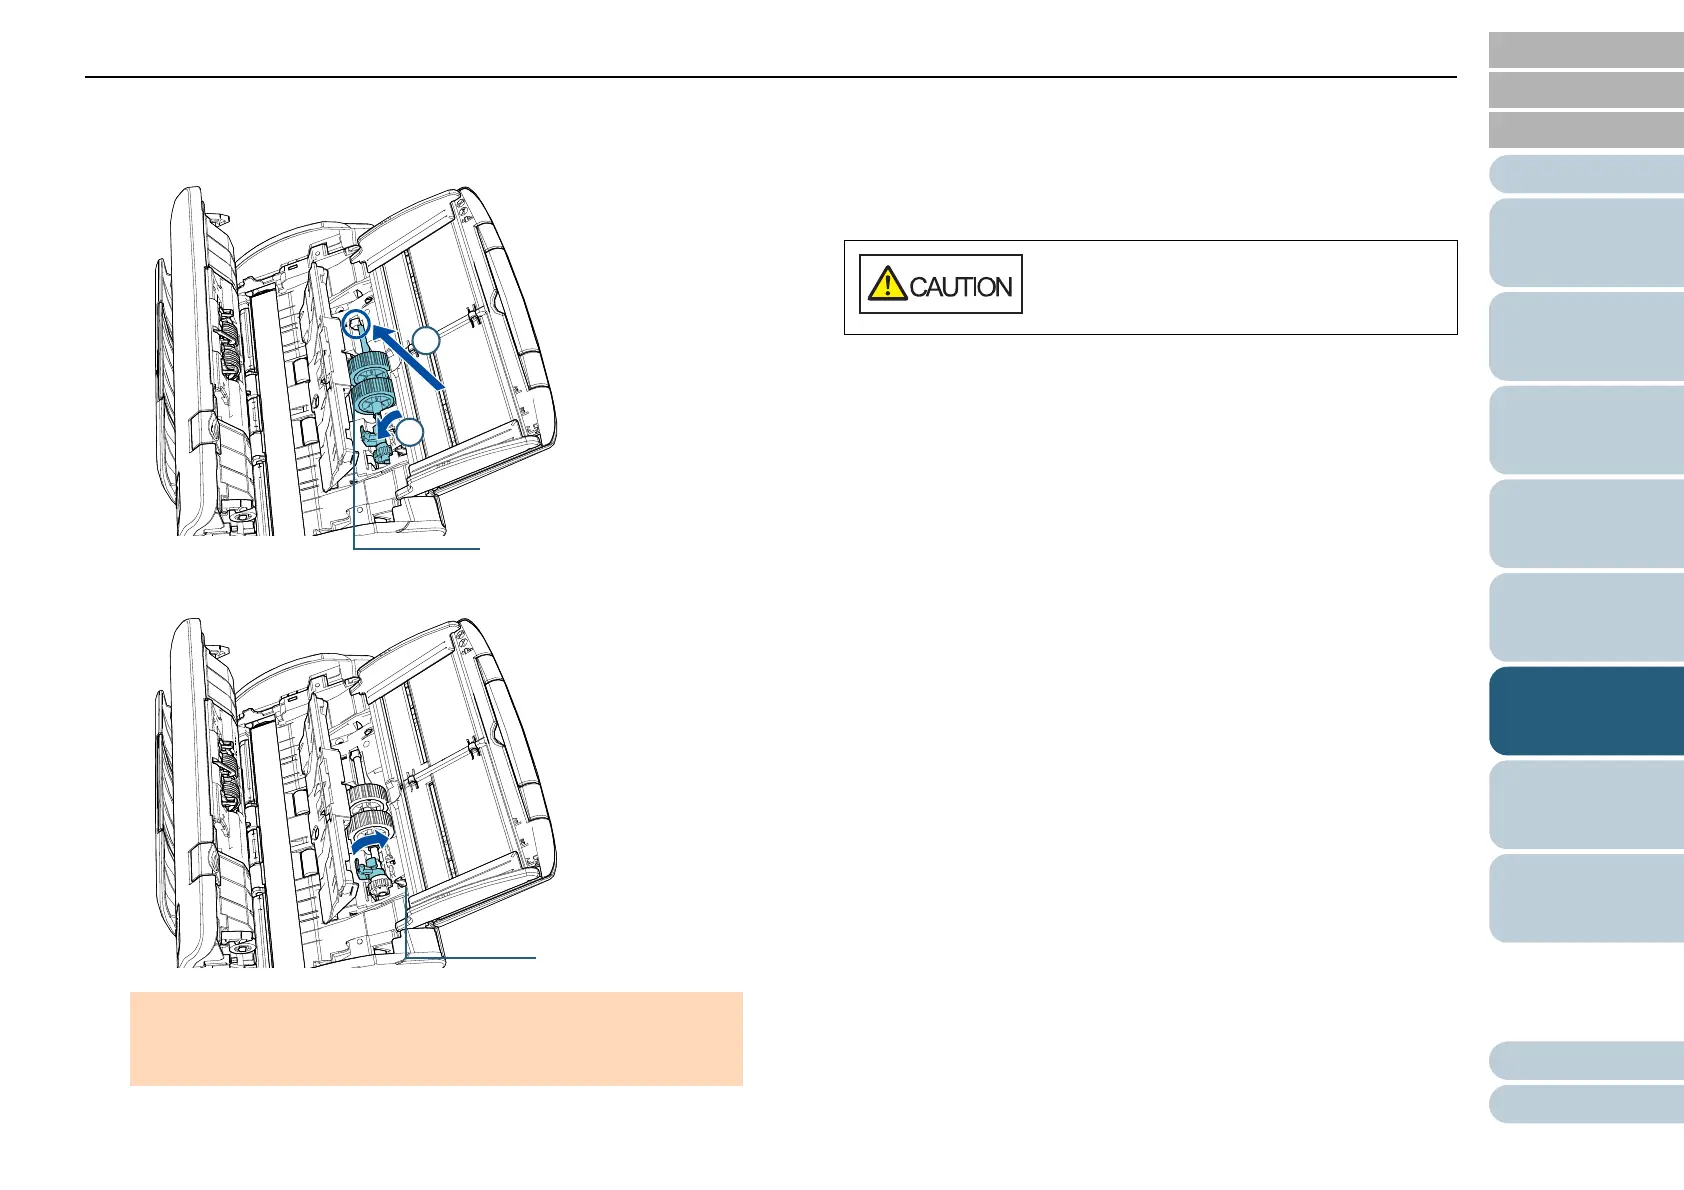
4 Install the new pick roller in the scanner.
Insert the left end of the shaft into the slot, and lower the other end
gradually.
5 Rotate the bushing in the direction of the arrow.
6 Close the sheet guide.
Make sure that both ends of the sheet guide are locked firmly.
7 Close the ADF.
For details, refer to "1.4 Opening/Closing the ADF" (page 21).
8 Plug the power cable, and turn on the scanner.
For details, refer to "1.3 Turning the Power ON/OFF" (page 19).
9 Reset the sheet counter in the Software Operation Panel.
For details, refer to "Resetting the Sheet Counters" (page 123).
ATTENTION
Confirm that the pick roller is installed properly. Otherwise, it may
cause feeding errors such as paper jams.
Be careful not to get your fingers caught when
closing the ADF.