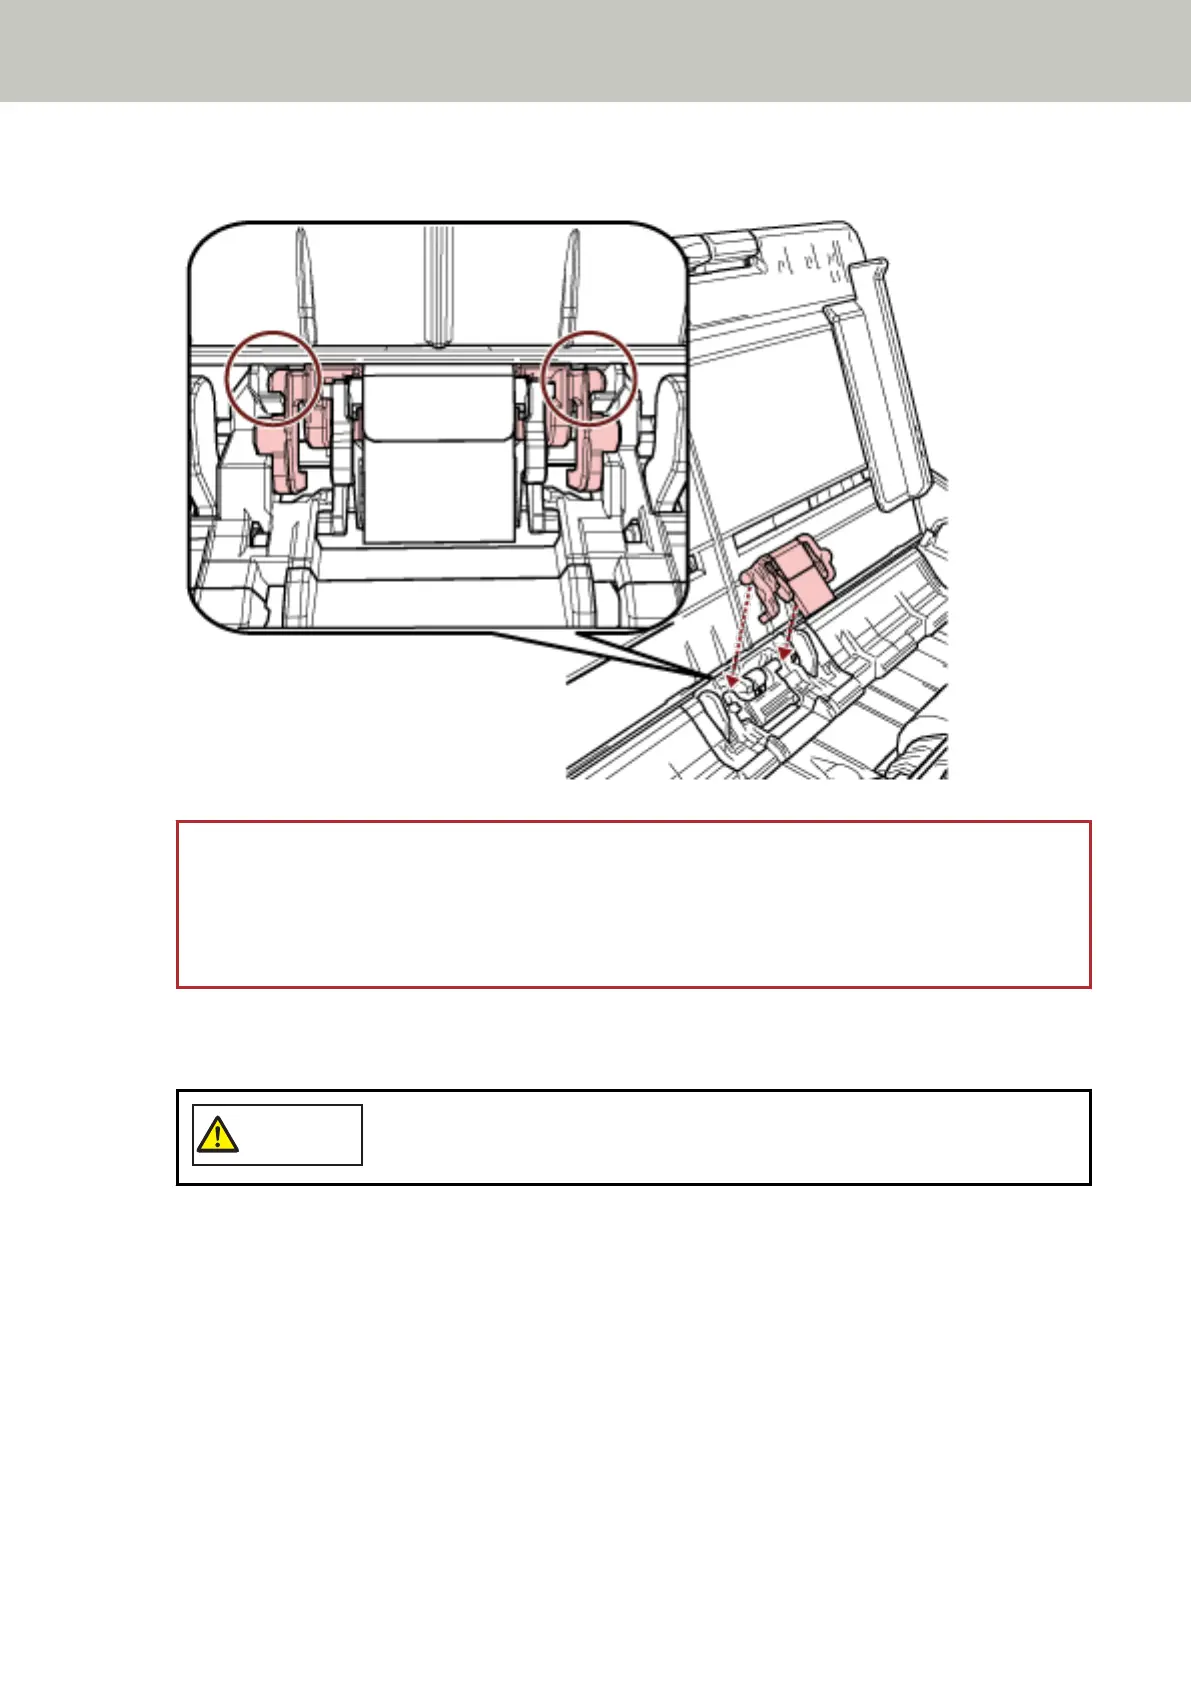
Attach the pad unit so that the protrusions are placed as shown below.
ATTENTION
● Attach the pad unit with the front side up. If the pad unit is attached upside down, paper jams or other
feeding errors may occur.
● Make sure that the pad unit is attached firmly. Otherwise, paper jams or other feeding errors may occur.
6 Close the ADF.
For details, refer to How to Close the ADF (page 33).
Be careful not to get your fingers caught when closing the ADF.
7 Plug in the power cable and turn on the scanner.
For details, refer to How to Turn the Power ON (page 29).
8 Clear the pad unit counter.
Start up the Software Operation Panel and clear the counter.
For details, refer to Clearing the Sheet Counters (page 164).
Replacing the Consumables
98
 Loading...